Configuring and Editing the Voice Bot: The Builder for the Perfect Dialogue
Creating a complex and effective dialogue scenario requires a powerful and flexible set of tools. The UniTalk Voice Bot editing page is a visual constructor where you build the Dialogue Tree (Flowchart), managing every branch through a system of nodes, conditions, and actions. This gives you the ability to not just automate responses, but to precisely control how the customer moves through the script, ensuring maximum relevance and speed in processing their request. Let’s take a detailed look at the controls that will turn your idea into a working algorithm.
The Voice Robot editing page can only be accessed from the Voice Robot page by clicking on the Edit, Add, or Copy button.
The Voice Robot has basic settings that can be accessed by clicking on the gear at the top of the page and from the dialog tree.

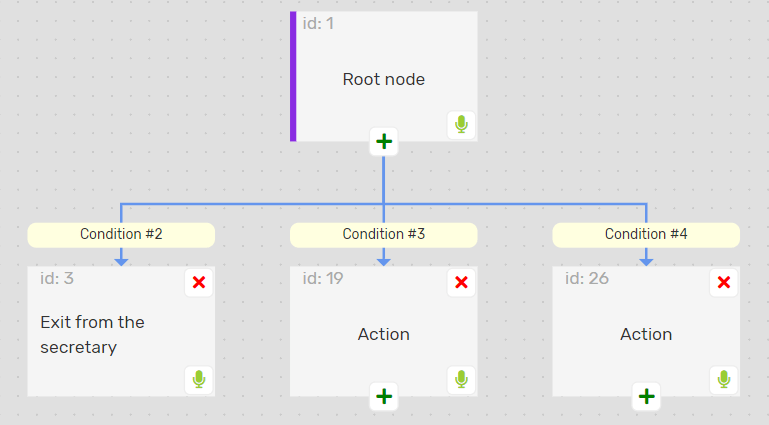
The dialog tree consists of nodes.
Nodes have the following components:
- node transition conditions – these are the conditions under which the transition from the parent node to the current node will be performed.

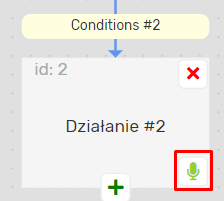
- node action that will be performed when you navigate to a node. Clicking on the action block opens the node action settings panel.
Nodes also have:
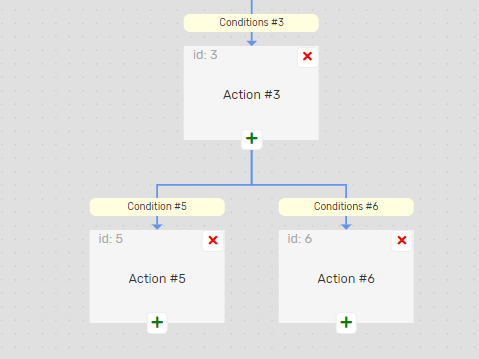
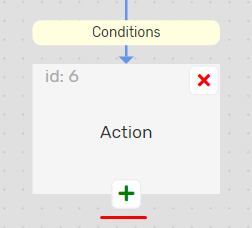
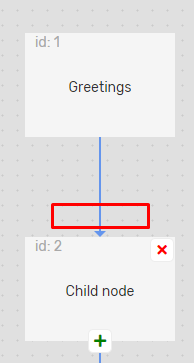
- child nodes – nodes to which the transition from the current node will be performed. Child nodes are marked with a blue arrow. But there may be no child nodes.
- id (node identifier) – used when displaying storage errors, can be sent in event processing webhooks. Unique within a single robot.
Control of the Voice robot
1. The Save button saves the Voice Robot.

2. The “Main settings” button opens a panel with the main settings of the robot.

3. The zoom in and out buttons zoom in and out of the tree. The current zoom value is shown in the middle. You can also change the scale by scrolling the mouse wheel.

4. The Undo button allows you to cancel any change made to the robot. If the button is grayed out, it is inactive, meaning that there have been no changes that can be undone yet.

5. The Redo button cancels the Undo button, i.e., returns the changes that were canceled. If the button is grayed out, it is not active, i.e. the Undo button has not been pressed.

6. Navigate the canvas with the tree. If the tree is too large to fit on the screen, hold down the left mouse button on the gray area and drag the tree.

Basic settings of the Voice Robot
When you click on the gear at the top of the screen, the main settings of the robot will open on the side panel with settings.

The menu with the main Voice Robot settings looks like this.
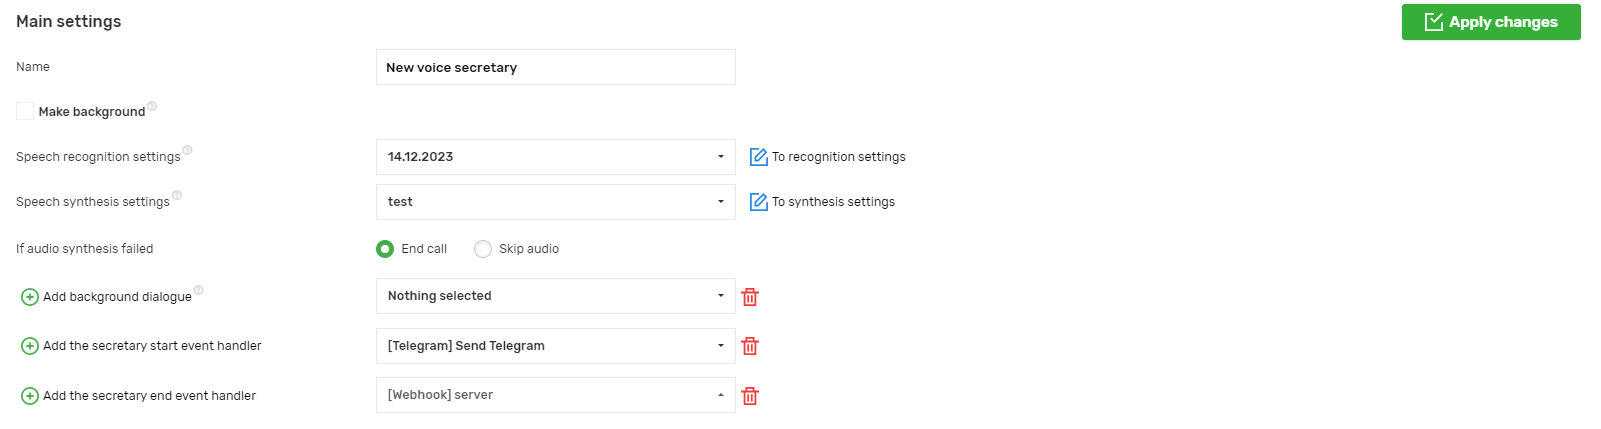
- “Name – the name of the Voice Robot, up to 100 characters.
- “Make background” – this setting is available only when creating a new Voice Robot. If the setting is enabled, the robot will be created as a background robot. Once it has been created as a background robot, it cannot be made a regular one, and vice versa.
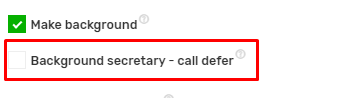
- “Background robot – call transfer” is a setting that does not affect the logic of the Voice robot and is used in the history of robots. Available only for background robots.
- “Speech recognition settings” – a setting that is not available for background robots.
- “Speech synthesis settings” – selects a speech synthesis settings profile that will be used when synthesizing audio. It is required if speech synthesis is present in the robot’s audio.
- “If audio synthesis fails” – a setting that determines what to do if audio synthesis fails. It is not available for background robots.
- Background dialogs (the “Add a background dialog” button) – settings for background robots. Not available for background robots.
- “Add robot startup event handler” – a setting that allows you to add up to 5 event handlers that will be called when the robot starts.
- “Add a robot termination event handler” – a setting that allows you to add up to 5 event handlers that will be called when the robot is terminated.
Side panel with settings
The sidebar with settings is needed in the following cases:
- when editing the basic settings of the robot (by clicking on the gear at the top)
- when editing the node conditions settings (by clicking on the node conditions block)
- when editing the node action settings (by clicking on the node action block)
In all cases, the panel works according to the same principle.
To save the settings, you need to click the “Apply Changes” button at the top right, but this only saves the settings in the browser memory, it does not save the robot.

To save the robot, click the “Save” button located in the upper center.

For example, if you already have a robot created and want to change its basic settings, you need to do the following:
- click on the gear
- change the necessary settings
- click on the “Apply changes” button on the settings panel
- click on the “Save” button at the top of the page
The panel closes when you click on the cross, the “Apply changes” button, or press the Esc key.
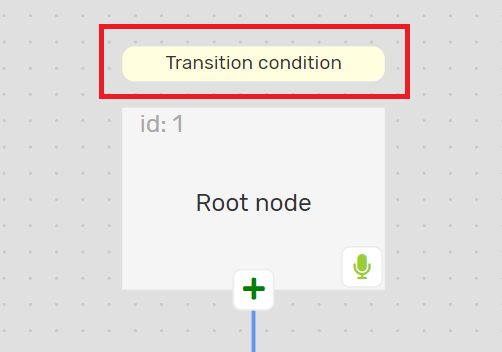
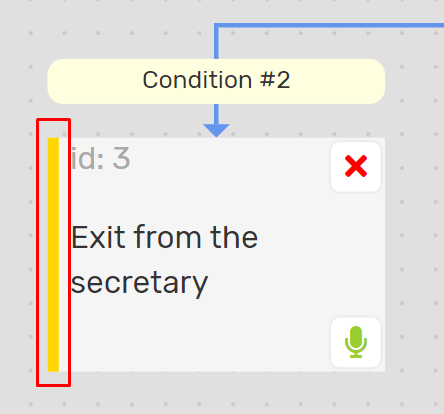
Setting up a node condition block
The conditions settings describe the conditions under which a switch to the current node can be performed.
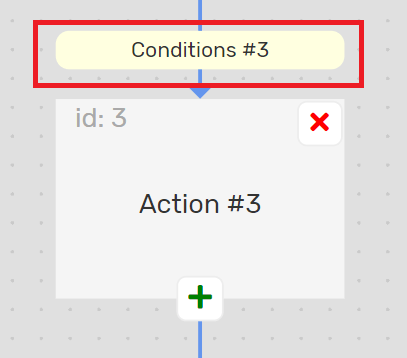
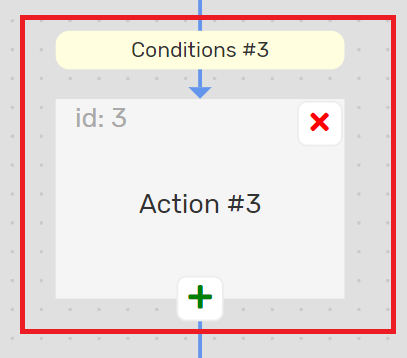
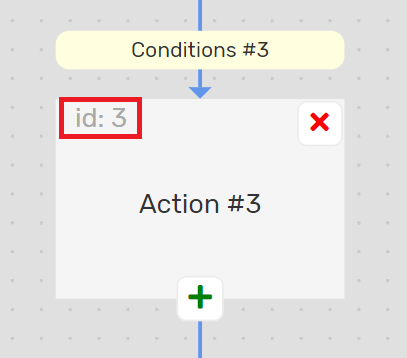
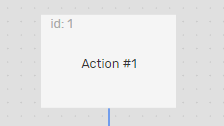
In some cases, a node may not have a condition block. For example, the root node of an ordinary robot looks like this:
When you click on the conditions block, a sidebar opens with the settings for the transition conditions to the node.
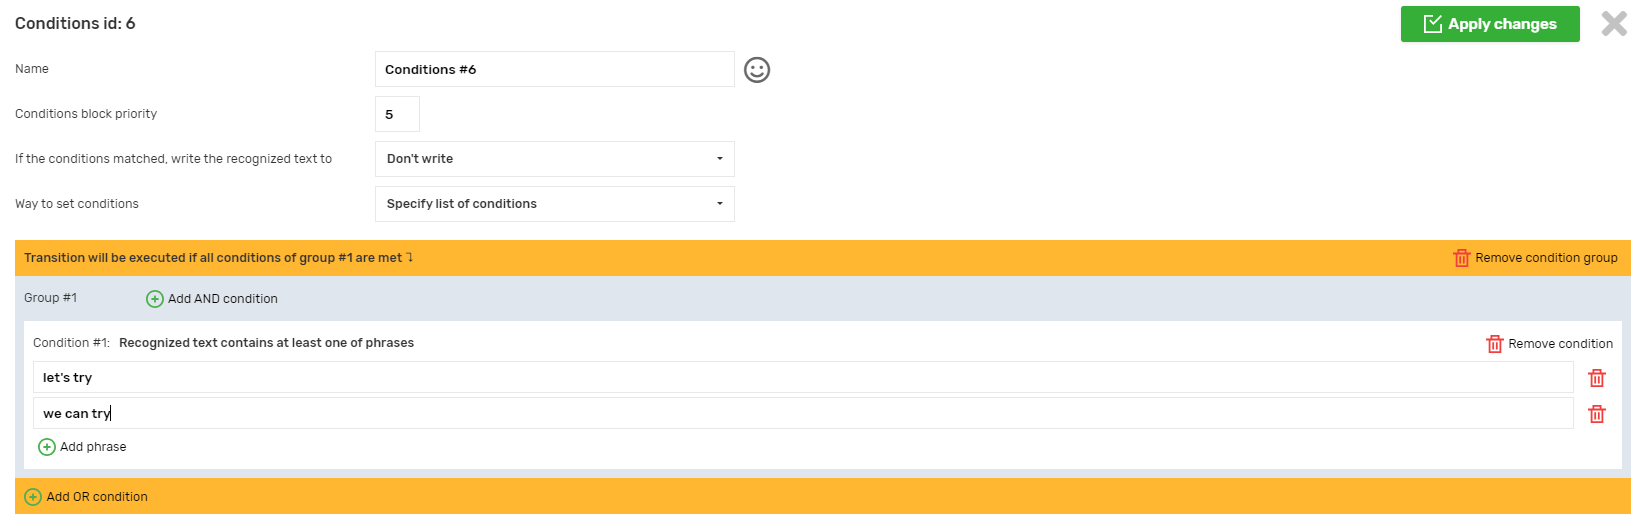
Description of the conditions settings
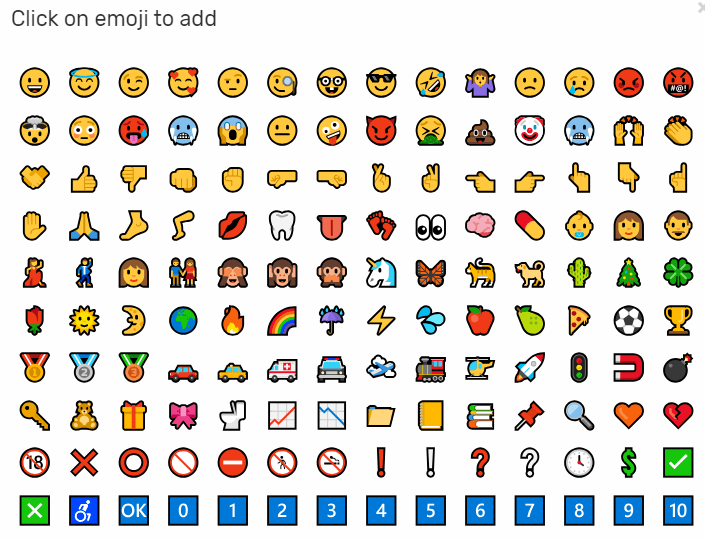
- Name – the name of the block with conditions that is displayed in the tree nodes. The maximum length of the name is 25 characters. There is also an emoji to the right of the field, which you can click to add an emoticon. If you don’t find the emoji you need in the list, you can copy and paste it into the field from anywhere.
- The priority of the condition block – from 1 to 10 – determines the order in which the conditions of neighboring nodes will be checked. The higher the priority, the earlier it is checked.
Example: during a call, the Voice Robot reaches a node with id=3, which has 2 child nodes, the conditions of the first (id=4) have priority 5, and the second (id=5) has priority 10.
When a subscriber speaks a phrase, the robot receives the already recognized text and it may be that it is matched to both child nodes. However, if priorities have been specified, in this case, the second node has a higher priority. So first, we check its conditions, make sure that the text matches them, and then move on to child node 2. You don’t need to check the conditions of node 1.
- If the conditions are met, write the recognized text to a call variable. This allows you to save the recognized text to a call variable and use it later in dynamic event processing values. The variables are stored for the duration of the call, not just as long as the robot is running. If a value is written to a variable several times within the same call, the last entry is saved.
- There are several ways to set conditions:
1. set a list of conditions manually

2. select a profile of project conditions

You can see the composition of the profile by clicking the “Show profile conditions” button; you cannot edit the profile.
3. choose the UniTalk conditions profile

You can see the profile contents by clicking the “Show profile conditions” button, you cannot edit the profile.
For convenience, UniTalk profile names are prefixed with a short language name in square brackets – UA, RU, EN, etc. When selecting a profile, you can enter the prefix in the search field and see a list of profiles in the language you are interested in.

The prefix indicates the language in which the phrases should be in the profile, but it does not mean that the profile will contain phrases only in that language. For example, profiles with the UA prefix contain phrases in two languages – Ukrainian and Russian.
Conditions of transition
- The transition conditions consist of a group of conditions
- Groups of conditions consist of conditions
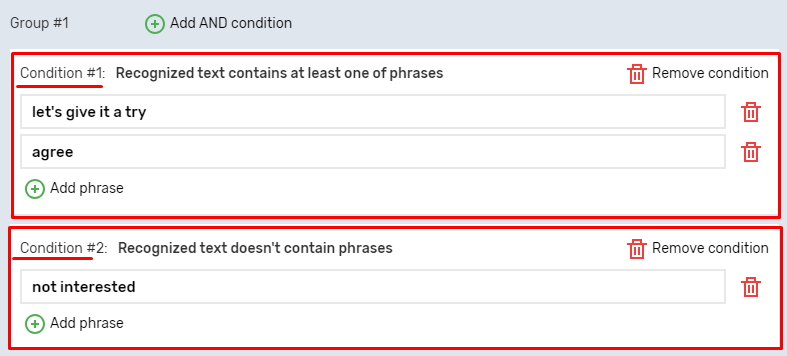
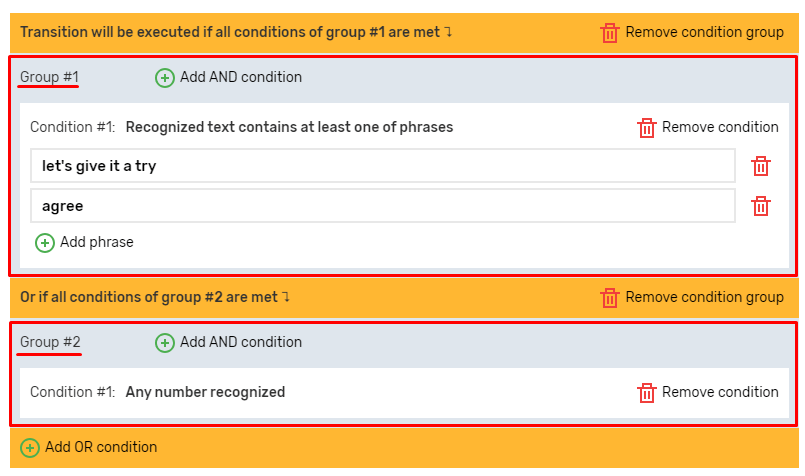
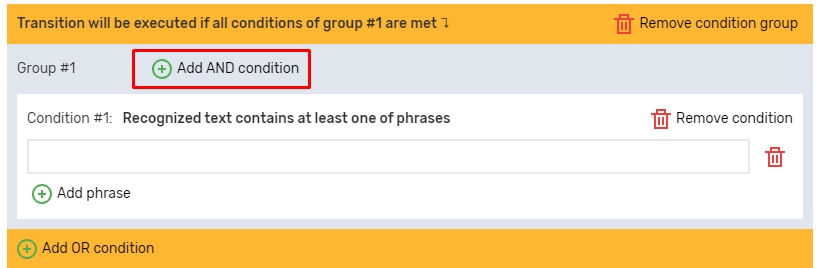
The transition to the current node will be executed if the recognized text on the parent node meets the conditions for transitioning to the current node. The text meets the conditions if all the conditions of at least one of the groups are met. For example, the current node has the following transition conditions:
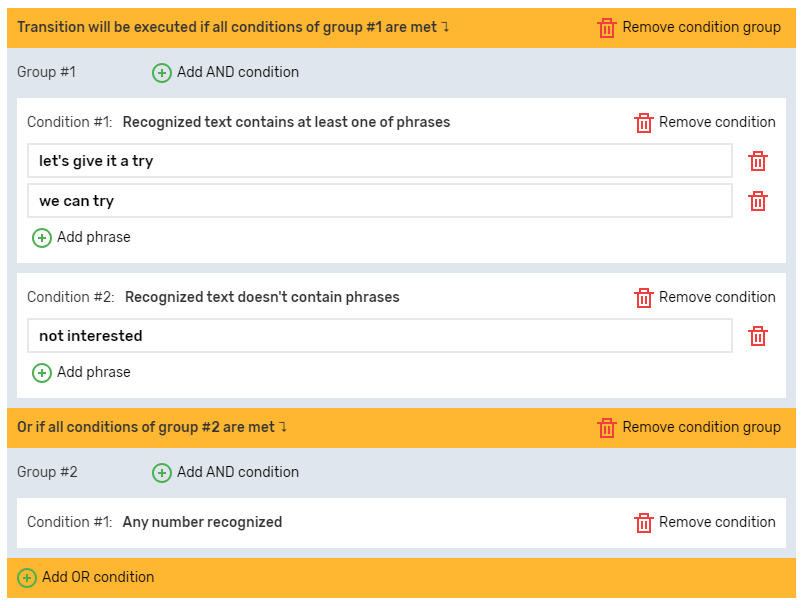
Let’s summarize the transition conditions.
– The transition will be executed if the recognized text contains one of the phrases “let’s try” or “we can try” and does not contain the phrase “not interested” (i.e. all the conditions of group 1 are met)
– or the transition will be made if any digit is unclasped (i.e. all the conditions of group 2 are met)
In technical terms, a logical “AND” stands between conditions in a group, and a logical “OR” stands between groups of conditions.
- Adding conditions
You can add a group by clicking the “Add OR condition” button:
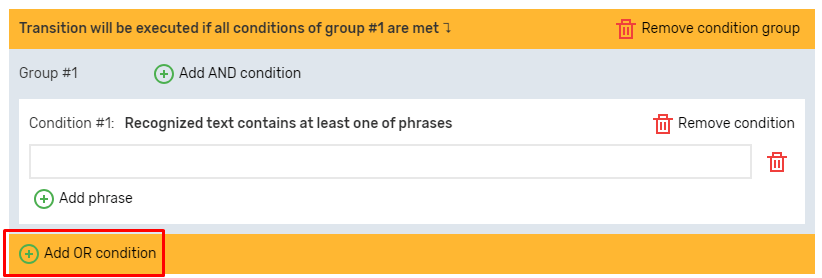
Add a condition to the group by clicking the “Add Condition AND” button:
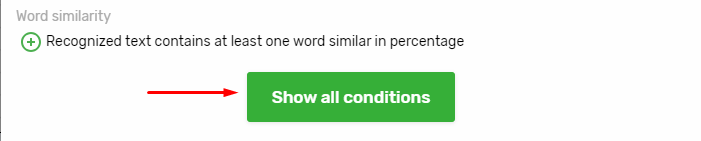
After that, a window with conditions will appear. As soon as you click on a condition, it will be added to the group.
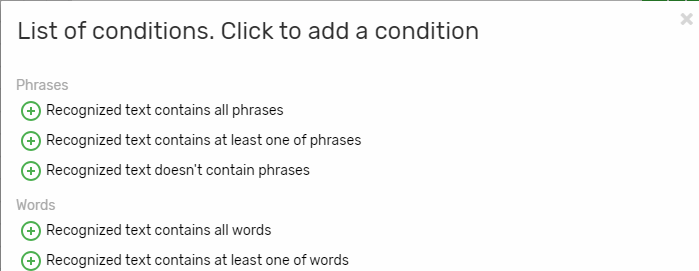
You see only the main terms. To show all of them, click the Show all button.
General settings for node actions
The action settings describe what will happen when you switch to the current node. When you click on the condition block, the sidebar with the node action settings opens.
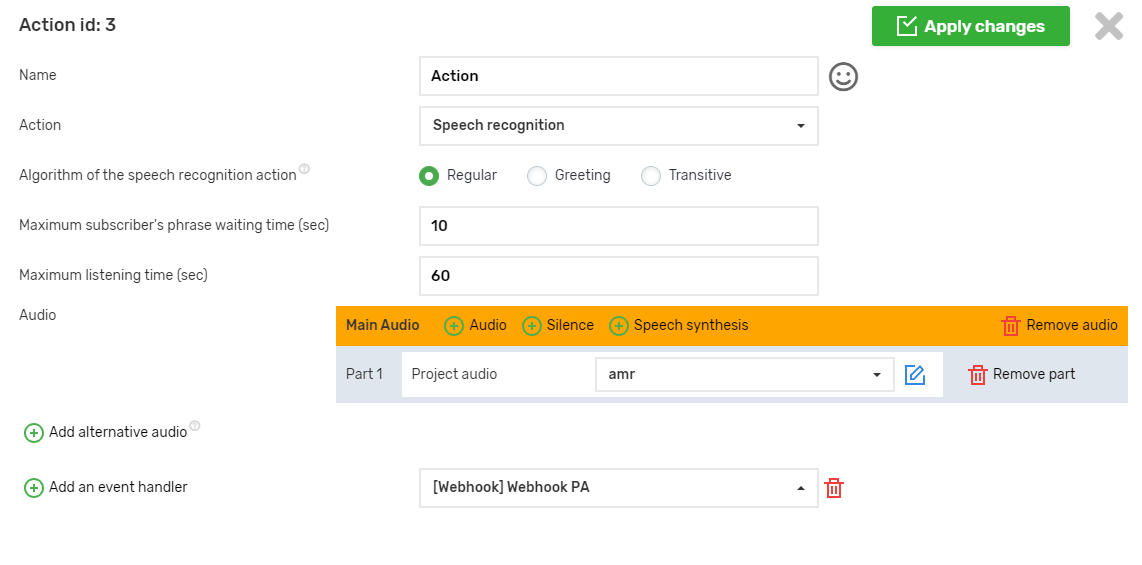
The list of settings differs depending on which type of action is selected in the Action setting.
General settings (those that are available for any action type):
- The name has a maximum length of 40 characters, and an emoticon has been added to the right, which you can click to add an emoji.
- Action – the type of action of the node.
- Audio – will be played when you click on the node. This is a required field for the Speech recognition and Audio playback action types. You can listen by clicking the Play Audio button.
- Event handlers – you can add up to 5 event handlers that will be called when a node is navigated.
Action of speech recognition
The root node of a non-background robot can only have the action type “Speech Recognition”.
Only nodes with the Speech Recognition action type can have child nodes. Nodes with other action types do not have a button to add a child node. If a node with the Speech Recognition action type has child nodes and you change its action type to another one, the child nodes will be deleted.
A node with an action type of Speech Recognition cannot be the last node in a branch, and the tree will not be saved.

How the speech recognition action works and what additional settings are available depends on the “Speech recognition action algorithm” setting.
The algorithm is simple
Recognizes the caller’s words and, depending on the recognized text, switches to one of the child nodes or to one of the background robots (if they are specified in the main settings).
Specific settings:
- Maximum waiting time for a caller’s phrase – the maximum time the robot will wait until the caller starts speaking (from 1 to 60 seconds).
- Maximum time to listen to the caller – the maximum time the robot will listen to what the caller is saying after the caller starts speaking (from 1 to 600 seconds).
- Alternative audios (the “Add alternative audio” button) – optional. You can specify any number of alternate audios. They are played after the robot leaves the background, if not specified, the main audio will be played again.
Alternative audio can be useful when you want to make a dialog between a caller and a voice robot as similar as possible to a dialog with a live person. If the main robot switches to the background robot, after leaving the background robot, you will be returned to the node from which you switched to the background robot and the audio of this node will be played again. People usually do not say exactly the same phrases. You can specify alternative audio that is similar to the main audio, but not exactly the same. Then, after leaving the background robot, the subscriber will hear not the exact same phrase, but a similar one.
Audio is played in a circle. For example, if you specify the main audio and 2 alternative audios, the main audio will be played when you switch to the node, after switching to the background robot and returning back – alternative audio 1, if you switch again and return from the background robot – alternative audio 2, again to the background robot and return from it – the main audio, and so on in a circle.
Features:
- Can have more than one child node. Must have at least one child node.
- In the conditions of transition to child nodes, you can specify a special condition of the type “Any text is recognized” no more than once
- When switching to child nodes, you can specify a special condition of the type “The subscriber is silent and the waiting time has expired” no more than once
- In the conditions of transition to child nodes, the special condition “The recognized text does not meet any of the conditions and the waiting time has expired” must be specified once. For this reason, if you click on the add node button when the node with the “Normal” speech recognition algorithm has no children, not one node will be added, but two at once, one of them will have the condition “The recognized text does not meet any of the conditions and the waiting time has expired”, but you do not have to leave this node, this condition can be set in any other node. This is just for convenience, since the condition is required, why not add it automatically.
The algorithm of work:
1. Audio is playing
2. After the audio is finished, if the caller has not started speaking within the “Maximum time for waiting for the caller’s phrase”, the caller is transferred to the node that contains the condition “The caller is silent and the waiting time has expired”, or if this condition is not present, the caller is transferred to the node with the condition “The recognized text does not meet any of the conditions and the waiting time has expired”.
3. If the caller starts speaking, the speech recognition system waits for the final recognition result within the “Maximum time the caller can listen”. If the final recognition result is not received within this time, the last intermediate recognition result will be taken.
4. The received recognition result is formatted:
- everything is removed from the text except letters, numbers and spaces
- the text is converted to lowercase
- multiple spaces between words are replaced with single spaces
- spaces at the beginning and end of the text are removed
5. After the recognition result is received, the node with the appropriate transition conditions is searched for:
- First, the conditions for switching to child nodes are checked, except for special conditions. Nodes are checked in order depending on the priority specified in the conditions settings, from highest to lowest. If we find a node with the appropriate group of conditions, we switch to it.
- If no suitable node is found among the child nodes, we check the conditions for switching to background robots (specified in the root node). Background robots are checked in order depending on the priority specified in the root node conditions settings, from highest to lowest. If we find a background robot with the appropriate group of conditions, we switch to it.
- If there are no background robots or a suitable background robot has not been found, if there is a child node with the condition “Any text is recognized,” we switch to it, otherwise we switch to the child node with the condition “The recognized text does not meet any of the conditions and the waiting time has expired.”
The greeting algorithm
It is intended to greet the user. After picking up the phone, the subscriber can immediately say something, or he can remain silent until he is told something, this algorithm takes this into account.
When you create a new robot, the root node is automatically created with the Greeting algorithm, but it is not necessary to do so, any algorithm can be specified in the root node.
Specific settings:
- End the greeting if you hear “Hello” – if the voice robot receives an intermediate recognition result with the phrase “Hello”, the audio will be played immediately and the next node will be transferred
- The maximum waiting time for a subscriber’s phrase is from 1 to 60 seconds
- The maximum time of listening to a subscriber is from 1 to 600 seconds
Features:
- A node can have only one child node. If you switch the algorithm to “Normal”, add several child nodes, and revert back to the “Greeting” algorithm, the robot settings will not be saved and the arrows to the child nodes will flash red.

- No transition to the background robot is performed
- Since there is only one child node and there can be no transition to the background robot, the child node does not need to specify transition conditions (they are absent)
The algorithm of work:
- If the final recognition result is received from the speech recognition system in less than the “Maximum time for waiting for the caller’s phrase”, the audio will be played and the robot will switch to the child node.
- If the subscriber starts speaking during the “Maximum time for waiting for the subscriber’s phrase”, the robot will wait until he or she finishes (until the final result is received), but not more than the “Maximum time for listening to the subscriber”. After that, the audio will be played and the robot will switch to the child node.
- If the subscriber does not start speaking within the “Maximum time for waiting for the subscriber’s phrase”, the final recognition result is expected to be no more than the “Maximum time for listening to the subscriber”.
- If the final recognition result is received, the audio will be played and the call will be transferred to the child node.
- If the final result is not received, but the subscriber is not silent, the audio will be played and the call will be transferred to the child node.
- If the subscriber is silent, the call ends.
Transitive algorithm
This algorithm simply plays the audio and transfers to the child node. It has no specific settings.
The features are the same as those of the greeting algorithm:
- A node can have only one child node. If there are several children, the arrows leading to them will flash red and the robot settings will not be saved.
- Switching to the background robot is not performed
- No conditions are specified for the child node
The algorithm of work:
- Audio is playing
- When the audio is finished, the caller is transferred to a child node. What the caller says is not checked, and even if they do speak, the recognized text is not recorded in the robots’ history.
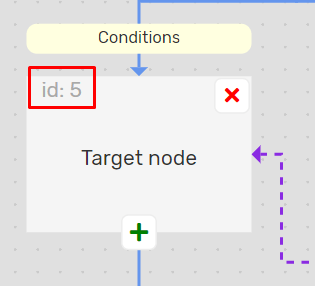
Action “Go to another node”
This action allows you to navigate to any node in the tree.
Specific settings:
- go to node with id – the identifier of the node to which the transition will be performed
Features:
- Does not have any children
- An animated dotted purple arrow should lead to the specified node
Limitations:
- it is forbidden to go to the current node
- it is forbidden to move to a node with the action type “Go to another node”
- it is forbidden to go to the parent node if it has no children other than the current node
In the cases described in the restrictions and if you do not specify the node id to jump to or specify a non-existent node id:
- the robot settings cannot be saved
- near the id input field, the problem will be described in red
- a red dotted arrow will go down from the current node
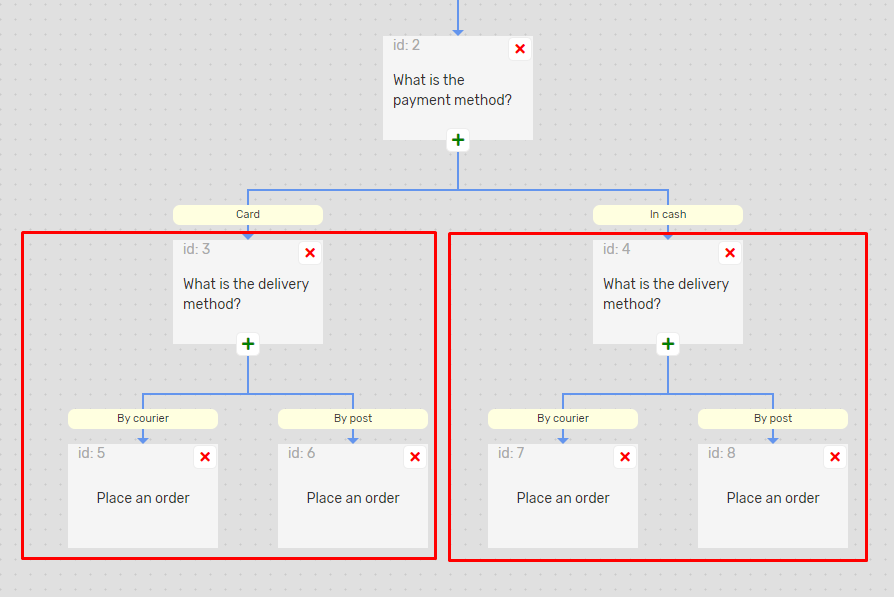
Example:
In the work, you need to ask 2 questions in a row and then perform the same action. First question: what is the payment method (cash or card), second: what is the delivery method (courier, mail), action: checkout.
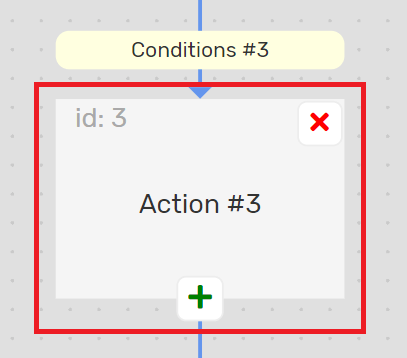
Without the “Go to another node” action, you will get 2 identical branches:
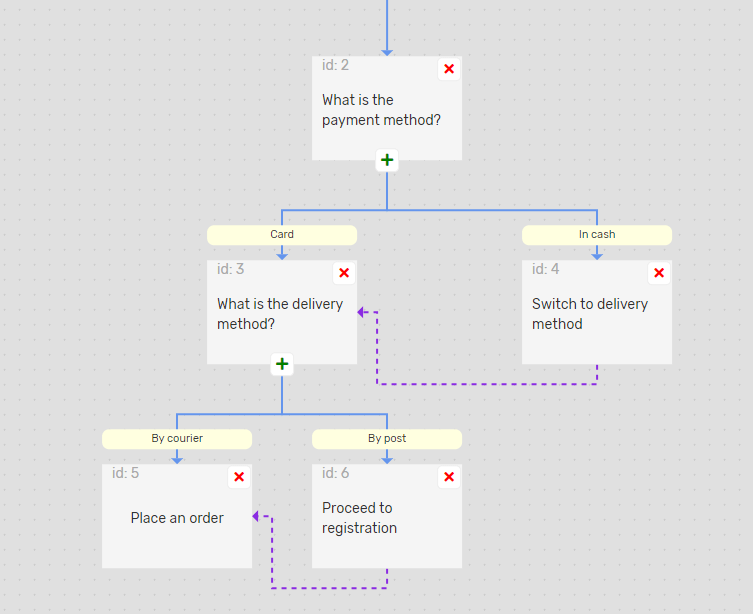
Using “Switch to another node”, you can avoid duplication:
Instead of two actions where we ask about the delivery method, there is only one, the “Courier” and “Mail” conditions are set up once each, instead of four checkout actions, there is only one, but the logic of the work remains the same.
Background works
There are phrases or questions that the caller can say at any time in the dialog. To avoid describing this logic on each node, you can use background work
Features:
- Background robots are robots that can be used only in normal (not background) robots, specified in the main settings. They can be called on any node of the main robot with the speech recognition action type and the “Normal” algorithm.
- Background robots are considered part of the main robot:
– you cannot specify speech recognition settings in their main settings, the settings of the main robot are used;
– in the call history, background robots are not displayed in call forwarding;
– background robots are not written to the history of robots, but are in the forwarding of the main robots.
- Background robots work on the same principle as regular robots. Starting from the root node, they move to the end node. If the end node of the background robot has the action type “Exit voice robot”, it will return to the main robot at the same node from which it switched to the background robot. With other types of actions of the background robot end node, both the background and the main robot will terminate.
- The conditions for switching to the background robot are specified in the background robot itself in the root node conditions block.
- Background robots cannot be used in inbound scripts, voice robots, and API calls.
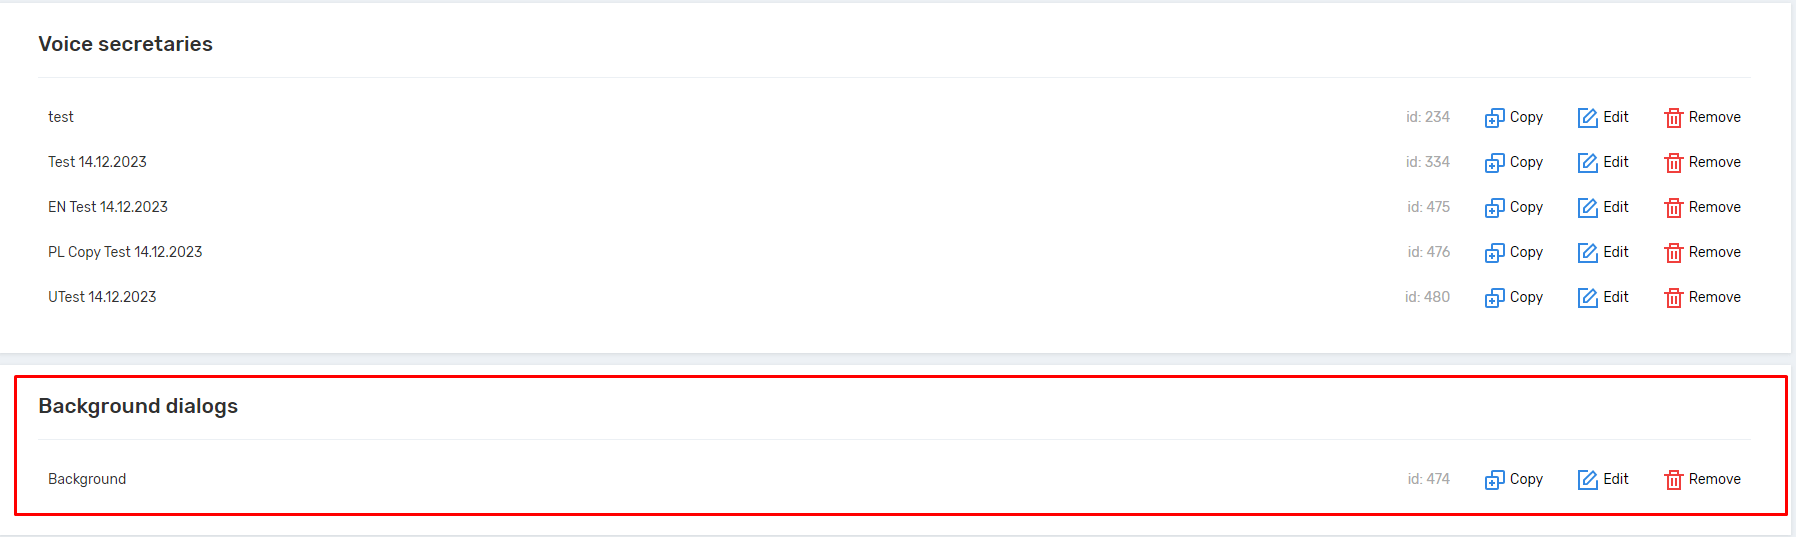
- On the robots page, they are displayed in the Background dialogs section.
Example:
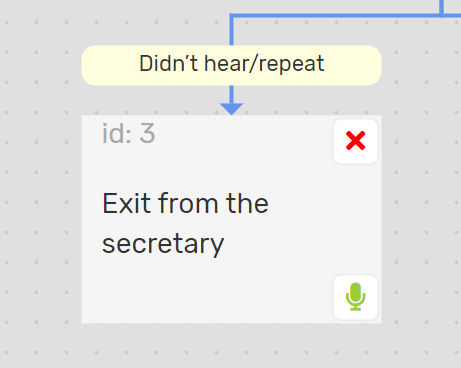
At any point in the dialog, the caller can say “I didn’t hear you”, “please repeat”, or something similar. It would be nice to replay the audio for the caller afterwards. You can create a background robot with the transition conditions “I didn’t hear you”, “repeat”, etc., specify the action type “Exit voice robot” and add this background robot to the settings of the main robot.
Each time a subscriber speaks one of the listed phrases, any node in the tree with speech recognition using the “Normal” algorithm will be recognized:
- the transition to the background robot will be performed
- instant exit from the background robot (action in the root node – “Exit voice robot”)
- return to the same node of the main robot
- the main audio of the node or alternative audio (if specified) will be played again
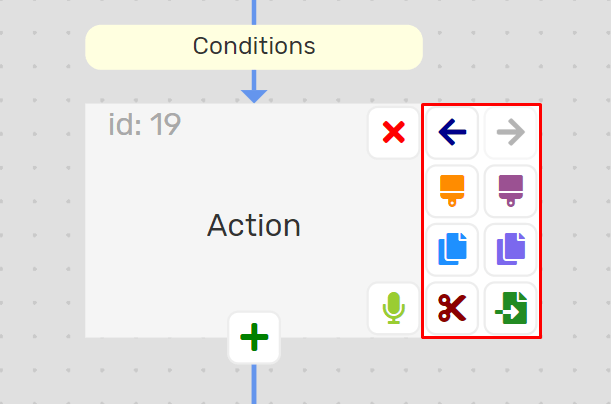
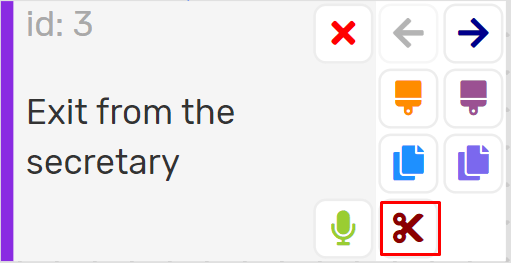
Panel of additional node buttons
When you hover over a node, a panel with buttons appears on the right
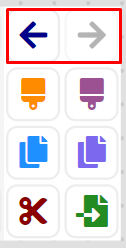
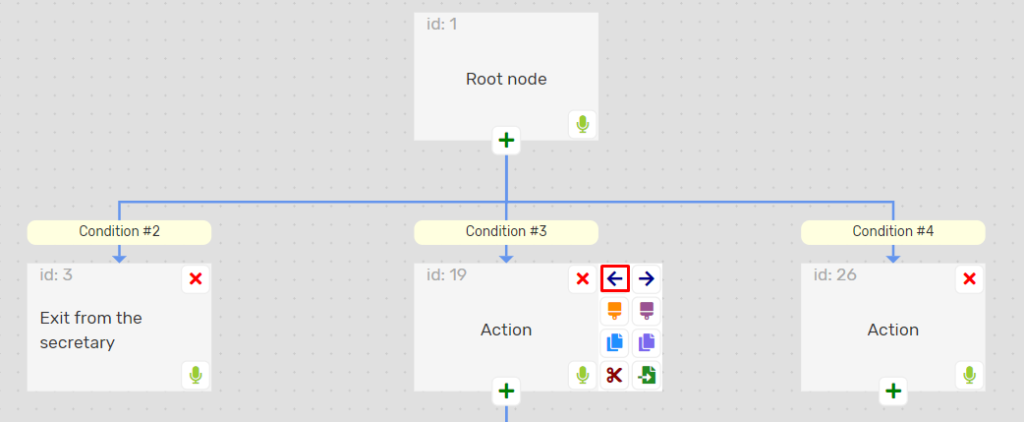
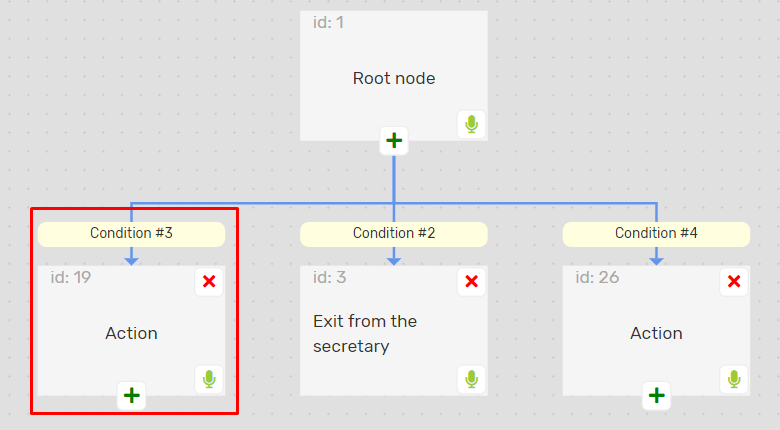
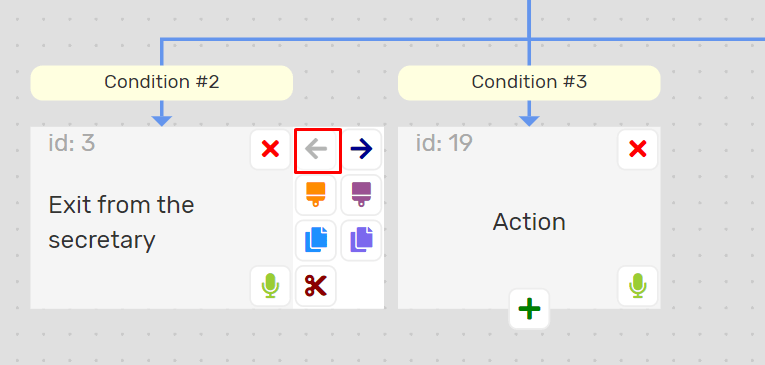
1. Move a node to the left/right in the parent node’s children
- the logic of the robot is not affected, only the image of the tree changes;
- an example of moving:
to
after (if you click on the node with id=3, it will move to the left, the nodes were in the order 2, 3, 4, and now 3, 2, 4)
- if the parent node has only one child node (the current node), then the left/right buttons will not be displayed on the current node
- if the current node is the leftmost among the children of the parent node, the left button will be inactive
- if the current node is the rightmost among the children of the parent node, the button on the right will be inactive
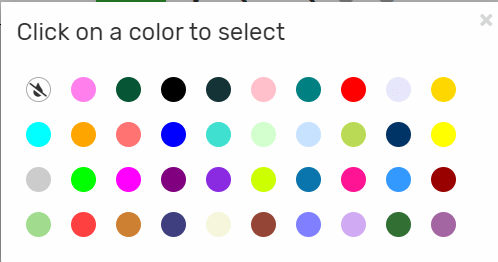
2. Change the colors of a node and branch
- allow you to change the color of the bar on the left side of the node

- the “Color” button allows you to set the line color of the current node
- the “Branch color” button allows you to set the line color of the current node

- after pressing the specified buttons, you can select a color from the palette

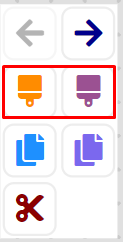
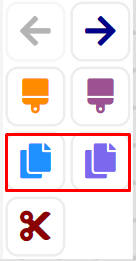
3. copying nodes and branches

- “copy” button
- button “copy branch”
You can copy nodes in one work and paste them into another, but within the same project.
4. Button “Insert”

- Allows you to paste previously copied or cut nodes into children of the current node.
- Pasted nodes receive new id’s.
- After copying, the button will not be visible if the current node cannot have children, or if it can have only one child and it already exists.
5. Button “Cut”
- Allows you to cut a branch after clicking the branch is copied to memory, then the “Paste” button appears. Until you click the Paste button, the branch will remain in place.
- Paste is not available in the parent node and in the children of the current node.
Setting up the end of the robot
When the robot is finished, various parameters are calculated: the reason for the end, the duration, and the type of node where the robot ended. Data about the robot’s work is saved in the history.
1. Reason for termination:
- Ended normally – the robot reached the endpoint
- The subscriber ended the call – the subscriber hung up
- The subscriber was silent during the greeting – the subscriber was silent during the entire waiting time on the node with speech recognition and the Greeting algorithm
- Answering machine recognized
- Speech recognition error – speech recognition was interrupted for technical reasons
- The limit of nodes crossed has been exceeded – a maximum of 200 nodes are allowed to be crossed in one robot run, including the nodes of background robots. This is a protection against robot looping
- The limit of completed “Go to another node” actions has been exceeded – a maximum of 20 nodes with the “Go to another” action type are allowed to be passed in one robot run, including background robot nodes. This is a protection against robot looping
- Unknown error – an unknown error during robot operation
2. Duration of the robot
The duration is indicated in the robot history and in write-offs. It is counted from the moment the robot is launched until the endpoint audio is completed (the endpoint action is not included in the duration) or until the robot is terminated for another reason. The number of seconds is rounded up. For example, 14.3 seconds is rounded up to 15.
3. The type of node where the work ended
- Intermediate – the robot ended on an intermediate (not the final) node
- Successful – the robot completed on the end node and in the action settings the type of the end node is specified as “Successful”
- Unsuccessful – the robot ended at the end node and the end node type is set to “Unsuccessful” in the action settings
- Background – the call ended on the background robot
- Background – call transfer – the call ended on the background robot and the “Background robot – call transfer” checkbox is enabled in the main settings of the background robot
Detailed work with the Voice Bot editor allows you to achieve maximum accuracy and efficiency in dialogue automation. By using condition priorities, background bots to handle unexpected phrases, and the “Go to another node” action to avoid logic duplication, you build complex but clean and manageable scenarios. This ensures a ** high percentage of successful dialogue completion** by customers, minimizes errors, and allows your bot to function like a perfectly trained human operator.


