Connect and configure UniTalk IP telephony integration with Odoo CRM
- Go to your UniTalk personal cabinet, go to the Odoo CRM integration page. Click the “Connect” button.

The database can be found in your Odoo personal account in the “Databases” section.

Copy the login in your Odoo personal account in the email field in the account settings:

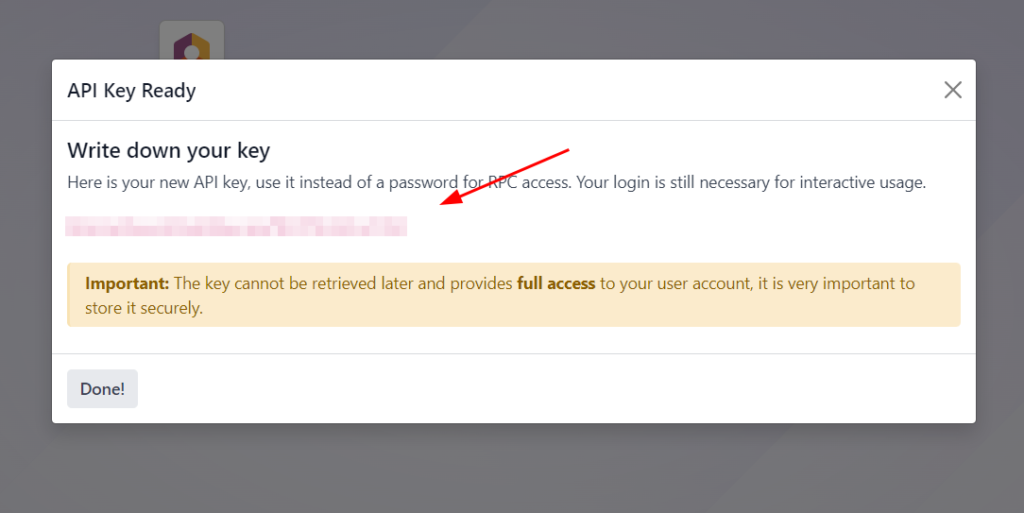
API key should be created in Odoo personal cabinet on the database page in the personal settings in the “Account Security” tab.


2. In your UniTalk personal cabinet go to the Odoo CRM integration page in the settings block and enable the checkboxes for the following actions.
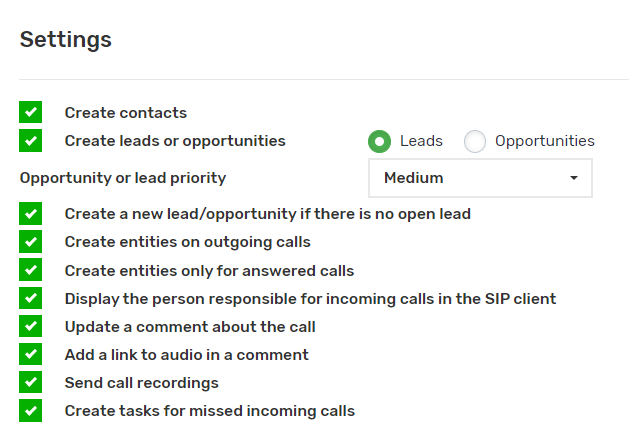
- If you enable the “Create a new lead if there is no open lead” checkbox, a new lead will be created only when the previous one has a closed status.
- If you enable the “Create entities on outgoing calls” checkbox, leads and contacts will be created in the CRM system when making outgoing calls to cell phone numbers.
- If you enable the “Create entities only for answered calls” checkbox, leads and contacts will be created in CRM only for answered phone calls.
- If you enable the “Display responsible person on incoming calls in SIP client” checkbox, additionally in UniTalk personal cabinet in SIP settings in the “Users” section for each user enable the “Display caller’s name” checkbox.
- If you enable the “Leave a comment about the call” checkbox, a comment will be added about the call.
- If you enable the “Add audio link to comment” checkbox, a link to listen to audio will be added to the comment.
- If you enable the “Send call recordings” checkbox, the audio of the call recording will be attached to the comment.
- If you enable the “Create tasks on missed incoming calls” checkbox, tasks will be created to ring back incoming calls that go unanswered.
- When creating leads fields will be filled with data from UniTalk.
The “Decimal” field has a value to the nearest hundredth (0.01). Values to more than two decimal places are automatically discarded (0.009 will become 0.00).
In the “Date” field it is necessary to enter the value in the format 2024-02-16.
In the “Date and Time” field, you must enter a value in the format 2024-02-16 14:00.
In the “Checkbox” field, you must enter a value of “false” (off) or “true” (on).
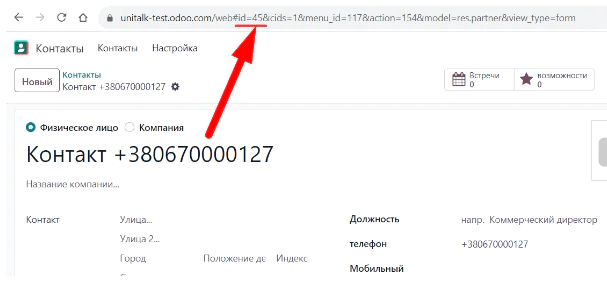
In the “Many2One” field, you must enter a value with an integer that corresponds to the id of the corresponding entity. For example, when creating such a field for the “Contact” model, the id value should be searched in the url of the page in the open contact card:
13. Assign responsibility for missed calls.
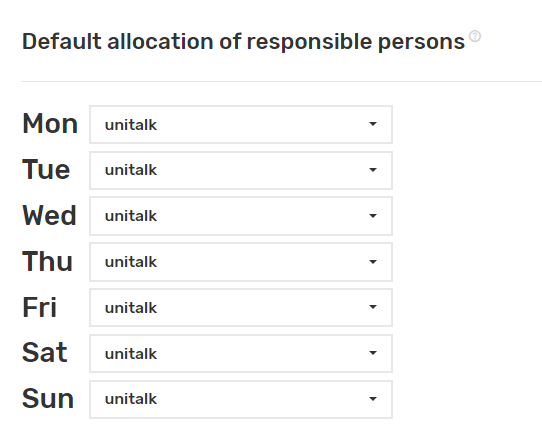
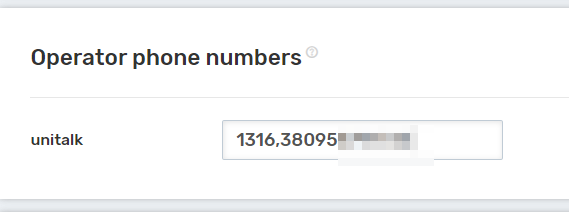
Separate the phone numbers of Odoo users with commas – GSM numbers or internal lines.
When creating, select the lead and contact distribution settings.
Asterisk VoIP Server Configuration for Odoo
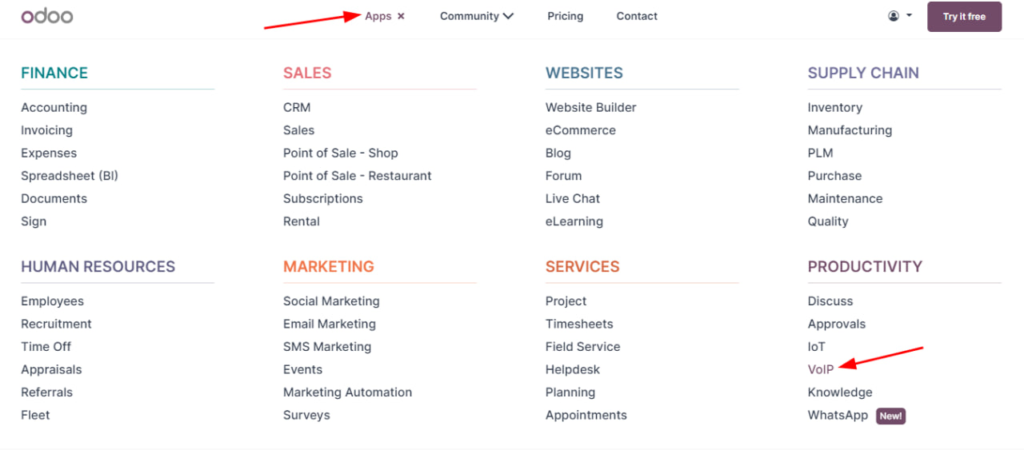
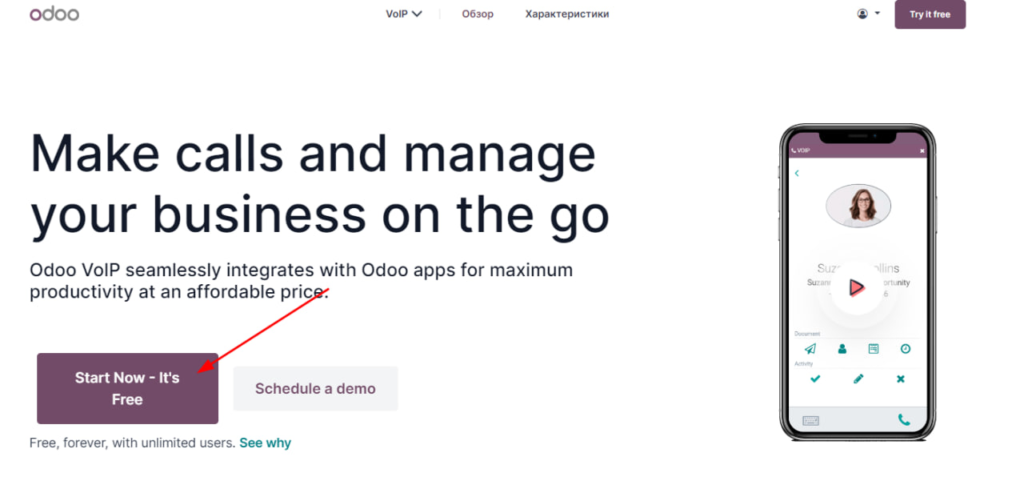
To connect the Odoo VoIP module in your Odoo personal account, go to the “Applications” menu.
- To connect the Odoo VoIP module in your Odoo account, go to the “Applications” menu.
- Next, select the “Productivity” category and click “Install” in the “VoIP” module block.
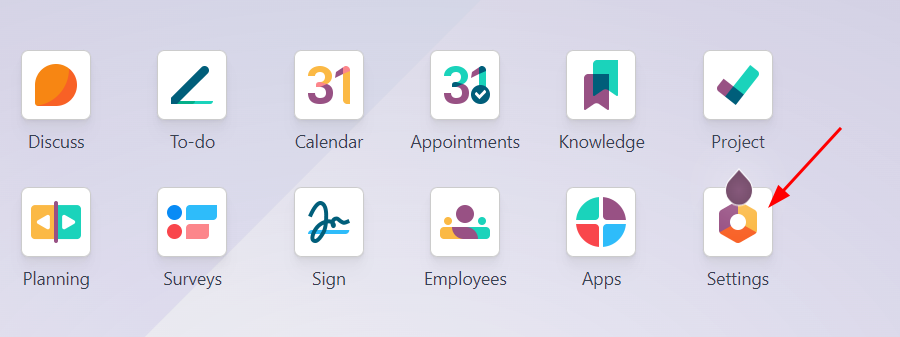
2. To configure the Asterisk VoIP server in your Odoo account, go to the “Settings” section
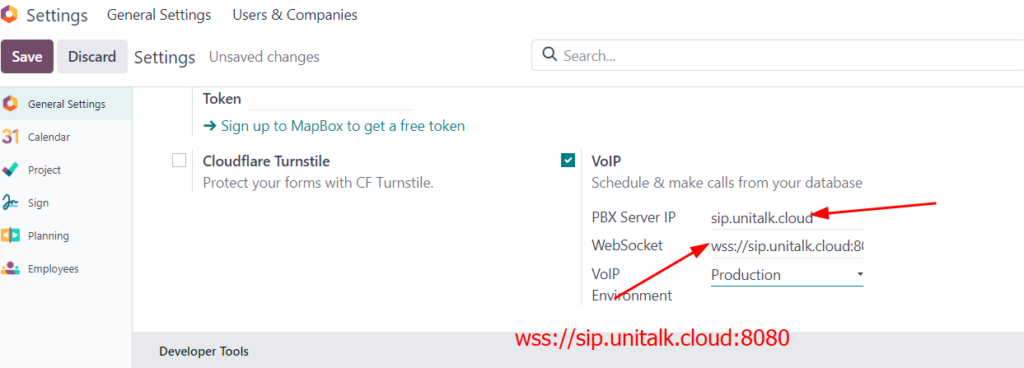
In the section “General settings / Asterisk (VoIP)” specify the IP address of the PBX server and WebSocket (specify the wss protocol, server address and port 8080)
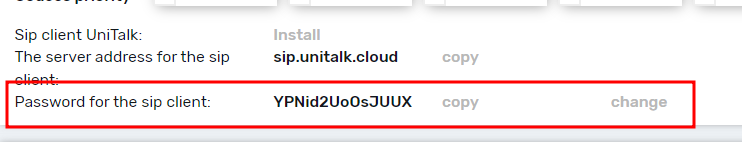
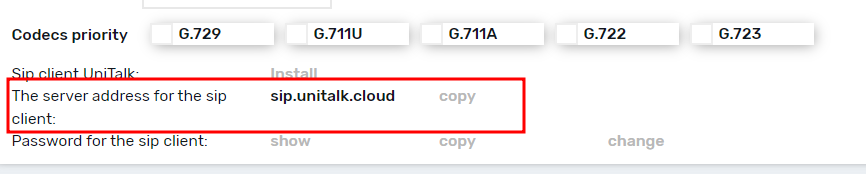
3. The IP address of the ATC server is specified in the UniTalk Personal Account in the “Users” section of the user card in the “SIP Setup” menu item in the “Server address for sip client” field.
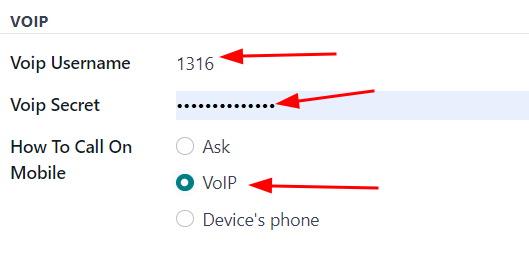
4. Next, in your Odoo account, go to the “My Profile” menu section

In the VOIP section, in the “VoIP Username” field, specify the SIP number of the UniTalk user, and in the “VoIP Secret” field, specify the password for the UniTalk user’s sip client, then set the “How to make calls to a mobile” switch to “VoIP” and click “Save”.
5. The password for the sip client is specified in the UniTalk Personal Account in the “Users” section in the user card in the “SIP Setup” menu item.