How to set up AnyDesk on macOS
Step 1. Download and launch AnyDesk
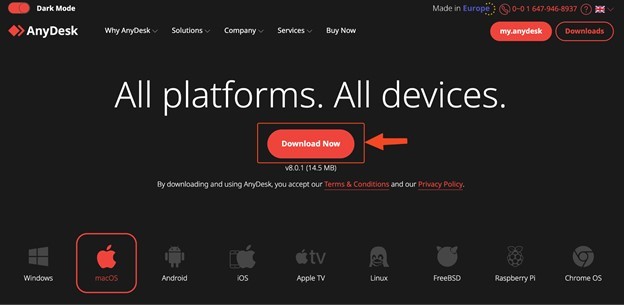
You can download the app using the following link.
After opening the downloaded file, a window will appear where you need to drag the application into the Applications folder:

AnyDesk will show up in the list of applications within the Applications folder:

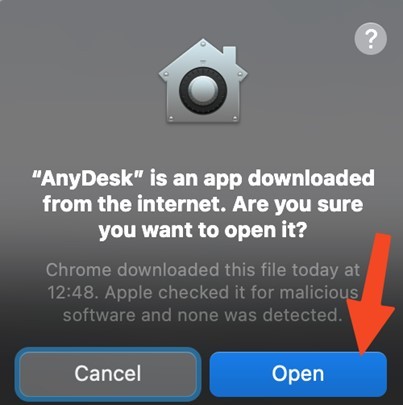
Now you need to double-click on the AnyDesk application, which will display a confirmation window where you should click the “Open” button:
Step 2. Granting AnyDesk the necessary permissions for special features
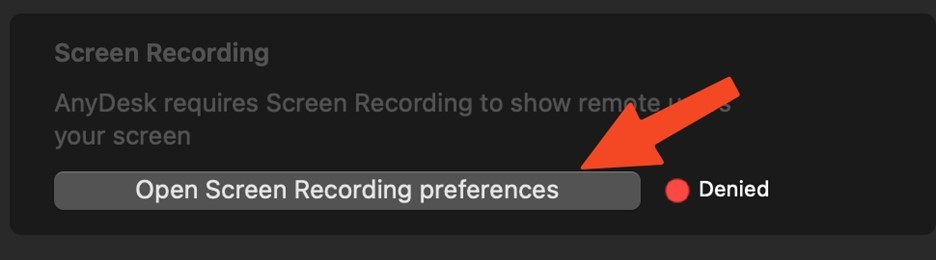
After successful opening, a window will be displayed in which you need to grant permissions:

First, click on “Open Screen Recording preferences”:
Press the switch:

Click on “Quit & Reopen”:

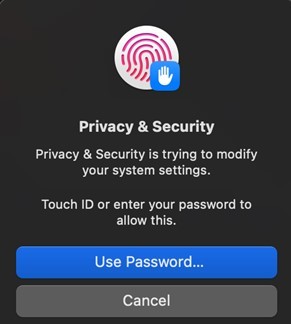
Confirm the action with a password or fingerprint:
If the changes were successful, a green check mark will appear. You should then click on “Request Accessibility”:

Press the switch:

Confirm the action with a password or fingerprint:

Two green marks are now displayed:

The AnyDesk workspace has been successfully set up:


