Instructions for setting up the “BRIA SOLO” mobile app
To set up the mobile application “BRIA SOLO” you need to click on the link and create a personal account https://www.counterpath.com/
- To register, click on “START MY FREE TRIAL” or follow the link https://solo.softphone.com/logi

2. Then press the “CHOOSE MY PLAN” button.

3. Choose a plan for personal use – “BRIA SOLO”

- At the bottom of the page click on “START A FREE 21-DAY TRIAL”.
After the 21-day period is over, your plan will be automatically switched to “BRIA SOLO FREE”. On a free basis, the functionality of the service does not limit the reception of outgoing and incoming calls.

- Then you need to specify your email, password and full name, which will be used to enter the personal account of BRIA SOLO.
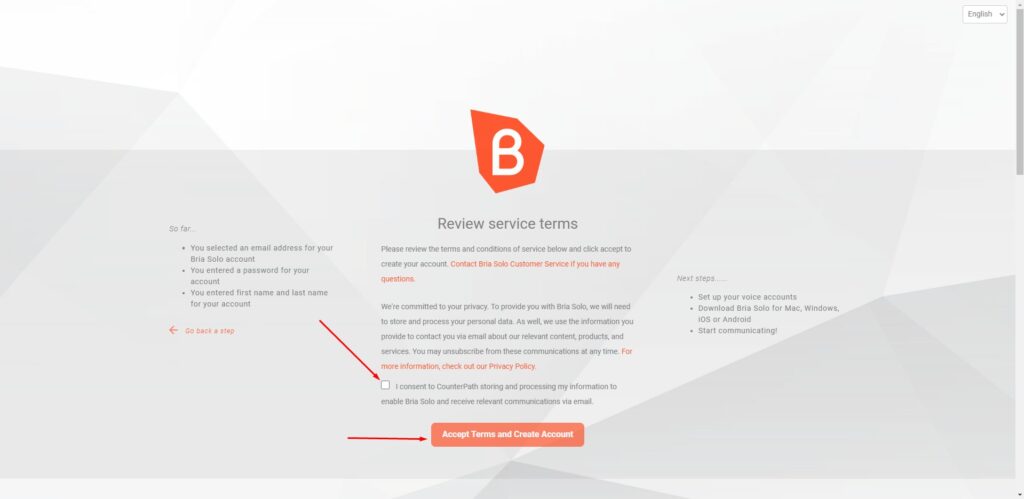
- Once you have filled in your personal information, check the box in the User Agreement and click “Accept Terms and Create Account”.
After successful registration you will be redirected to your personal “BRIA SOLO” cabinet, where you have to make settings of the SIP line that will be used for calls.
- To configure the SIP line, press the “CONFIGURE SIP SETTINGS” button

- Next, you must enter the settings for your SIP line. Enter the following information:
DOMAIN – sip.uintalk.cloud
SIP USERNAME – 4-digit SIP line number
SIP PASSWORD – your SIP line password

You can find this information in your personal UniTalk cabinet in the “Users” section https://my.unitalk.cloud/index.html#users or ask your manager.

3. Next, change the transport type to “UDP”. Leave the rest of the settings unchanged.

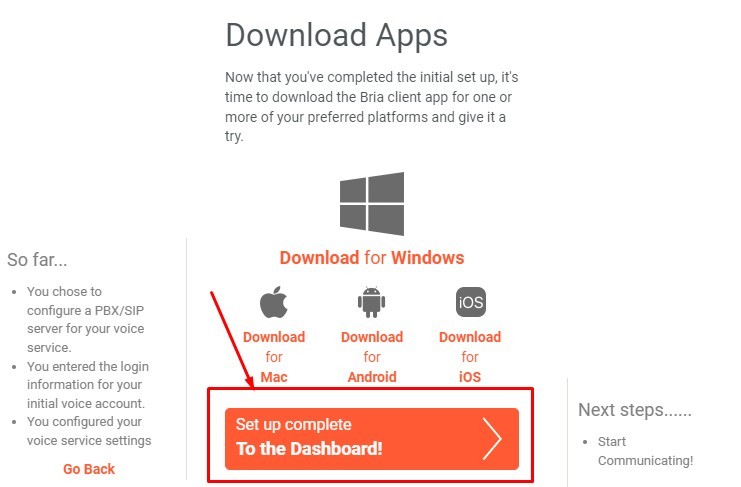
4. Done! You have created an account in “BRIA SOLO” and configured the SIP line. Press the “SET UP COMPLETE” button to confirm the above settings.
Setting up the BRIA app on your smartphone
To set up the BRIA app on your smartphone, follow these steps:
1.To download the BRIA app, go to the Play Store or Apple Store.
2.Search for and install the “BRIA” app.
3. The first time you start the application, you need to enter your authorization data for the BRIA service. This is the information you entered in point 5 when you registered.
- After authorization, the application will ask for a number of permissions.
For the application to work correctly in the background, you must provide all permissions requested by the application. - Now make changes to the line settings on your smartphone. To do this, go to the application menu.
6. In this menu, go to “Settings”.
8. In the account settings, turn off “NAT Emulation” and accept the changes.
9. Done! You have set up and activated your account. Now you can use it to make calls.


