INSTRUCTIONS FOR SETTING UP THE CLICK TO CALL BUTTON
To activate the Click to Call service, you need to:
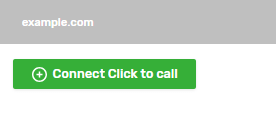
- Go to the Click to Call screen;
- Click on the “Connect Click to Call” button on the form of the desired website, and the corresponding form will open;
Note! You can navigate through the steps by clicking on the name of the corresponding steps at the top of the form. Changes to the service settings can be made regardless of the sequence of steps.
- Customize the behavior and design of the service, as well as instructions on how to install it on the website;
- Click the “Save Click to call” button in the lower right part of the form.

Step 1: Setting up
In the first block of the first step, you can enable/disable the service, activate the “PRO” and “Premium” functionality.

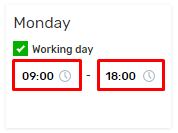
- The “Work schedule” block allows you to set up a schedule according to which the rules for ordering calls will be selected. To do this, you must:
- Activate the “Working day” checkbox for all working days, respectively
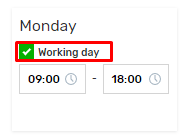
Set the time interval in 24-hour format
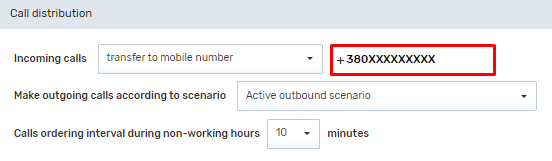
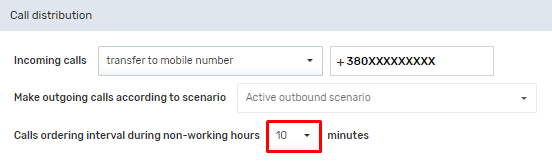
The Call distribution block allows you to set up rules by which ordered and completed calls will be distributed. To do this, you need to:
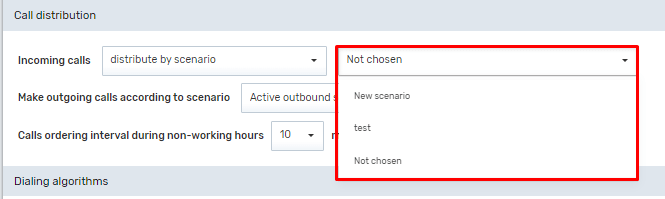
- Select the type of incoming call distribution from the drop-down list

- Fill in the fields corresponding to the selected type:
- To distribute by scenario – select one of the available scenarios from the drop-down list

To redirect to a mobile number – fill in the field in international format
To transfer to an extension – select the required number of extensions from the drop-down lists
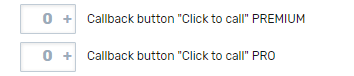
Click the “Call the customer back” button
Note! At least one available extension must be selected.
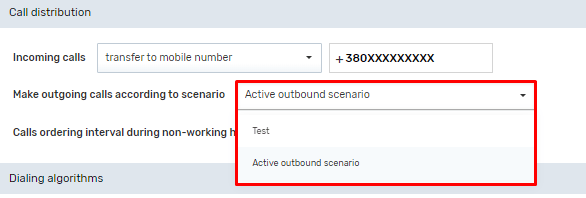
- Select one of the available output scenarios from the drop-down list
Select the minimum interval between calls made outside of business hours from the drop-down list
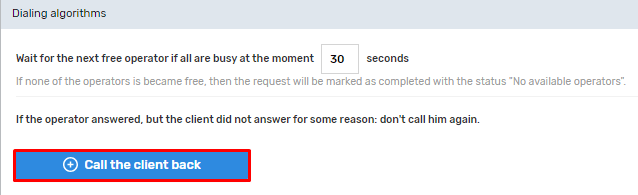
The Dialing Algorithms block allows you to set the maximum waiting time for free operators and dialing intervals
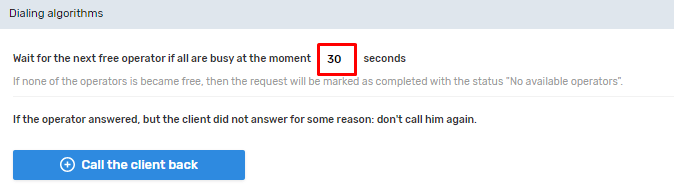
You need to set the resolution intervals:
- Click the “Call the client back” button
- Set the time interval in minutes
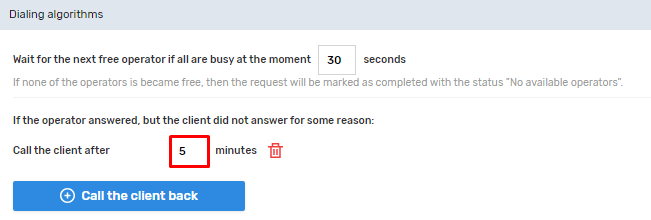
- If you need to set up further dialers, repeat steps 1 and 2 of this list.
Note! It is recommended that the time intervals be set in the order of their increase.
In the “Advanced” block, you can set a prefix for incoming calls received using the service

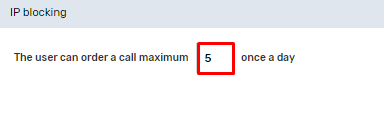
In the Call destinations block, you can restrict the numbers to which outgoing calls will be made

Note! It is recommended to set the time intervals in the order of their increase.
In the “Advanced” block, you can set a prefix for incoming calls received using the service
Step 2: Installation on the website
The Step 2 tab provides instructions for installing the service on your website and some of its additional features. You can perform them yourself or pass them on to your technical specialist.
Please note! The service cannot be installed on a website without following these instructions, which means that in all cases when there is no access to editing website pages
Step 3: Customize the widget style
The tab of step 3 presents an editor that allows you to view and customize the visual component of the service in real time.
Please note! To access the settings, you need to activate at least the “PRO” functionality.
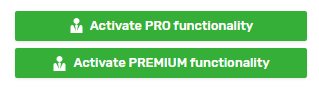
If the number of purchased services for connecting additional functionality is exhausted, the corresponding form will be displayed. Clicking the “Order” button will take you to the page for purchasing them.

Please note! When you go to another page, all changes made to the service settings that were not previously saved will be lost.

Select the necessary services in the “Ordering additional services” block and generate an invoice by clicking the “Generate invoice” button and pay for it. After connecting additional services, you can disable them by clicking the corresponding “Disable PRO” and “Disable Premium” buttons.
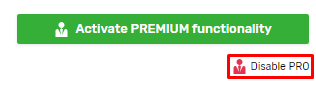
Note! Disabling the additional functionality is saved automatically, so to prevent problems with accidental clicking, disabling occurs with a delay. During the delay period, the “Do not disable PRO functionality” and “Do not disable Premium functionality” buttons will be displayed on the form, respectively.
PRO functionality
PRO functionality includes the following features:
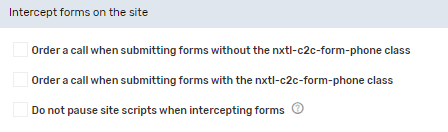
- Capture forms on the website block on the tab of step 1;
- Configuring the button style.
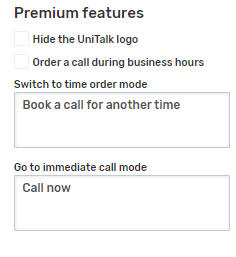
Premium functionality
Premium functionality includes access to the corresponding block on the button style configuration tab, namely:
- Ability to hide the UniTalk logo;
- Ability to order calls during business hours;
- Change the transition text between the forms for ordering a specific time and an urgent call