INSTRUCTIONS ON HOW TO CONNECT UNITALK INTEGRATION WITH ZENDESK
The integration of UniTalk IP-telephony with Zendesk transforms your support desk into a high-performance contact center. By merging these tools, your team can manage calls directly within the CRM interface, automatically generate tickets, and view full customer interaction history before even answering. This eliminates manual tasks and allows your staff to focus on delivering top-tier support.
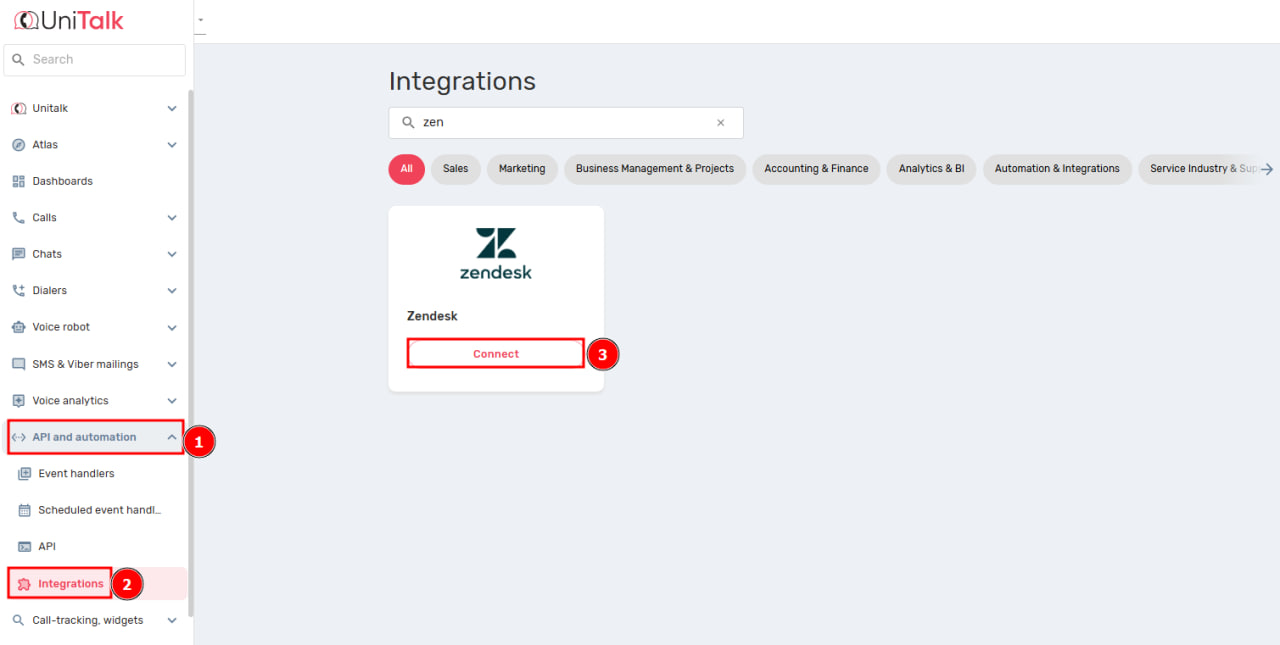
1. In your UniTalk personal account, go to the “API and automation” – “Intagrations” menu, and then select “Zendesk”.
2. After opening the integration page, you must enter the name of your Zendesk account in the ” Account name (https://******.zendesk.com)” field . You can see the name of your account on the Zendesk website after authorization in the URL field. If your account is in the form https://avtocar.zendesk.com — you only need to enter avtocar name .
Also enter “Login” and “Password” and click the “Connect” button.

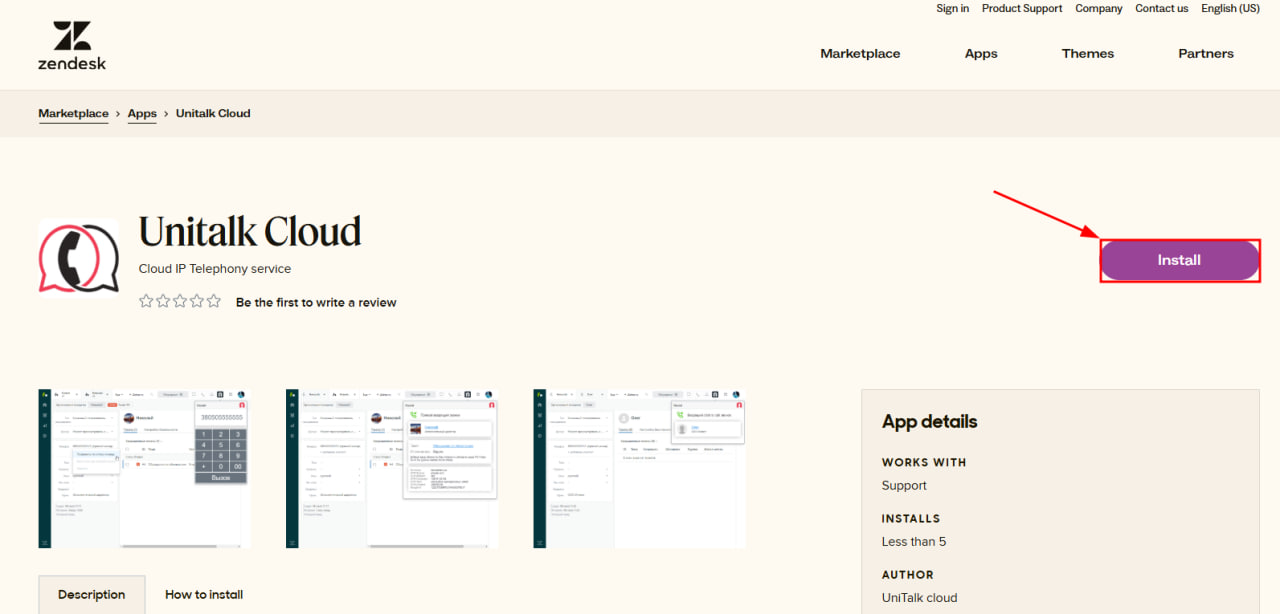
3. Then, in your Zendesk account, open the UniTalk Cloud widget via the link and install it.
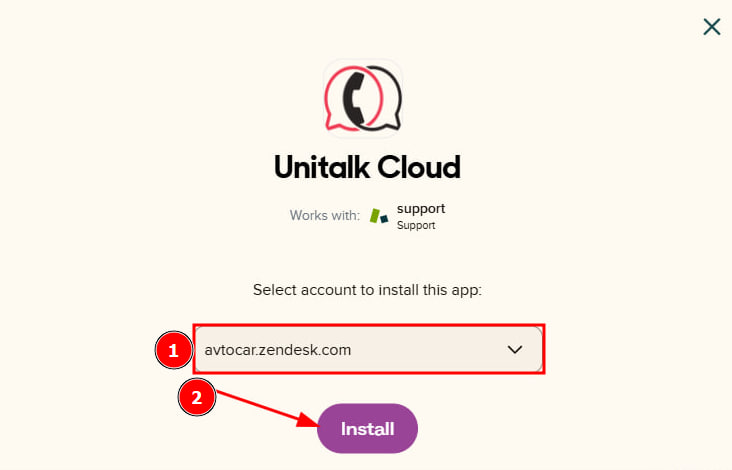
4. Select the Zendesk account you want to connect to the integration.
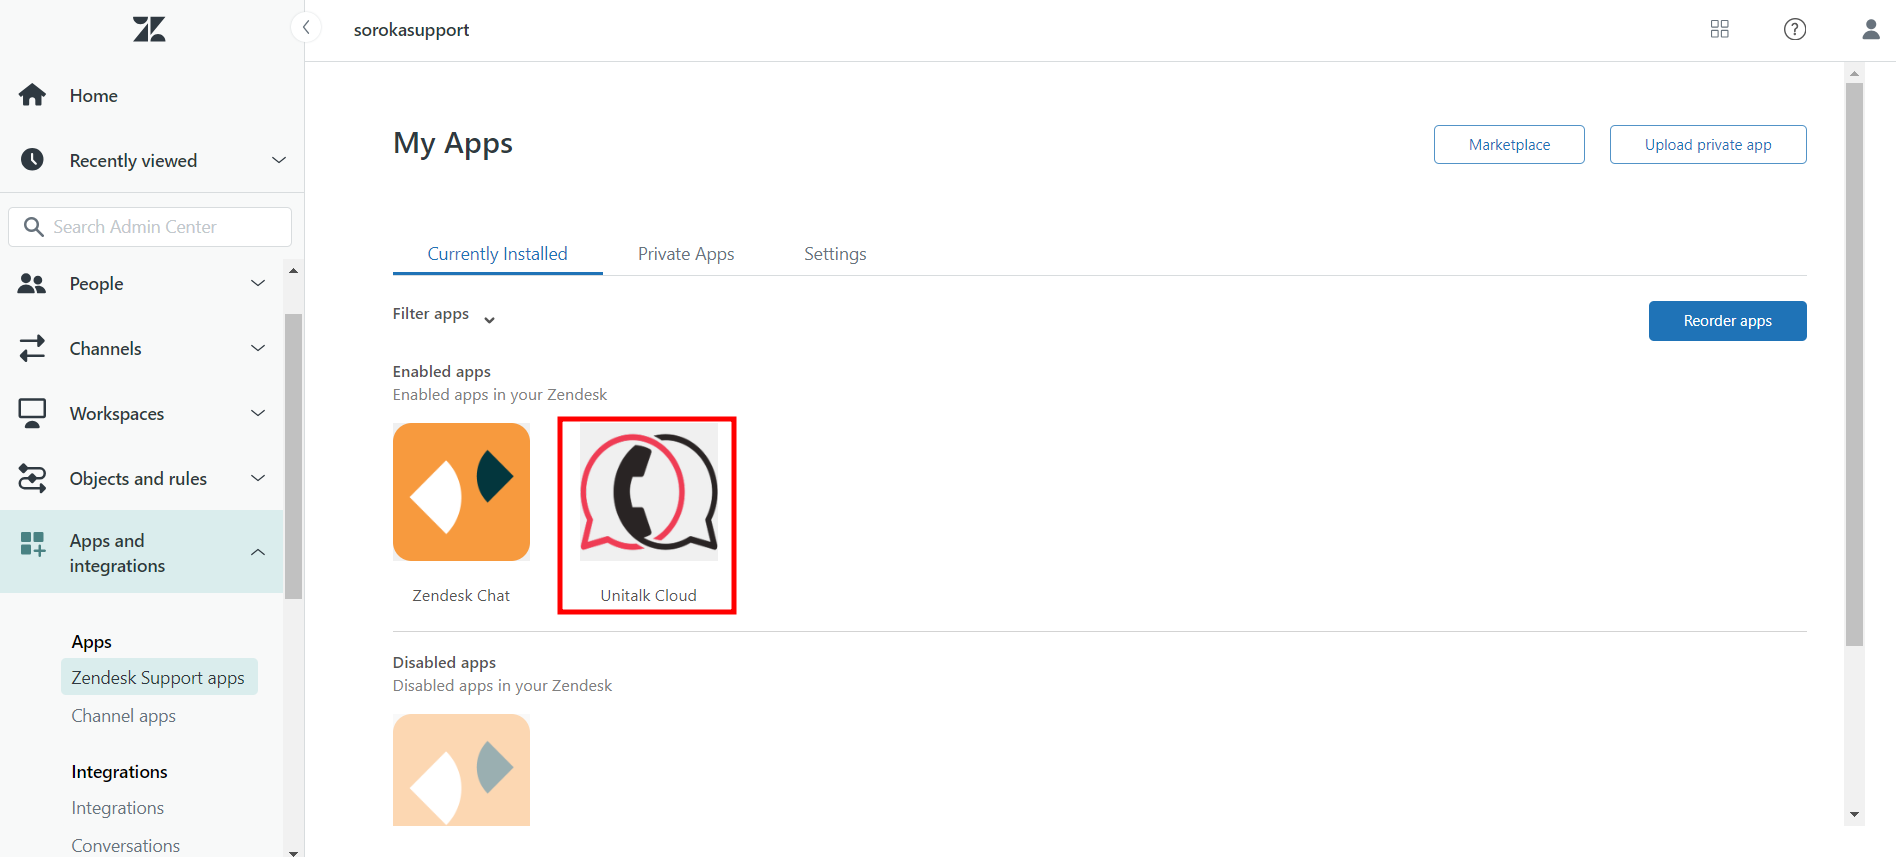
5. Account selection field, you will be automatically redirected to the “Administration Center” in the “My Applications” tab, where you need to configure and install the Unitalk Cloud application.
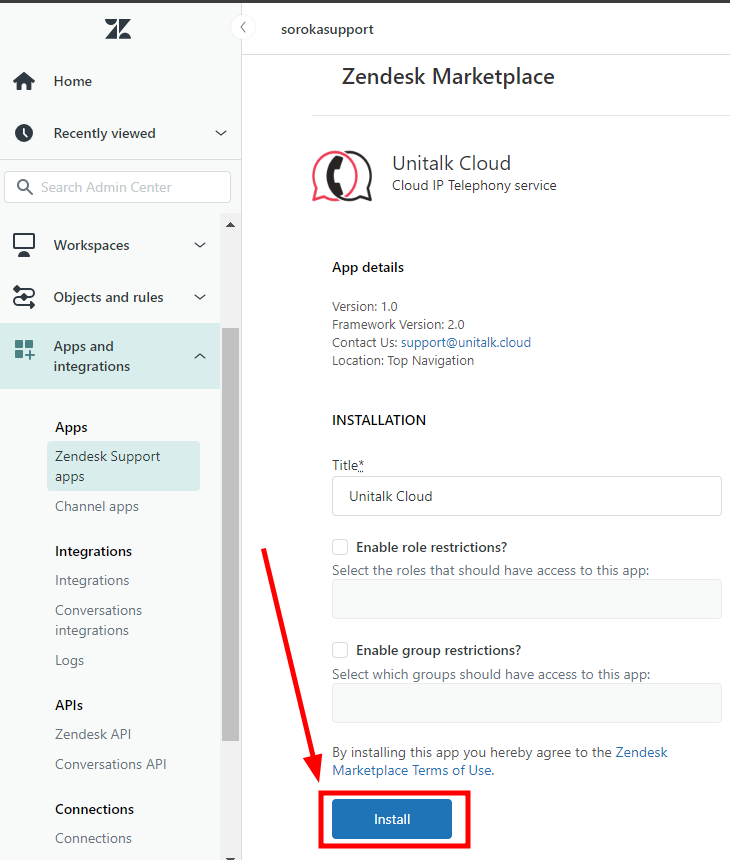
6. After successful installation, in the “My Applications” tab, you will see the installed UniTalk Cloud application.
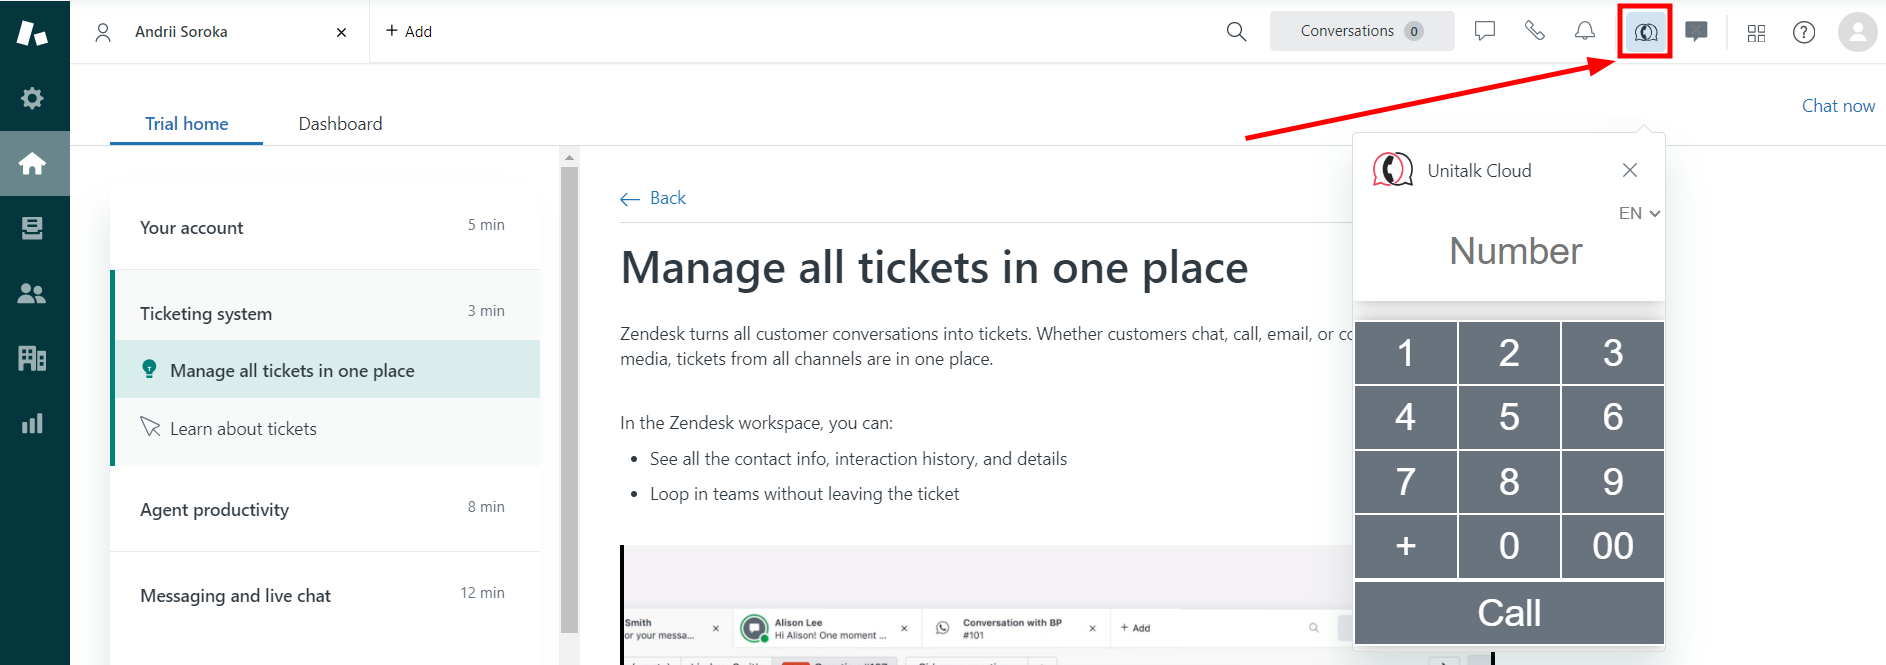
7. In the Zendesk account, you can also see the UniTalk Cloud application icon in the navigation bar in the upper corner. Clicking on the icon calls up the keyboard for dialing a number.
Enable integration
If you want the customer’s ticket to automatically open in the browser in your Zendesk Support account when you answer a call, enable the setting “Automatically open a ticket in the browser when you answer a call”.
If you want customer requests to be created not only for incoming calls, but also for outgoing calls, then enable the setting “Create contacts and tickets also for outgoing calls”.
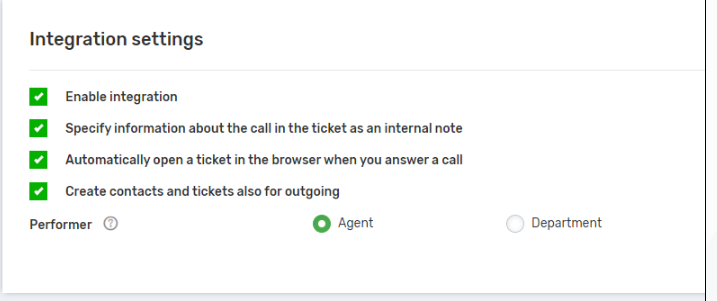
Determine who will be responsible for the created request:
- Agent – in this case, the user who answered the call will be responsible.
- Department – in this case, the standard department whose operator answered the call will be responsible.
If the call is missed, the request will be created for the operator or department that did not answer the call.
If the call is received on a number that is not linked to a Zendesk Support user, the requests will be created without specifying the responsible person.
Assign internal line numbers to Zendesk Support dashboard users.

The setup is complete — your Zendesk is now a fully functional hub for voice communications. With automatic ticket triggers and contact synchronization, you gain objective data on support performance and response times. If you have any questions regarding access permissions or widget functionality, our technical support is available 24/7.


