Predictive dialing
To ensure your operators speak only with “live” customers, without wasting time on ringing tones and unanswered calls, you need intelligent automation. Predictive Dialing is a technology that maximizes your managers’ workload and significantly increases their productivity. The benefit for you? You don’t pay for waiting, and your calls are always effective. Learn how the smart UniTalk algorithm works.
What is predictive dialing?
Predictive dialing is a technology that automates the simultaneous dialing of multiple phone numbers from your customer database and subsequently connects the client to an available operator in your company.
The intelligent algorithm of the UniTalk system forecasts the volume of calls required to ensure maximum operator utilization. This prediction is based on various statistical data, including:
- the average duration of conversations between your operators and clients;
- the time an operator spends on post-call processing;
- the contact rate within your contact base.
When one of the calls is answered, it is instantly connected to an available operator in your company. In predictive dialing mode, the system places more calls than there are available operators at a given moment because it anticipates that some calls will go unanswered (e.g., the number is busy, the call is declined, or the phone number is invalid).
Creation of the Department
Now let’s create a group of employees with whom we will need to connect clients when they pick up the phone.
1. Go to the UniTalk account section – IP Telephony – Departments .
Click the “Add Group” button.

2. Enter the name of the department. The name has no technical meaning; it is needed to understand which employee lines are in which groups.
Examples of names: “Department No. 1”, “Alena’s Team”, “Operators 3rd floor”, “Trainees”, “HARD department”.
3. By default, “Group of inner lines (SIP)” will be selected – just don’t change it.
4. Enter your quick call number. This is not necessary, but it makes it possible to dial this number on any SIP line and call simultaneously to all lines of this group.
5. Click “Add” next to the Lines block in the group as many times as there are employees in the department.
6. In the appeared ones, select the lines of all employees on which dial-up calls should be received.
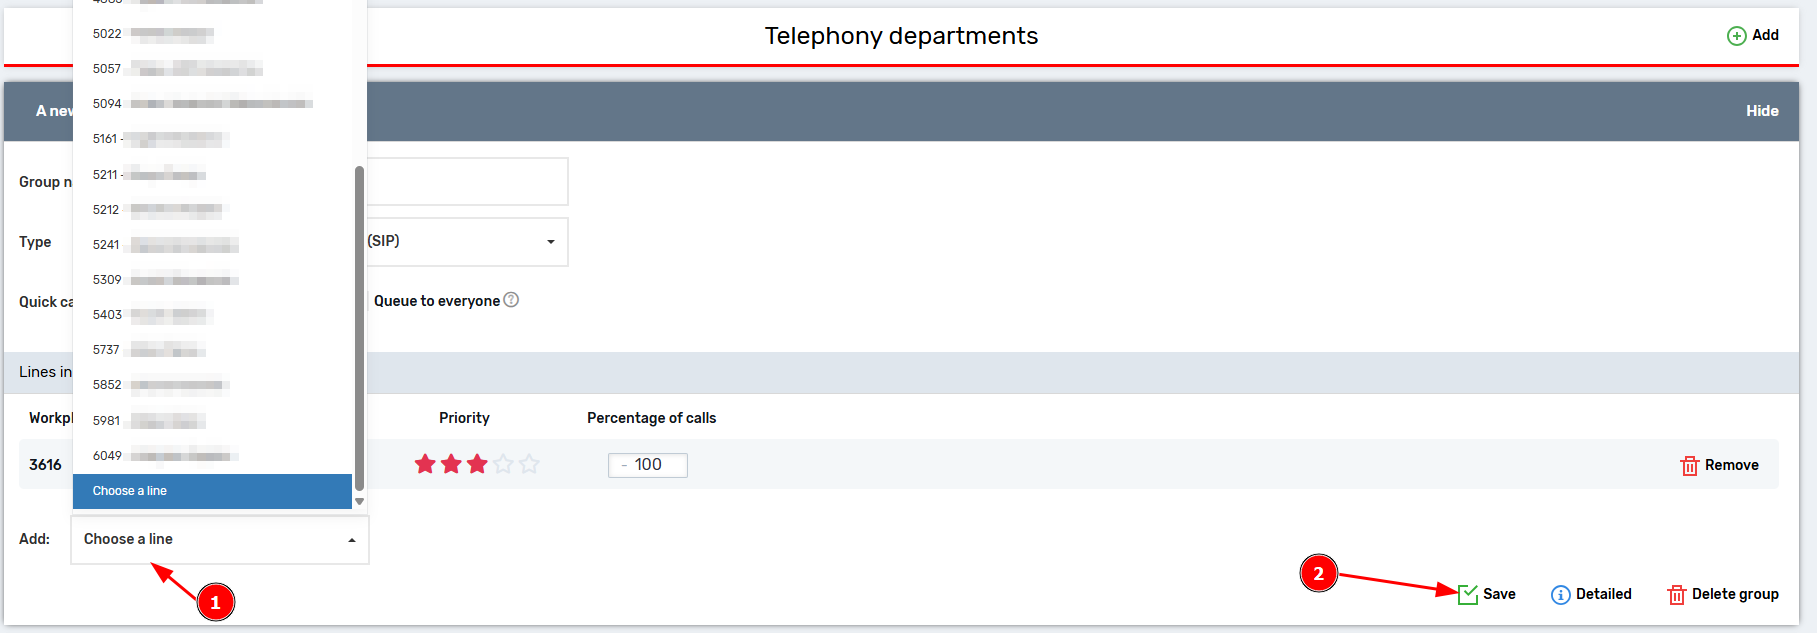
Done, the department has been created.
Preparing the outbound script
If you plan to dial from a number that is used for regular calls, then you don’t need to do anything. Otherwise, follow the instructions further.
Go to the UniTalk account section – IP Telephony – Outgoing scenarios and click the button at the top of the page “Add scenario”.

In the interface that appears, in the any condition rule, remove the setting to use UniTalk numbers for calls.

After that, provide a name that you understand. For example, “Dialing” or “Dialing script”. Select the number from which you want to call and click “Save”.
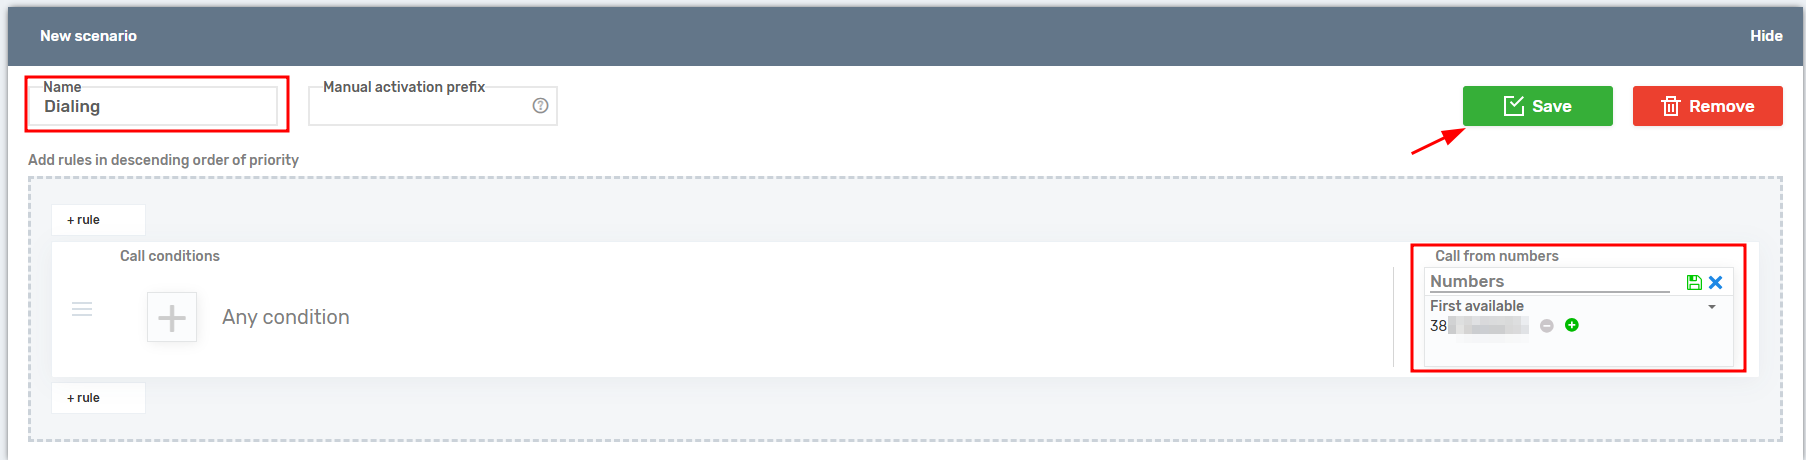
Great, the outgoing scenario is ready.
Predictive Dialing Settings
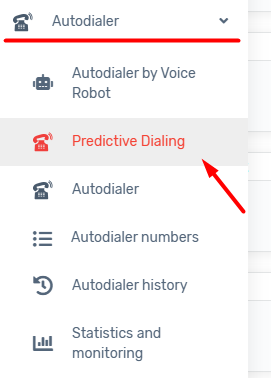
The section for adding and editing predictive dialing can be found in the “Autodialer” item of the side menu.
At the top of the page, you will find the following section controls:
- “Add” – creates a new predictive dialing campaign within the project;
- “Load by …” – allows you to select how many predictive dialing entries are displayed per page for the project user (from 5 to 50). If there are more dialing entries than the selected amount, information will appear above the first entry indicating how many are displayed out of the total. Below the last entry, a “Show more…” button will load the same number of additional entries as selected in this setting;
- “No sorting” – the default setting; it can be changed to “Sort by status”, in which case predictive dialing entries will be grouped by status (e.g., “Completed”, “Paused”, “Waiting for available agents”, “No numbers added”, etc.);
- “Denied numbers” – this block allows you to upload a list of phone numbers that should be ignored when loading a contact base into the predictive dialing campaign.

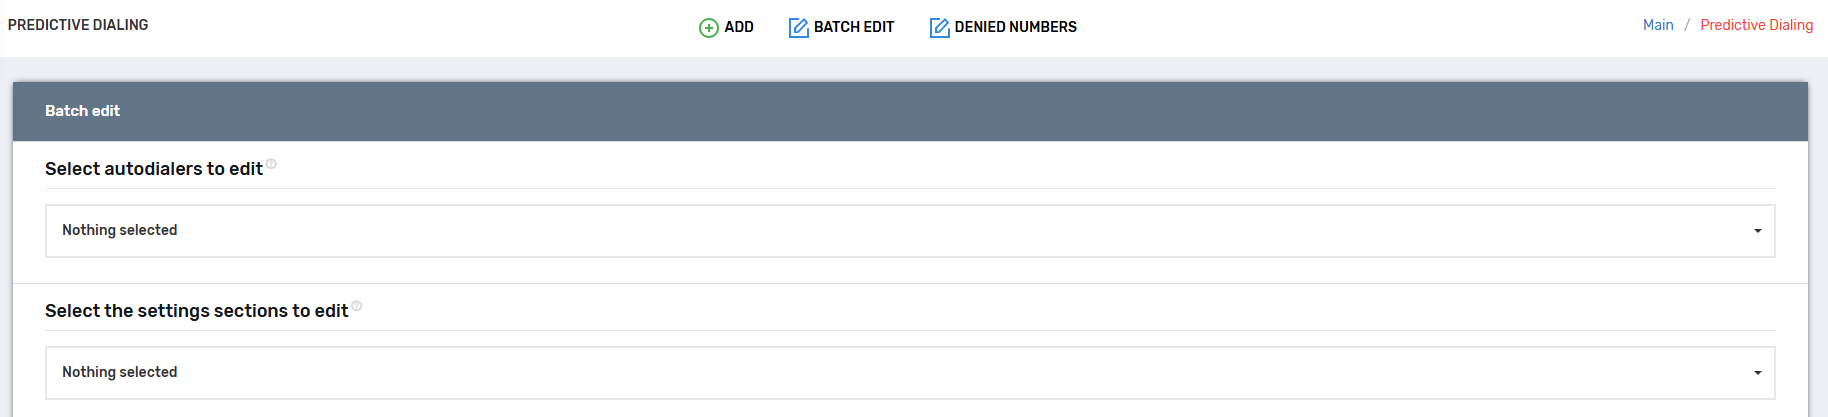
Bacth editing – the ability to edit settings in multiple dialing campaigns at once.
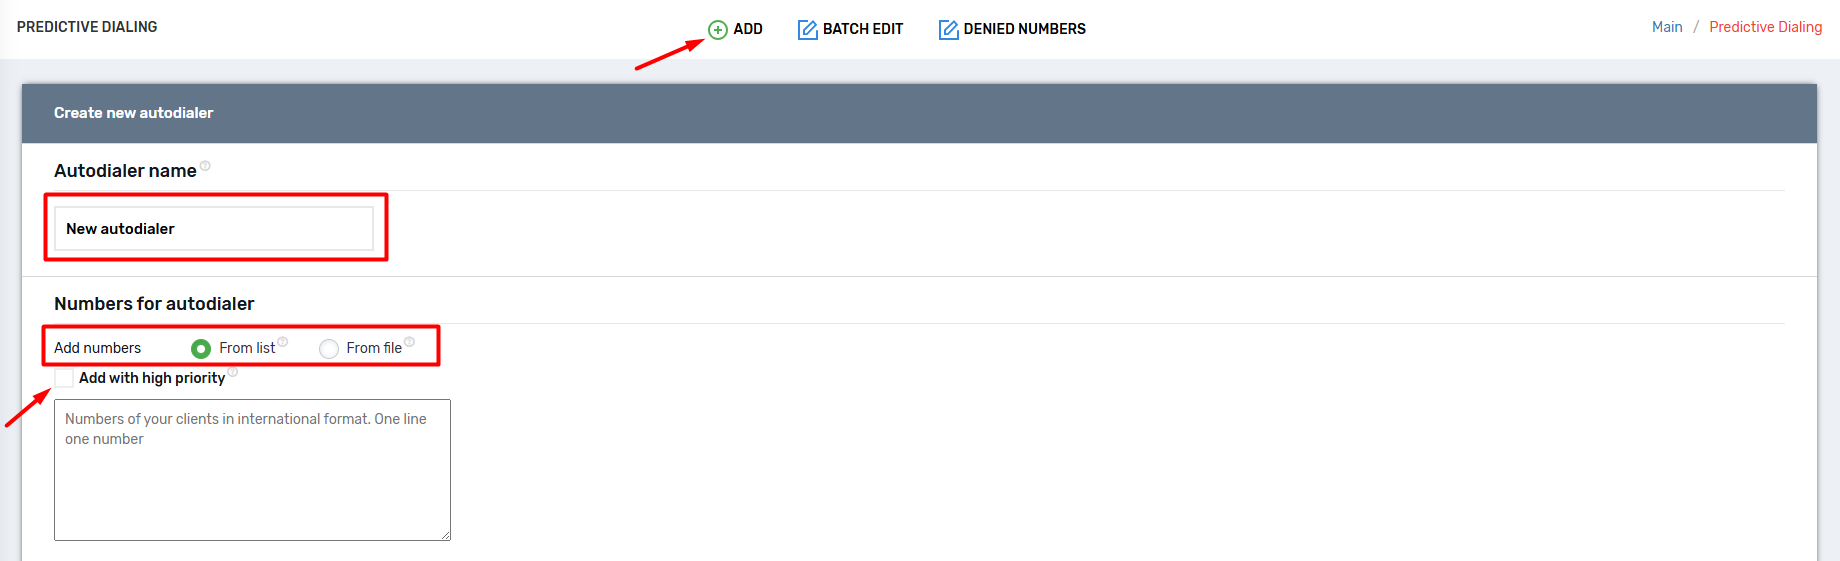
Creating a new autodialer
When creating a new autodialer, it is recommended to immediately assign it a unique name. Phone numbers can be added later; however, if needed, they can be uploaded during creation either as a list or via a pre-prepared file in .xls or .xlsx format.
There is also an option to “Add with high priority” — when this checkbox is selected, all numbers from the list will be processed first. Dialing will follow the order in which the numbers were uploaded.
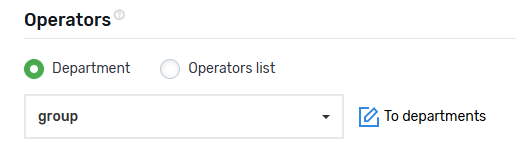
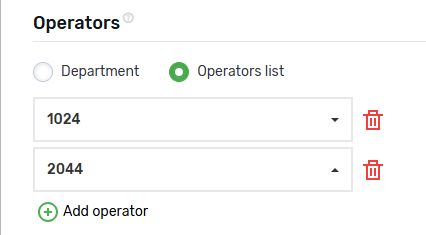
Operators
Department – the operator department, which must be created beforehand. By specifying a department in this field, answered calls will be routed to operators within the selected department.
Operator list – allows you to select specific operators for the dialing campaign. When selected, a pseudo-group of SIP lines is automatically created and linked to the specific dialing campaign.
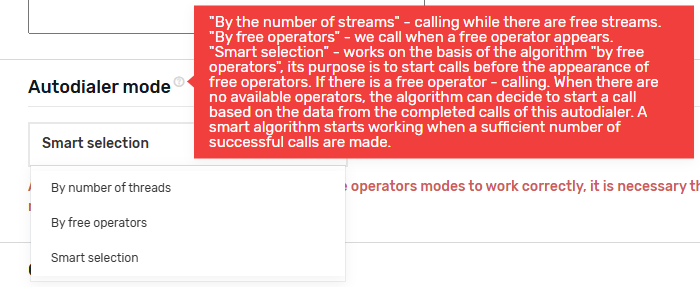
Autodialer mode – three modes are available:
- “By number of threads” – simply specify the desired number of simultaneous calls (configured below), taking into account the channel capacity of the selected numbers;
- “By free operators” – dialing will only initiate if an operator is available to take the call (the operator must select the “Working” status). One call will be made per available operator;
- “Smart selection” – similar to the previous mode, but in this case, dialing to clients will begin even before an operator becomes available. The smart algorithm activates after a sufficient number of successful calls have been made, allowing it to analyze and optimize the dialing process.
Schedule
By default, when creating a dialing campaign, the schedule is set to weekdays from 9:00 AM to 6:00 PM, and the campaign duration is set to one month from the current date. You can configure these settings immediately or edit this section later.
Pay special attention to the schedule only if you’re adding numbers during creation, as the auto-dialing may start immediately after the campaign is created and the numbers are uploaded, in accordance with the defined schedule.

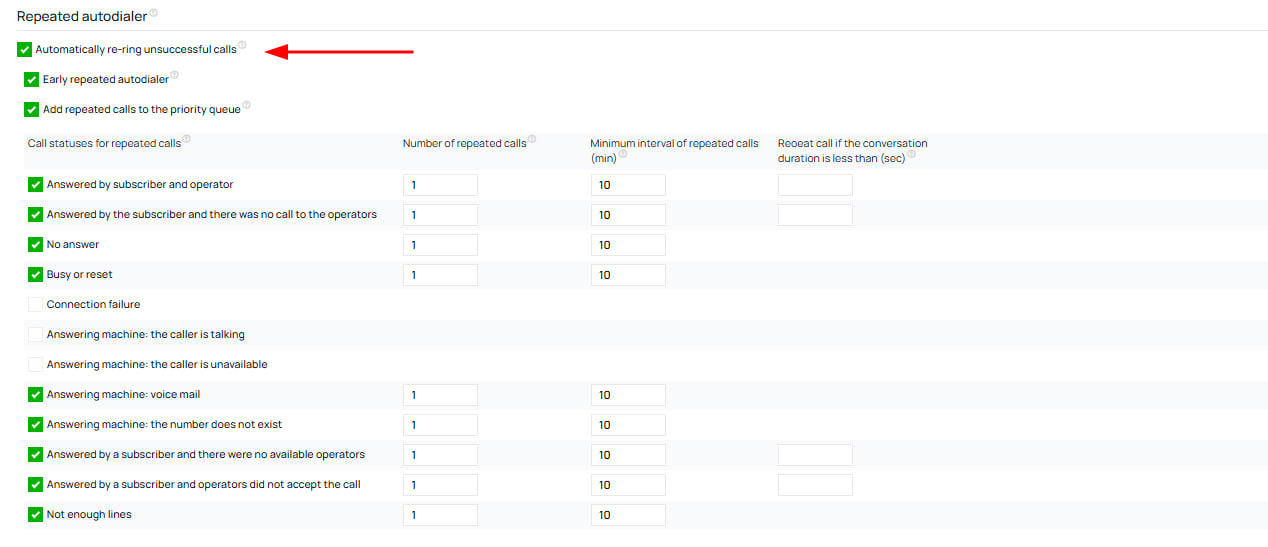
Repeated autodialer
When the “Automatically redial unsuccessful calls” checkbox is selected, the auto-dialer will make the specified number of repeat calls to subscribers at the specified interval (in minutes) for certain call completion statuses selected when editing or creating a call.
🔄 Additional parameters are specified:
- Number of repeat calls
- Minimum interval between them (in minutes)
- Redial if the call lasted less than the time that can be specified in seconds
- Now, for each status separately, you can set the number of repeat calls and the interval between calls. The status “Answered by subscriber and operator” (ANSWER) has been added to the repeat call, but for it, you must specify the duration of the call in seconds, and only if the call duration is less than that will it be considered necessary to call back.
- For other statuses where only the subscriber answered (there are 3 such statuses), but the operator did not answer, the “call duration” setting is also available. First, you can leave it blank, and second, it is calculated differently – seconds from the subscriber’s answer to the end of the call.
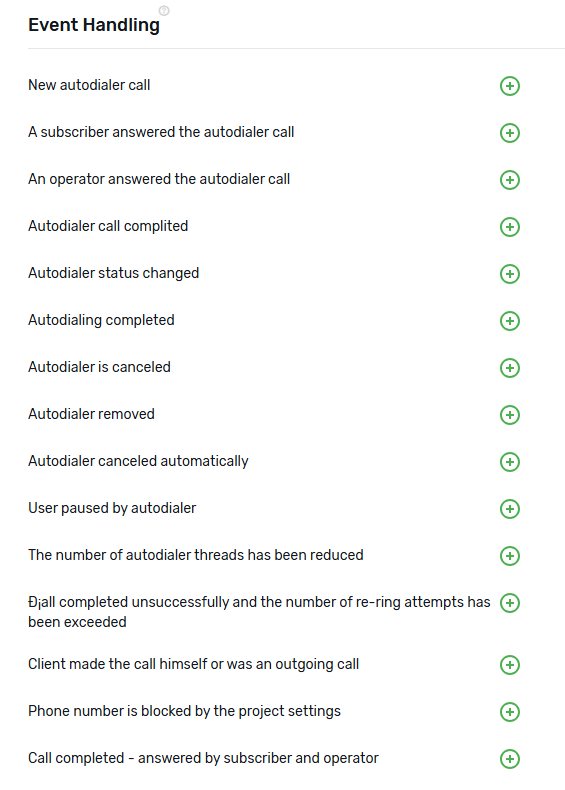
Event Handling
You can associate actions with dialing events and call termination events. Actions can be added on the “Event Handling” page.
For example, actions such as sending a Telegram notification to the project user, sending an SMS to the client’s phone number, removing a number from the autodialer, adding a number to another autodialer, and more can be configured. For more details, please refer to the “Event Handling” section.
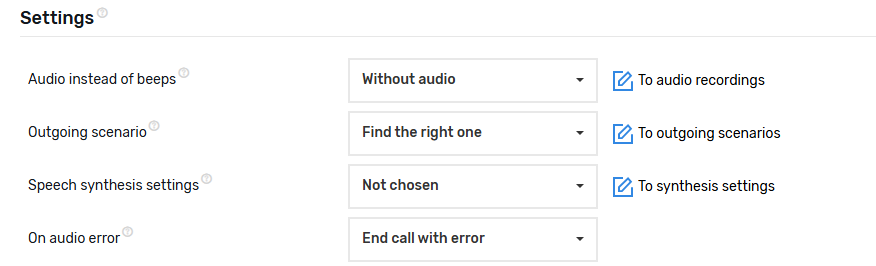
Settings
In the settings section, you can configure and edit the following parameters:
- Audio instead of beeps – You can specify an audio file that will be played to the client before the operator becomes available to take the call.
- Outbound scenario – You can choose a pre-configured outbound scenario. If no scenario is selected, calls will be made using the default scenario.
- Speech synthesis settings – Here, you need to select a pre-configured speech synthesis profile. This is an optional setting, and you can skip it if speech synthesis is not used in the dialing campaign.
- On of audio error – You can choose either “End the call with an error” or “Skip the audio or use the default dialing audio”.
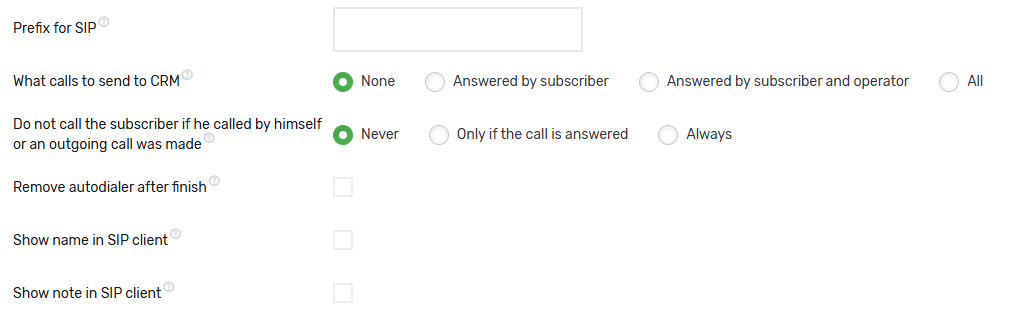
- Prefix for SIP – You can specify a recognizable value that will appear before the number in the SIP client, allowing the operator to identify the campaign from which the call originated. It is optional; by default, the prefix “Autodial-” will be shown before the client’s number.
- What calls to send to CRM – Available options are: send nothing, send all answered calls, send only those answered by both the client and the operator, or send all dialing calls.
- Do not call the subscriber if he called by himself or an outgoing call was made – In this section, you can cancel the call to a client from the dialing list if, during the campaign’s operation, the client calls the project number or if an outgoing call was made to the client. Options include: never (ignore such calls and still dial them), only if the call was answered, or always (do not dial the client).
- Remove autodialer after finish – You can choose to have the campaign automatically deleted upon completion if desired.
- Show name in SIP client – You can display the client’s name in the SIP client if it was previously loaded in the number table, and the “Show client name” feature is enabled in the operator’s SIP line settings.
- Show note in SIP client – You can display a note in the SIP client if it was previously loaded in the number table, and the “Show client name” feature is enabled in the operator’s SIP line setting
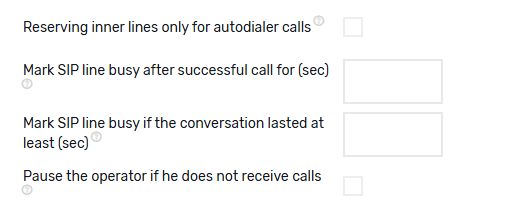
- Reserving inner lines only for autodialer calls – When initiating a dialing call, one internal line is reserved, and the reservation is released only after the successful completion of the call or when the dialing campaign is no longer processing calls. If this option is disabled, calls from other dialing campaigns or inbound scenarios cannot be received on the reserved line. If enabled, the reserved line will not receive calls from other dialing campaigns but can still receive calls from inbound scenarios.
- Mark SIP line busy after successful call for (sec) – After the successful completion of a call, the internal number of the operator who spoke will be marked as busy for the specified number of seconds for all calls (not just dialing calls).
- Mark SIP line busy if the conversation lasted at least (sec) – The “Mark SIP line as busy after successful call” setting will only apply if the conversation between the operator and the client lasts longer than the specified number of seconds.
- Pause the operator if he does not receive calls – If the specified number of dialing calls redirected to an internal line ends consecutively with the status “Operator did not answer the call,” the user attached to that line will be paused.
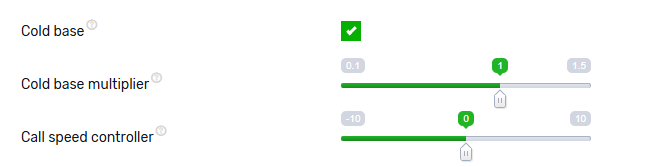
Cold Base Logic
The “cold base” setting is specifically designed for contact databases with a low success rate of successful connections. For example, many calls may be busy, dropped, invalid, or unanswered. In such cases, the system analyzes the ratio of failed calls and accordingly increases the number of channels for dialing numbers to compensate for the time lost on unsuccessful attempts.
When the “cold base” is activated, meaning a significant number of calls are not going through, the system will indeed increase the number of channels by the factor that the ratio of failed calls exceeds the expected level. This setting is particularly useful when working with truly “cold” databases that contain uninterested clients or invalid numbers, allowing for more efficient use of resources and reducing the time operators spend waiting.
However, it is important to note that the “cold base” setting is highly sensitive to configurations, and even small changes can negatively affect the efficiency of the dialing process. For instance, it might trigger a larger number of calls than the system can handle, or a client may answer the call, but there may be no available operators to connect with.
Call speed controler – This parameter is available only in the “Smart Selection” mode. It allows you to speed up or slow down the dialing process based on the smart algorithm. Lower values result in slower dialing, while higher values increase the dialing speed. A value of 0 means the dialing speed will remain unchanged according to the smart algorithm.
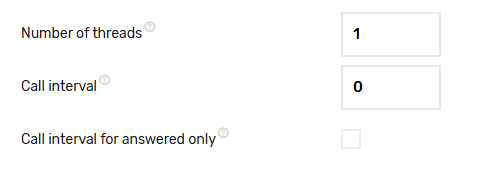
Settings available only in the “Number of threads” mode:
Number of threads– Specifies the number of parallel calls. Set the value according to the line capacity and the number of available operators.
Call Interval – The pause between calls. This setting works only when the number of channels is set to 1. The interval is measured in seconds.
Call interval for answered only – If this checkbox is selected, the pause between calls will apply only after calls that were answered by the operator.
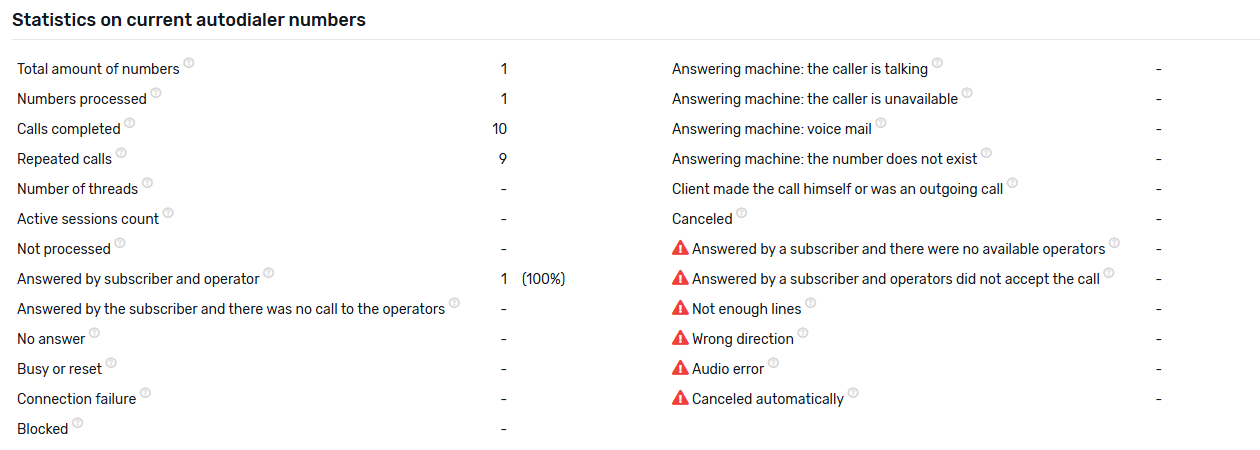
Statistics on current autodialer numbers
Status Name and Conditions for Assignment:
Total numbers – The total number of unique numbers that were added to the autodialer.
Processed numbers – The number of numbers that have already been dialed, but a retry is scheduled in the future.
Completed calls – The number of calls that have been processed by the system, and no further interactions will take place with these numbers.
Repeat calls – The number of calls made as a retry based on the autodialer’s “Automatically redial failed calls” setting.
Not processed – The number of numbers that the system will still attempt to call.
In progress – The number of active dialogues where clients have answered the autodialer call.
Answered by both the subscriber and the operator – The number of calls where the subscriber answered, and the call was transferred to the operator.
Subscriber answered but no operator was available – The number of calls where the subscriber answered, but the call ended before the operator could connect.
No answer – The number of calls where the subscriber did not answer the phone.
Busy or dropped – The number of calls that were either declined by the subscriber or the subscriber was already in another call during the attempt.
Connection failure – The number of numbers where an attempt was made but the call failed due to network or technical issues.
Blocked – The number of numbers that were blocked in the “Project Settings – User Blocking” section.
Voicemail: Subscriber speaking – The number of calls where the voicemail detected that the subscriber is speaking and unable to take the call.
Voicemail: Subscriber unavailable – The number of calls where the voicemail detected that the subscriber is out of reach and unable to take the call.
Voicemail: Voice message – The number of calls where the voicemail message indicated that the subscriber cannot take the call and asked to leave a message.
Voicemail: Number does not exist – The number of calls where the voicemail detected that the number does not exist, and it suggested checking the number dialed.
Subscriber called or there was an outgoing call – The number of calls where the subscriber called the company back, or a direct outgoing call was made by the operator. (This applies only if the autodialer is set to not call clients who called in or had outgoing calls).
Canceled – The number of calls that were canceled either by manually pressing “Cancel” in the autodialer or when the dialer’s schedule ended, and numbers in the “Not Processed” status were moved to “Canceled”.
Subscriber answered, but no operators were available – The number of calls where the subscriber answered but no operator was available to take the call.
Subscriber answered, but operators did not pick up the call – The number of calls where the subscriber answered, but operators did not pick up the call.
Not enough lines – This status occurs when there aren’t enough available lines for the call attempt, or when the outbound scenario settings are incorrect for making the call.
Wrong direction – This status occurs for numbers restricted by the outbound scenario or the tariff settings of the dialing number.
Audio error – This status occurs when there’s an error in playing audio at the start of the call, for example, if audio synthesis fails before the call.
Canceled automatically – This status is assigned when a call is canceled due to insufficient funds in the project’s balance.
The possibilities of interaction with the created autodial
Edit – Editing autodialer settings: changing scripts, operators, schedule, and other settings.
Add numbers – Adding new numbers to the current autodialer manually or from a xslx or xls file.
Statistics and monitoring – Viewing the current autodialer statistics.
History – History of autodialer calls.
Numbers – List of all numbers in the autodialer with their current statuses.
Copy – Copying the autodialer with all its parameters.
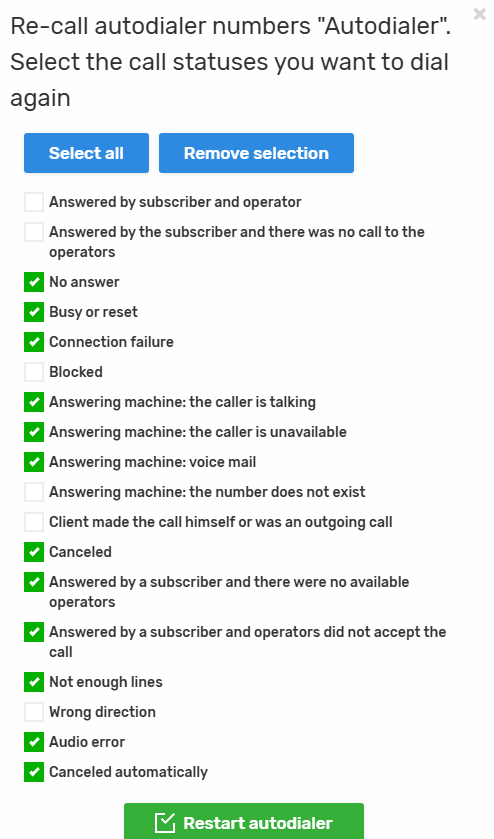
Call again – Redialing numbers with specified statuses.
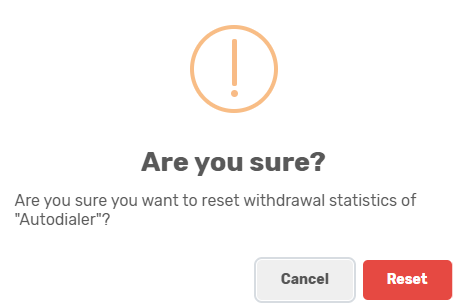
Reset withdrawals – Resetting the deduction of funds for autodialer calls.
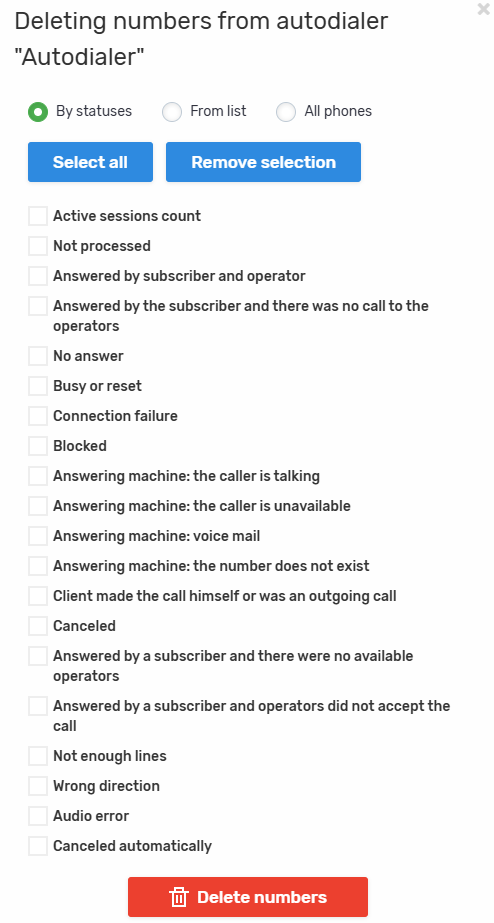
Delete numbers – Deleting selected numbers from the current autodialer database.
Delete autodialer – Complete deletion of the selected autodialer.
Reserving SIP lines by calling
If this feature is enabled, the status of SIP lines will not change to “reserved for calling” during calling. This is necessary for clients who launch multiple calls simultaneously on the same SIP lines so that the operator can accept calls from any of the calls, not just the one for which it is reserved.
If this feature is disabled, during a call, before calling the subscriber, the call will search for a free SIP line, and if one is found, it will reserve it. From that moment on, the SIP line is considered busy until it accepts the call or until the call completes its work.
How it works with the checkbox enabled: instead of being reserved, the SIP line will be marked as busy for the specified number of seconds, but the SIP status will not change, and the SIP will only be “busy” within the scope of the dialer for which this setting is configured. If you specify too few seconds, there is a possibility that there will be many calls where subscribers will not have enough operators.

You have successfully set up Predictive Dialing—a tool that makes your sales department highly efficient. Your result? Significant budget savings, as you pay only for conversations, not for ringing, and gain control over the team’s workload. Remember that the key here is optimizing call flows and proper configuration.


