Connecting and configuring EasyBusy integration
Integrating UniTalk IP-telephony with EasyBusy CRM is the ideal solution for entrepreneurs who want full visibility into every sales stage. Call synchronization enables automatic customer data storage, detailed interaction history, and effective task delegation without losing control. This integration provides a streamlined “single window” experience where telephony becomes a seamless part of your business workflow.
EasyBusy is a CRM system for entrepreneurs who want to see their business from the inside out. Here, manage sales at every stage, store customer data, schedule tasks and delegate responsibilities to a team without losing control.
To set up UniTalk telephony integration, you need to follow these steps:
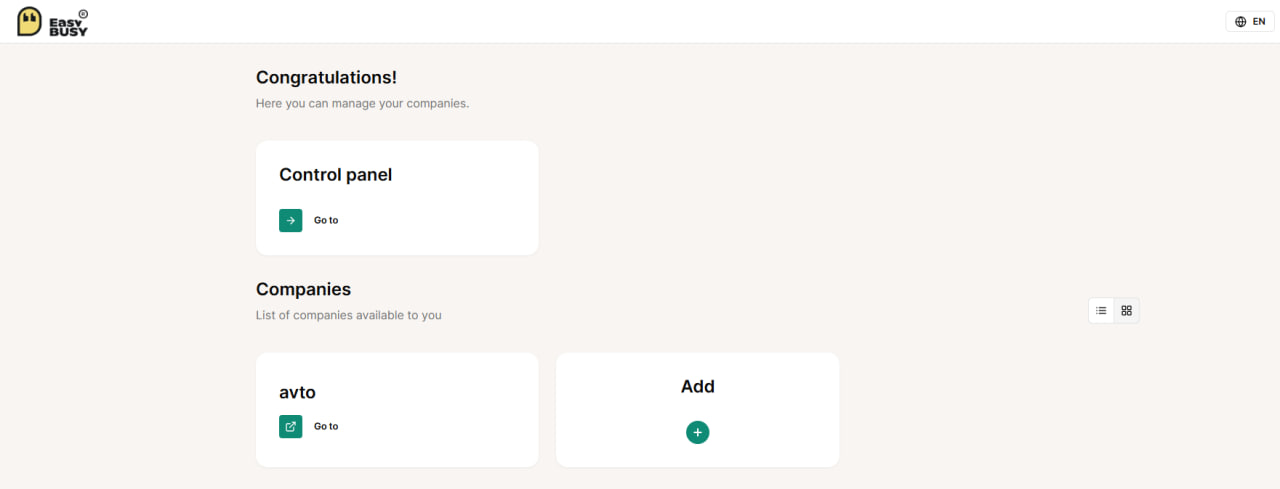
1. Log in to EasyBusy and go to Control Panel.
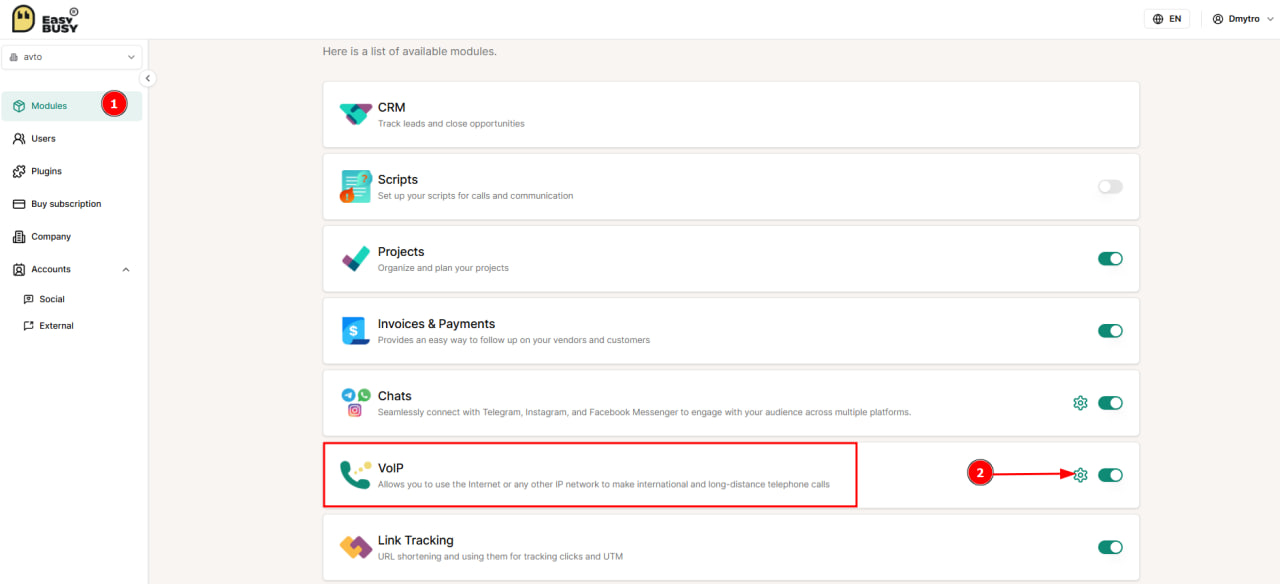
2. In the Modules section, click the gear next to IP Telephony.
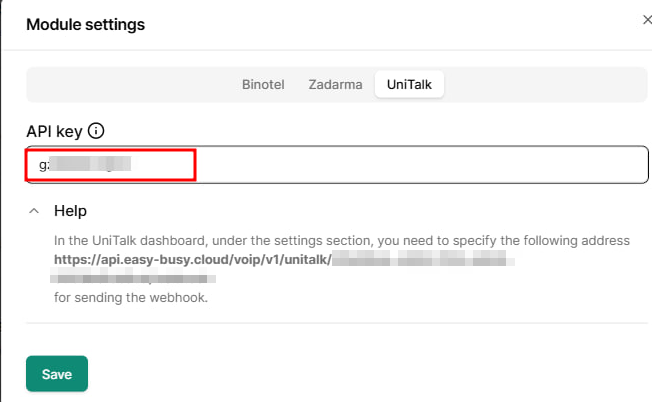
3. In the window that opens, select the UniTalk tab and expand Help, copy the link from the tooltip.

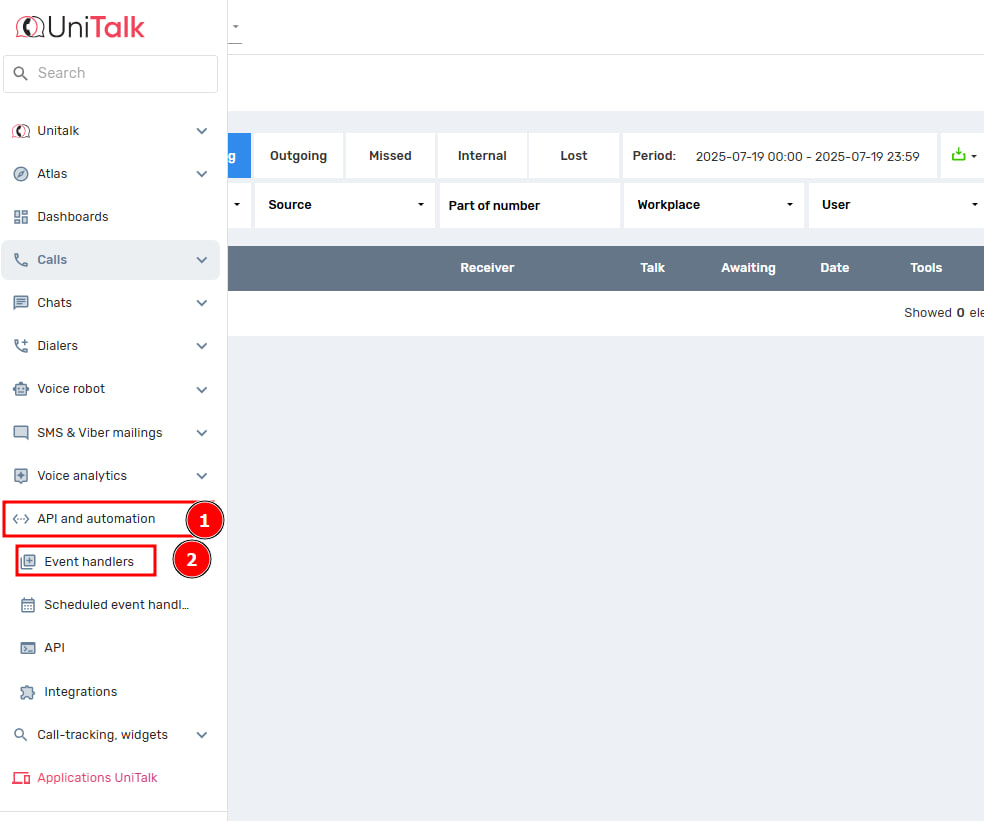
4. Go to your UniTalk personal cabinet, select “API and Automation – Event Handlers” in the menu on the left, click “Add”.
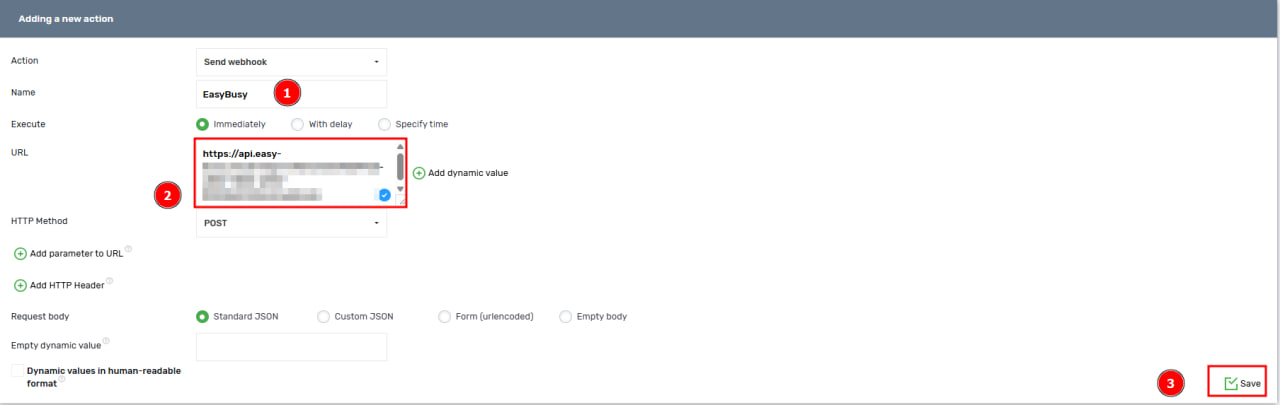
5. In the window that opens, specify the name of the handler (for example, EasyBusy) and paste the previously copied link into the URL field. Click “Save”.
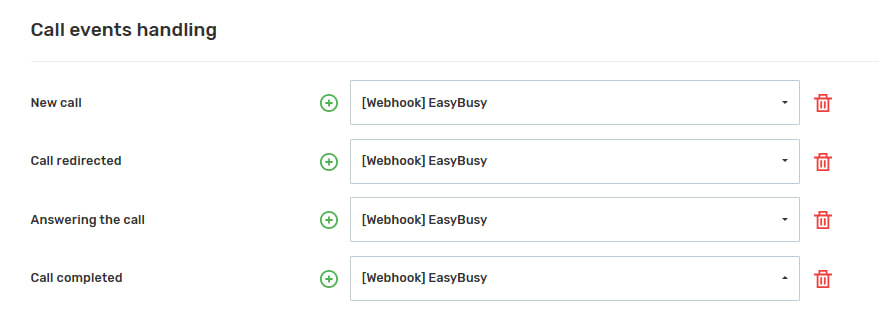
6. Next, go to the “API and Automation – ARE” section and specify the created “event handler” in the “Call Event Handling” section by clicking on the “+” next to each field. After that, click the “Save” button at the bottom of the page.
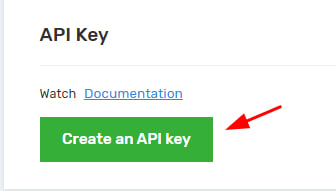
7. On the same page at the top you can get an API key, to do this click on “Create API Key” and copy the value you get.
8. Go back to the EasyBusy system and paste the copied API key into the appropriate field, click “Save”.
Now let’s configure the user.
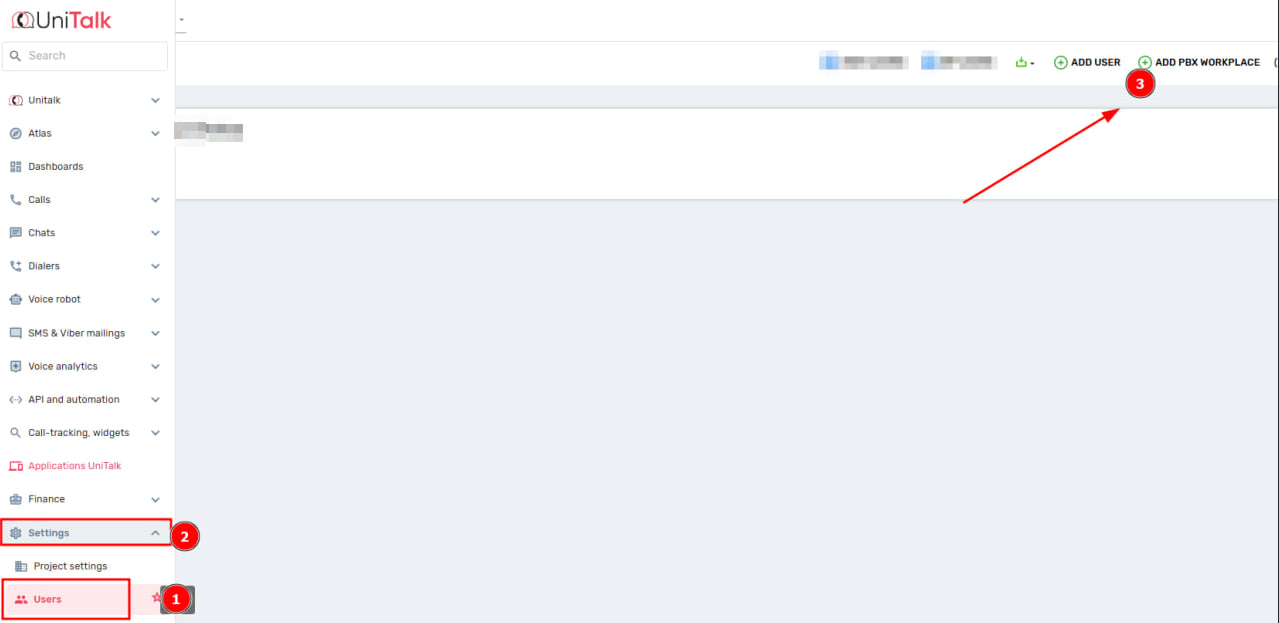
In the UniTalk personal cabinet go to the Users section and click “Add PBX workstation”.
Assign the added seat to a specific user, to do this, click “Change phone” and in the “Assign to workstation” field select the desired workstation. Click “Save”.

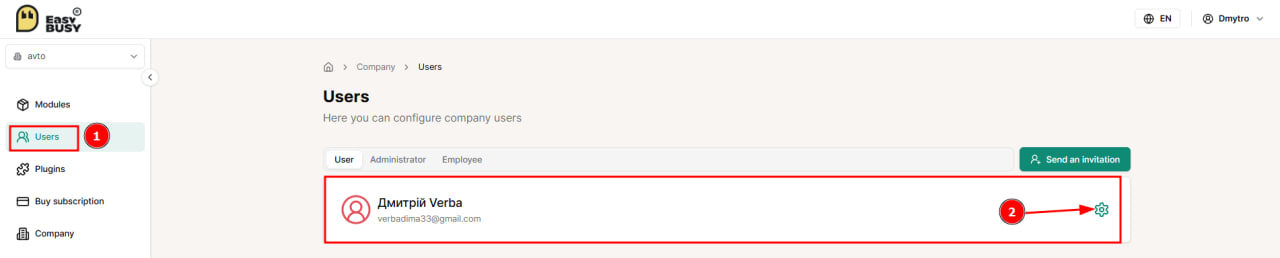
Go back to the EasyBusy system and go to the Users section. Click on the gear next to the name of the employee you want to connect telephony to.
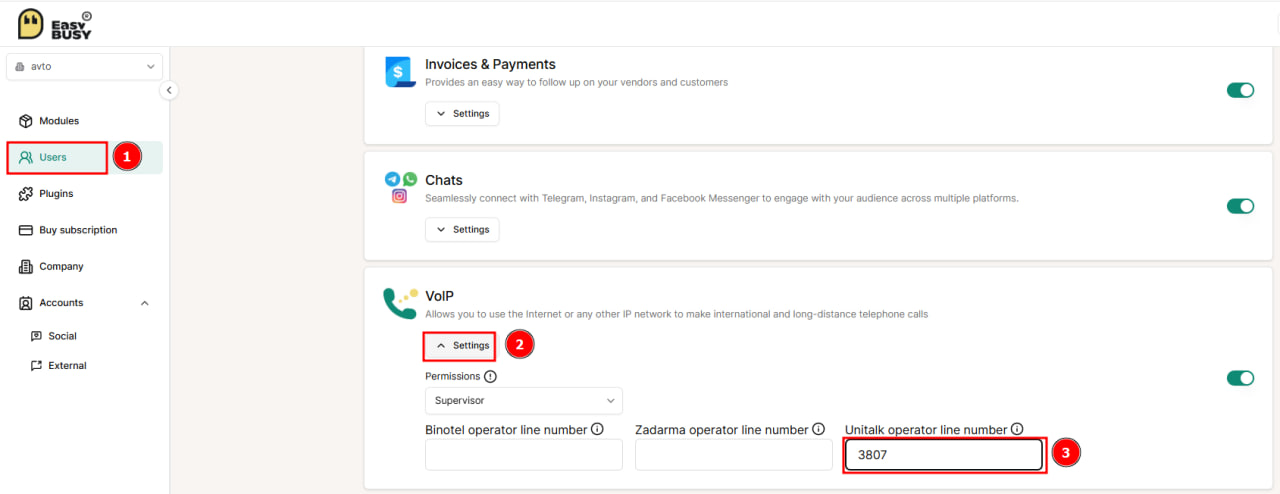
Scroll down the page to IP Telephony, expand “Settings”. Select the access level for the account you are configuring (Supervisor or User) and specify the number of the previously created workplace in the “UniTalk operator line number” field. Click the “Save” button.
Done! UniTalk integration with EasyBusy is successfully configured.
The setup is complete. Your EasyBusy workspace is now powered by reliable communication and objective data for every conversation. Automating manager workflows helps prevent data entry errors and speeds up order processing. If you have any questions regarding event handlers or workstation configuration, UniTalk technical support is available 24/7.


