Connection and configuration of UniTalk telephony integration with HelpDeskEddy
HelpDeskEddy is a system for recording and processing requests.
Thanks to HelpDeskEddy you can organize the process of technical or customer support for your business.
HelpDeskEddy system provides omnichannel ways of communication with customers: e-mail, WhatsApp, Facebook, Facebook, Telegram, Instagram, Viber and others.
Integration of HelpDeskEddy with UniTalk Virtual PBX allows you to receive phone calls from your customers directly from the system interface, as well as automatically create a new request where there will also be a record of the phone conversation.
To connect and configure this integration, you need in HelpDeskEddy go to the “Management” section, in the menu select “Setup communication channels”, and then click “Add channel”:

Your next step is to select the “UniTalk (Nextel) Telephony” channel and the division (department) where requests will be created after the received call, by default. Then you should perform the following actions according to the instructions:
- It is necessary to go to the UniTalk (Nextel) user cabinet and in the section Integration->API copy the API key, which should be pasted into the appropriate field of the HelpDeskEddy system. When the correct API key is specified, click “Synchronize and save” button:

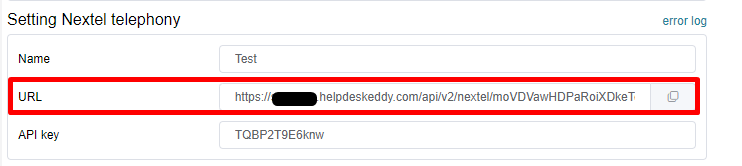
After that, you will be provided with a webhook link “URL” that you need to copy:
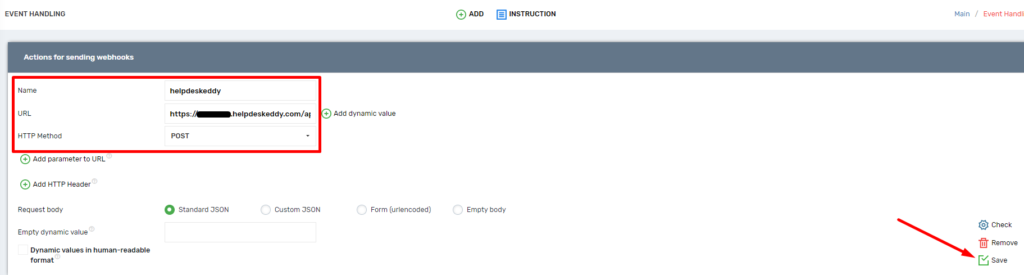
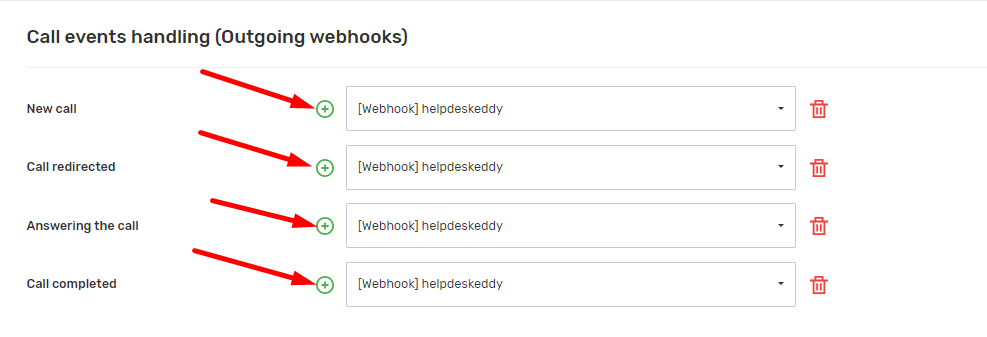
- Next, under Integration->API, you need to add four outbound webhooks at the bottom of the page with the following events: “Answered Call”, ‘New Call’, ‘Call Completed’ and ‘Call Redirected’. In the “URL” field, paste the link that you previously copied from HelpDeskEddy and save by clicking the “Save” button.
- To complete the configuration, it is necessary to synchronize users from UniTalk Virtual PBX with employees in the HelpDeskEddy system and click “Synchronize and save”:
Now you can receive and make calls and create a request right in the HelpDeskEddy system.
As soon as a ticket is created, a recording of the phone call is automatically attached to it, which can be listened to directly from the ticket or downloaded to your computer:

To view the history of previous calls or to make an outgoing call, it is necessary to click on the “Telephony” button. To customize the distribution of access level to “Telephony”, it is necessary to go to “Groups, access rights”, select the desired group of employees, and in the “Omni” tab to assign the appropriate accesses.


