AmoCRM integration with IP telephony
1. In the UniTalk account, go to the menu item Integration – AmoCRM. Click the “amo connect” button.

2. If you are not yet authorized in your AmoCRM account, a window will open in which you must enter the authorization parameters for your AmoCRM account.
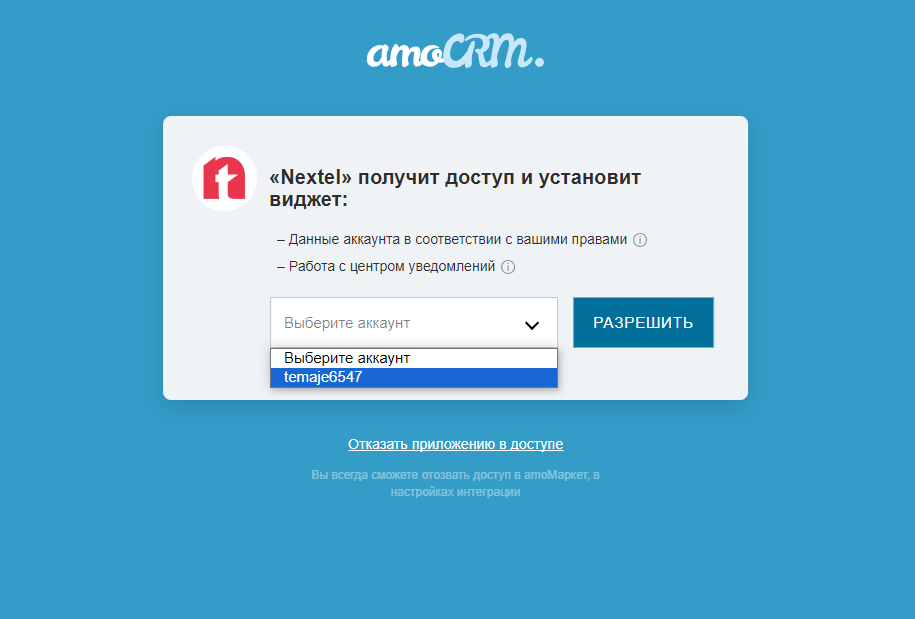
3. Next, select the AmoCRM account in which the integration and the UniTalk widget will be connected. Click the “Allow” button.
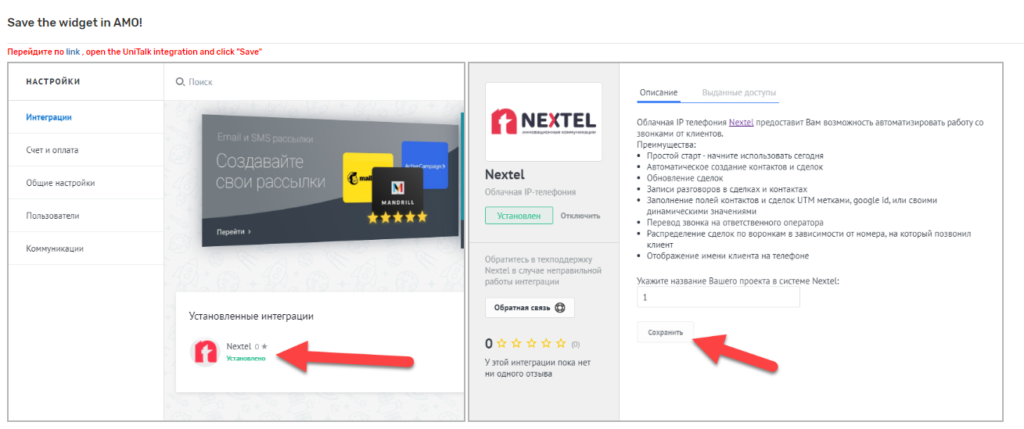
4. You will see a page with instructions for activating the integration. Follow the link highlighted in blue.
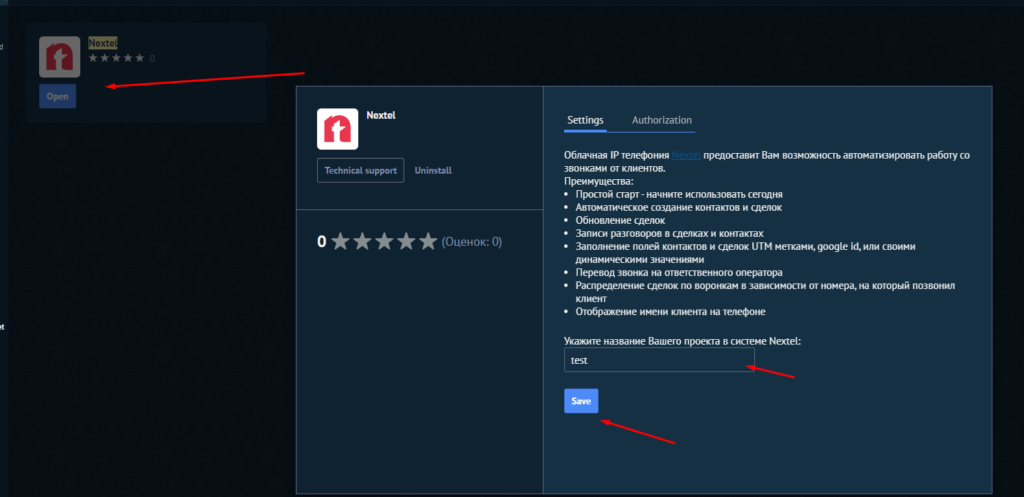
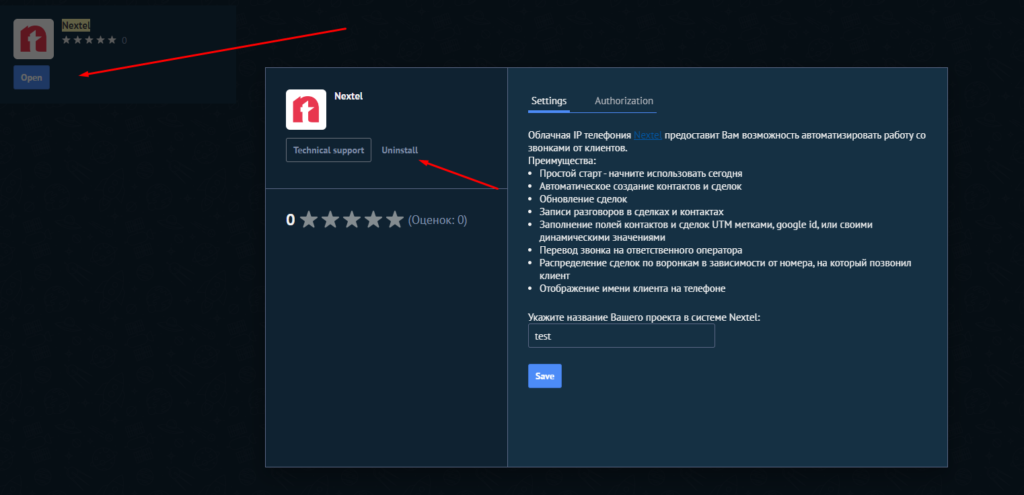
5. Next, follow the instructions, click on the “UniTalk” integration, enter the name of your project in the UniTalk account and click the “Save” button.
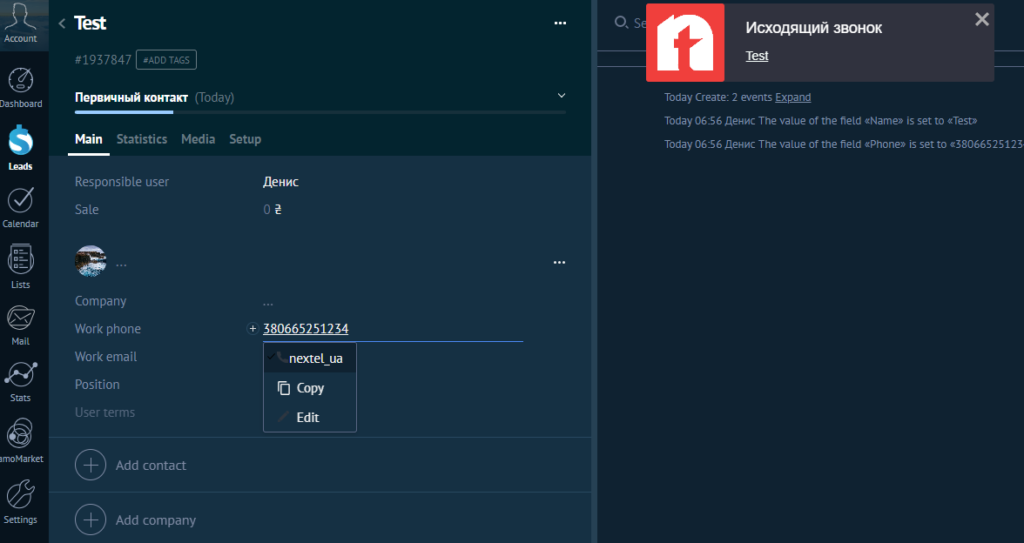
6. Try to make a test call to the phone number from your AmoCRM account. You will see the UniTalk widget.
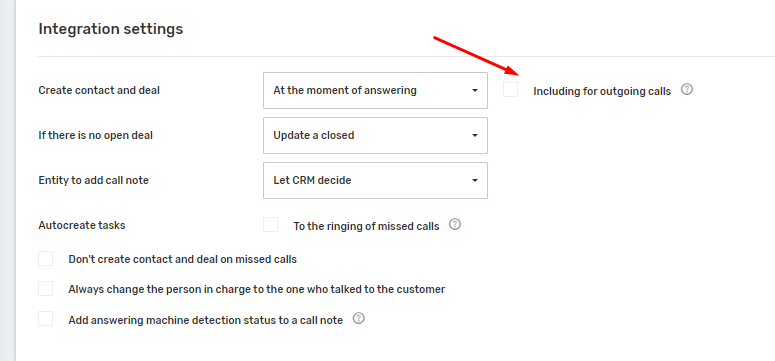
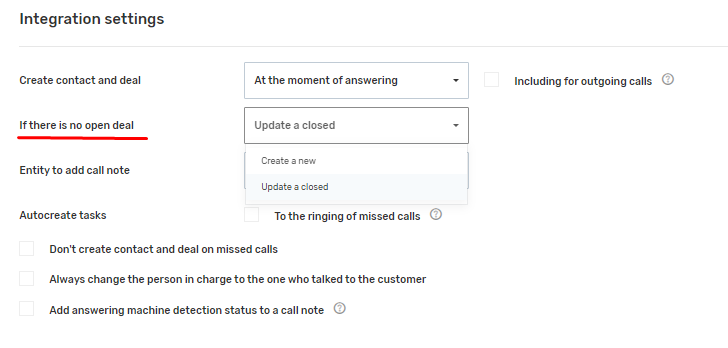
7. Now let’s set up the integration in the UniTalk account. It should be noted that if there is no contact or deal in the AmoCRM account, they will be automatically created only upon an incoming call. All outgoing calls are recorded only in the existing contact and deal.
8. Create contact and deal:
- At the time of response – in AmoCRM, a contact is created at the time of the client’s response.
- At the time of receiving a call – in AmoCRM, a contact is created during a call.
- Disable integration – contact and deal will not be created in AmoCRM, while the connection settings will be saved.
9. If there is no open trade:
- Create new – if there is no open deal, a new deal is created in AmoCRM and the call is recorded in it.
- Update closed deal – if there is no open deal, but there is a closed deal, then in AmoCRM the call is recorded as a closed deal.
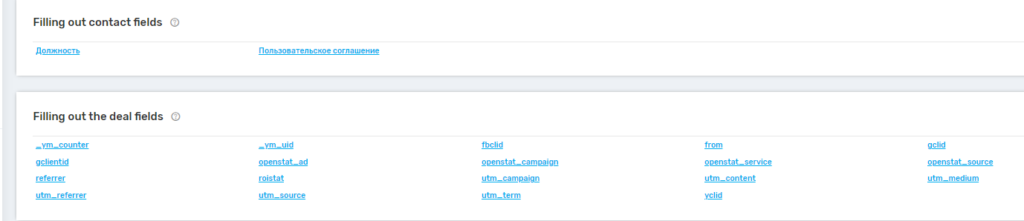
10. In the settings “Filling in contact fields” and “Filling in transaction fields”, you can specify what data will be transferred from the UniTalk account to the AmoCRM account.
11. Select a Default responsible for missed calls for each day of the week.

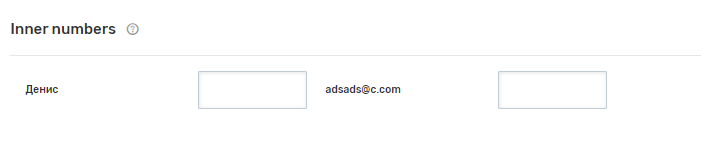
12. Assign extension numbers to your AmoCRM users.
13. Set up funnels and sales stages of external lines. Depending on the external line on which the call came in, deals will be created in AmoCRM in the selected sales funnel at the selected stage.

14. Don’t forget to click the “Save” button to apply the settings.

Integration settings options – link
Removing the widget and integration of UniTalk from the AmoCRM cabinet
15. Go to the menu item Settings -> Integrations. Click on UniTalk Integration.

16. Click on the “Disable” button.