Audio files. How and which records to download and what to use for
Your voice is the face of your business. Having a professional and informative audio greeting (for busy numbers, no answer, or out-of-hours calls) significantly increases customer loyalty and enhances your company’s image. Audio recordings are not just a feature—they are a crucial tool for informing, navigating, and building trust. We offer flexible and convenient ways to create and use audio files, enabling you to manage customer impressions from the first seconds of the call.
INSTRUCTION: Creating and Uploading Audio Files to UniTalk
Having an audio greeting (when the number is busy, unanswered, out of hours) increases the loyalty of your customers and the image of your company in the eyes of your customers. Audio recordings can be used in the format of a branded greeting at the beginning of each incoming call, as well as for informing and reminding about important things, etc.
To use audio files, you need to upload them to your UniTalk personal account. If you already have ready-made recordings, you can proceed directly to the second step.
The first step. Create an audio file with the information you want to convey to people.
There are several options for creating recordings.
Option 1. Free, low quality, possible WOW effect.
Record an audio file yourself using a phone, voice recorder or other recording devices. The easiest way is to call a number connected to UniTalk from your personal phone and say the text you want to record. Then go to the UniTalk call history, download the recording of this call and upload it as an audio file for auto-call.
This recording option, although not of the highest quality, is often perceived by people as if a real person called them, not a robot.
Now let’s go through the steps.
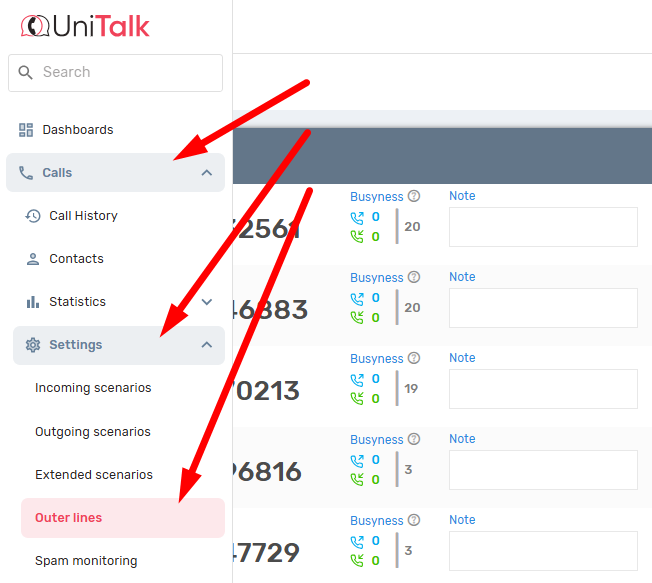
Call one of your project numbers. All project numbers can be found in the Outer lines section:
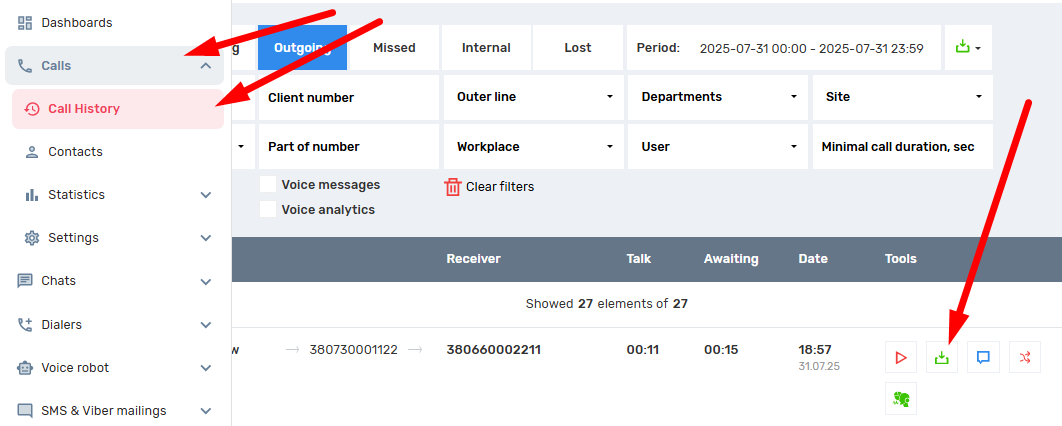
Go to the UniTalk Call History and download the call recording to your PC.
Great, the recording has been created and downloaded to your PC. Now you just need to upload it to the UniTalk audio file library (how to do this is described immediately after the description of the 3rd option for creating audio recordings).
Option 2. (free, medium quality).
Creating an audio file from your personal account, specifically in the section “Audio synthesis“.
Now you don’t need a voice actor to create any voice greeting. You can create dozens of personalized, branded voice greetings as quickly as possible and right from your account.
It’s convenient:
-
You can listen to all voiced greetings at once by selecting one of the many options;
-
If you choose the right settings, the automatically spoken text will be indistinguishable from the live voice of the speaker;
An example of generated audio (without manual pauses):
-
All generated audio files are ideal for the telephony format and are immediately ready for use, without the need for additional processing;
-
Voiceover is available in three languages (Russian, Ukrainian, English) and 49 different voices;
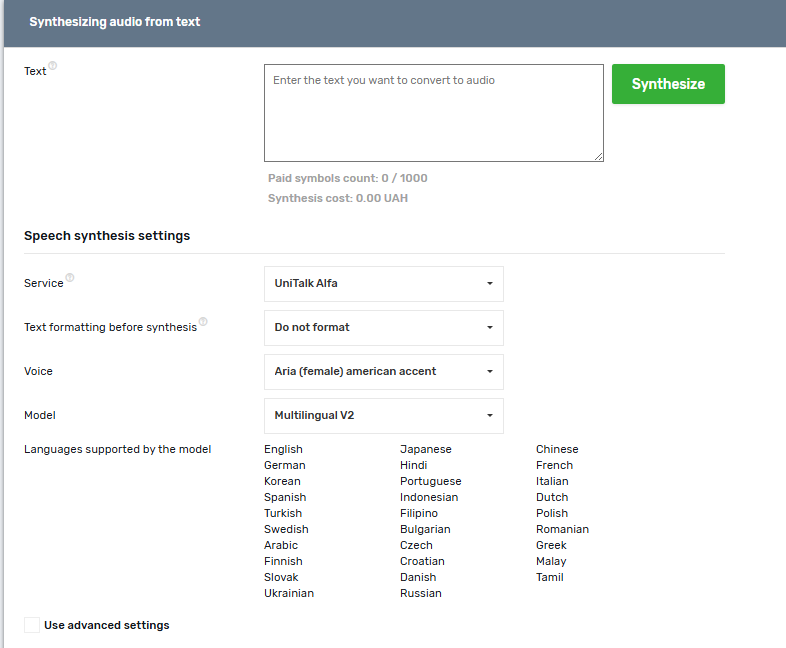
- You can use a large number of settings to get the optimal quality, and save these settings into ready-made profiles that can be used in auto-calls and API calls;
- You will see in real time how much it will cost you to synthesize each greeting.
After creating and downloading the audio file, upload it to the UniTalk library.
Option 3. (Paid, maximum quality).
Order the creation of a recording through a recording studio. Again, you can use the services of any studio. However, in order not to face an unscrupulous company, we recommend that you contact professional studios.
After creating and downloading the audio file, upload it to the UniTalk library (see above for how to do this).
The second stage. Upload audio files to the UniTalk library.
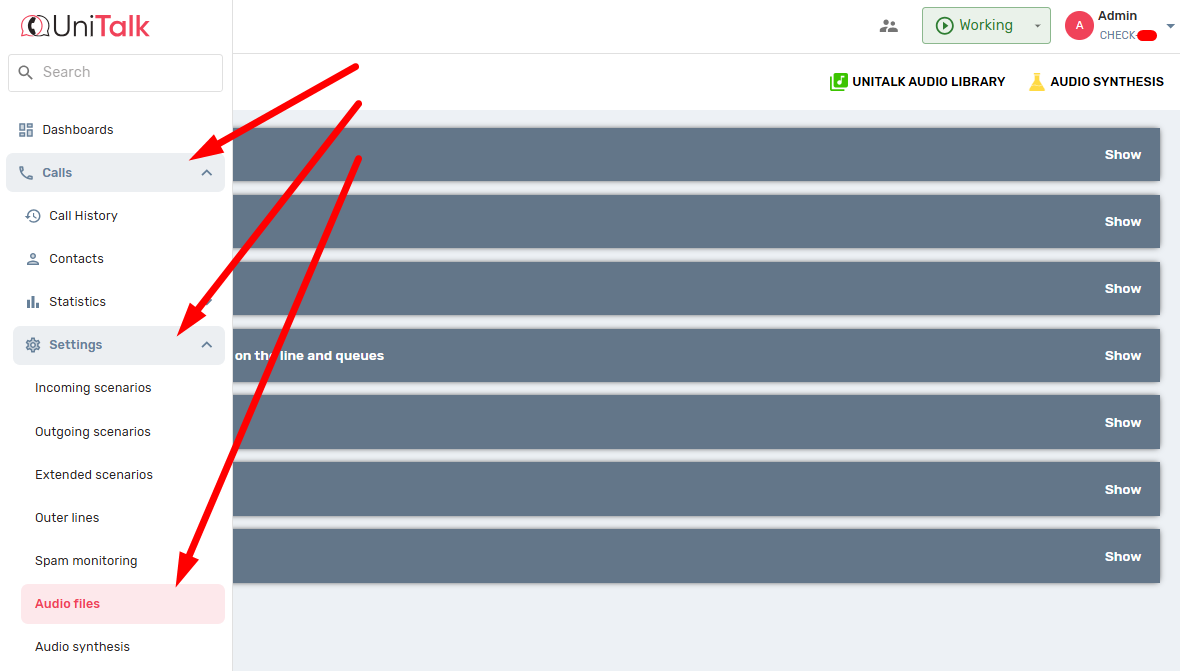
Go to the section “Calls” →“Settings ”→ “Audio files”
And load the record into the desired block. The choice of block depends on the purpose for which the record will be used. Here, the choice is simple: the blocks are labeled with the names of the records’ purpose
Next to the selected block, click the Select File button. In the file manager, browse to the audio file you want to download.

The recording is downloaded and can now be used.
The third stage. Create an incoming scenario.
The incoming scenario makes it clear how to distribute incoming calls to your employees. Instructions for setting up incoming scenarios are available here.
Important point:
Audio files should be different files for different purposes.
For example: the file with the text that will sound at the beginning of the call should be a separate file, as well as the file with the text that should sound after the caller selects one of the IVR menu options.
Using high-quality and correctly configured audio files is a direct investment in your customer experience. Regardless of whether you choose the WOW-effect option (own recording), speed and personalization (audio synthesis), or maximum quality (studio recording), UniTalk provides you with the tools for flawless communication. Now you can create any scenario: from a simple greeting to a complex IVR menu, which will reduce the load on operators and increase the professionalism of your service.


