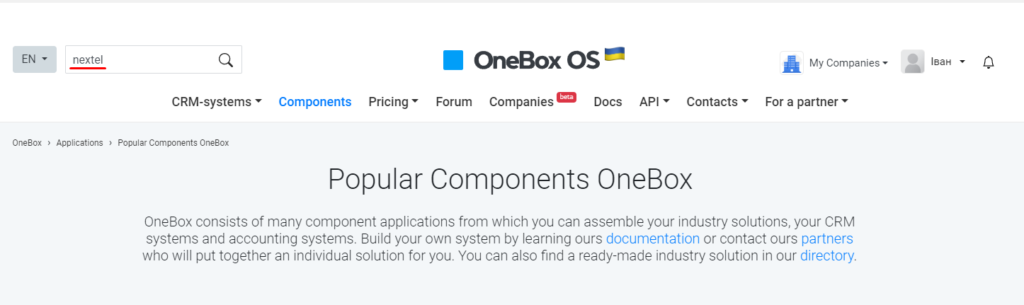
Instructions for integration with OneBox
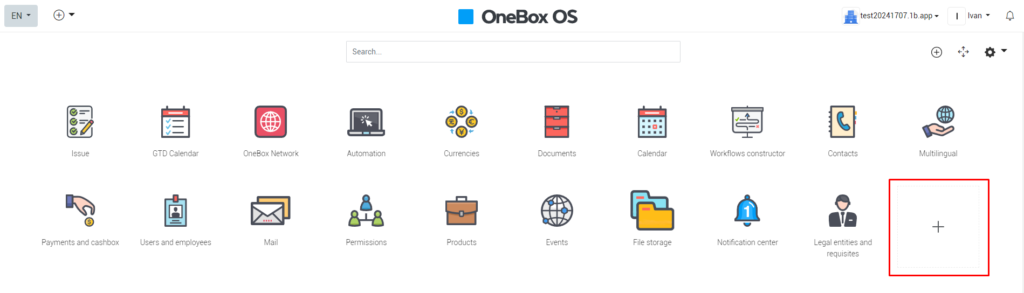
Let’s set up the integration of Unitalk telephony and CRM OneBox. To do this, go to our CRM system and choose to install a new application.
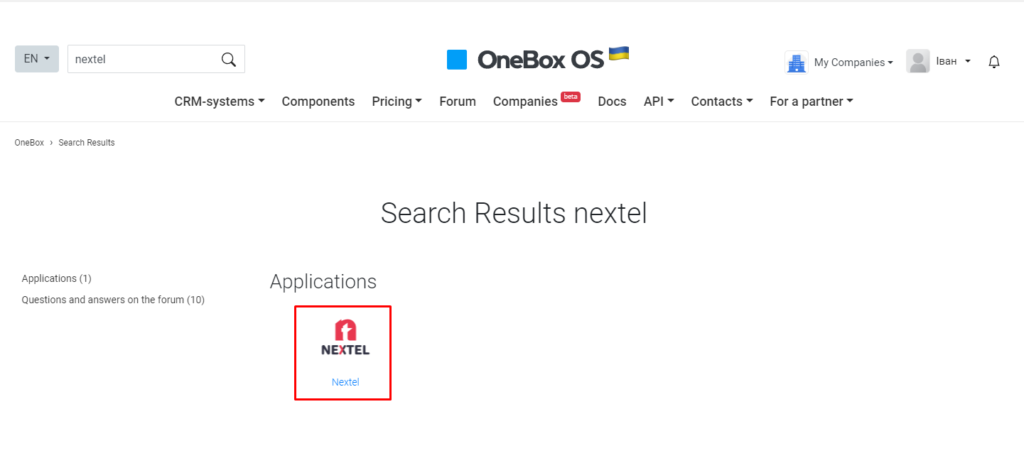
In the component search, find Nextel.
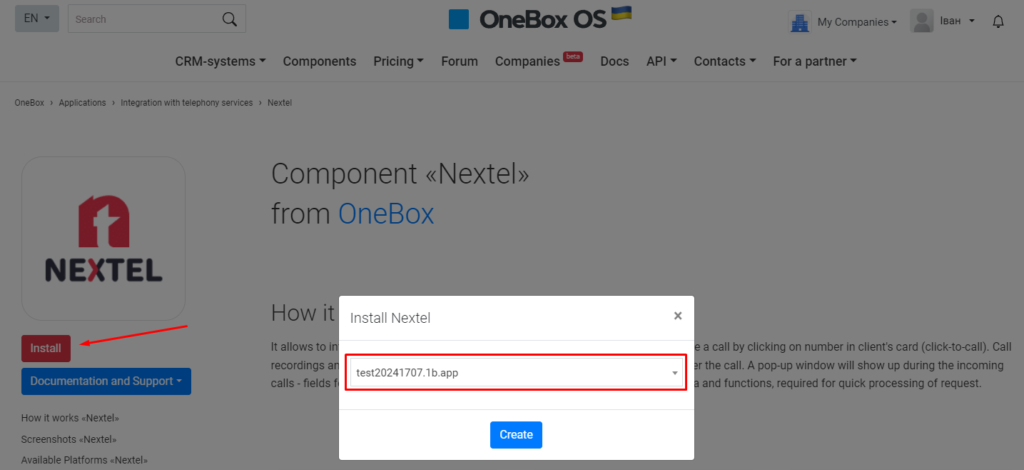
Install the application we found.
Select which box you want to install it in and confirm the installation.
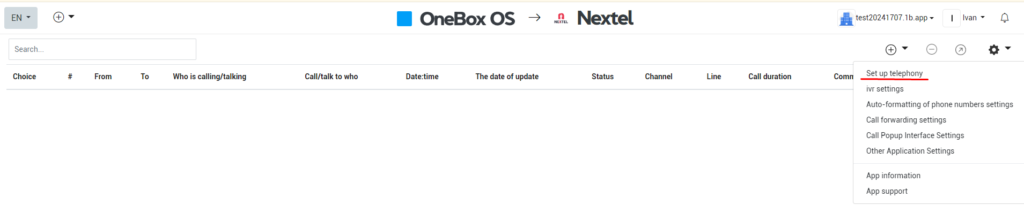
Go to settings – set up telephony.
Click “configure integration”. Here we need to specify the API key of our project in Unitalk.

To get it, go to the “API integration” section in Unitalk personal cabinet.
Click on the green “Create” button and copy the API key:

We specify our API key, we can also additionally customize the search for responsible employees and on calls.
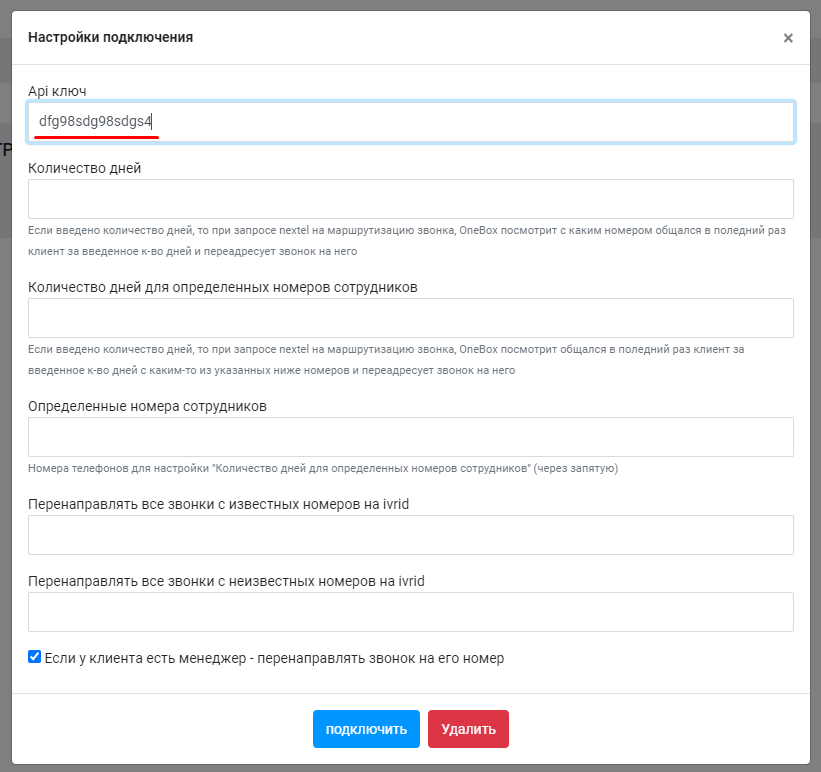
Save our settings and click “connect”.
Then go to the integration itself, click on the “add” icon, select “add internal number” and add the number:
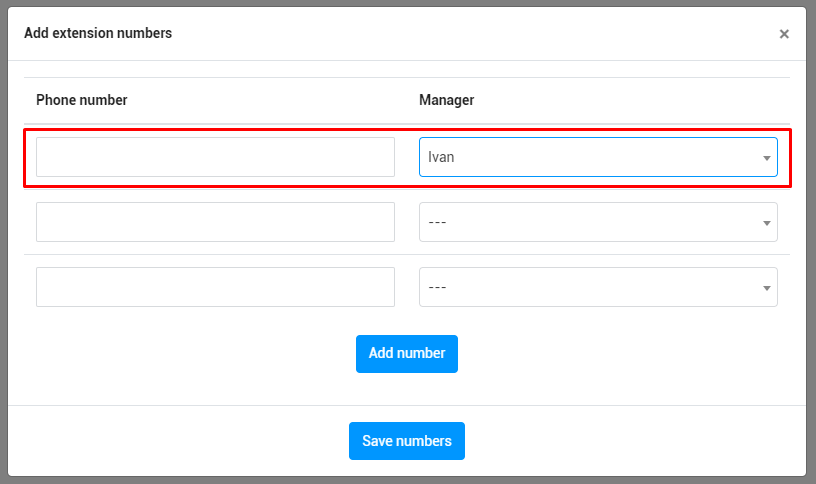
Here we need to specify the internal numbers of our employees and which manager they belong to.
To view internal numbers, go to the “user monitoring” section.

Copy the address of your OneBox domain from the address bar on the service page:

Далее переходим к настройке веб-хука для передачи информации о звонках в CRM-систему. Для этого в личном кабинете переходим в раздел “обработка событий”
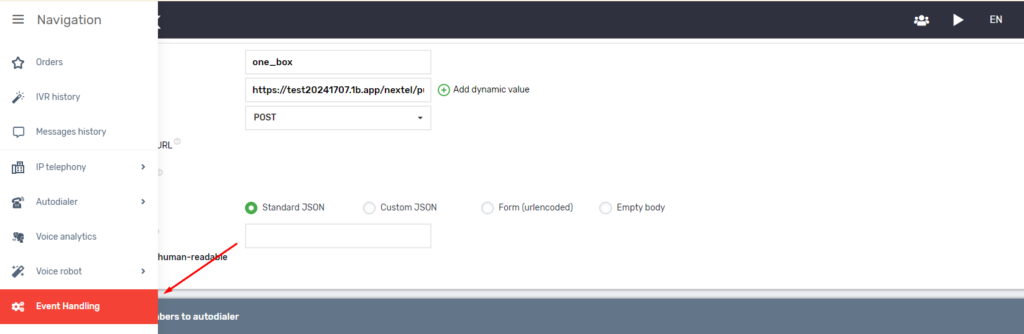
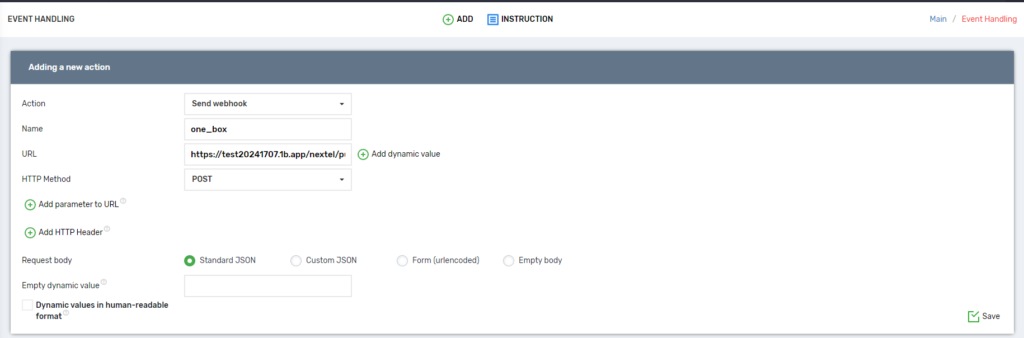
Add a new handler.
To create it, go to the Event Handler page and click “Add”.
Then you need to fill in the data of the webhook, namely:
- name – any name of the event handler, it is stored only in Unitalk personal cabinet and is used for convenient management of event handlers;
- URL – address of the portal to which requests will be sent by UniTalk. It should be specified in the format “https://OneBoxDomen/nextel/push/”, where OneBoxDomen is the domain of your portal hosted on the OneBox side.
- HTTP method – leave POST
- Request body – standard JSON – this is a template generated automatically by our system.
Other parameters should be left by default and the event handler should be saved
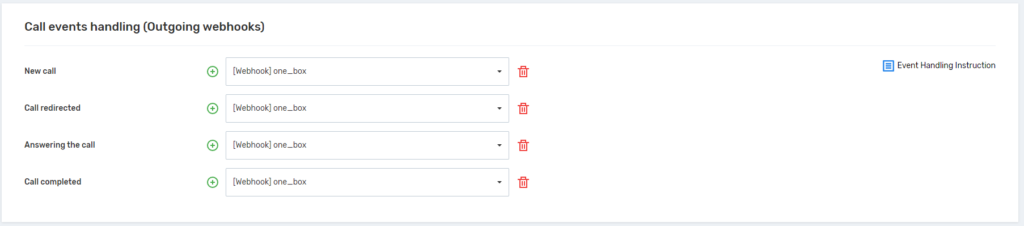
After saving, go to the “Integrations” – “API” tab and add an event handler for each call event. This is done by clicking the + icon and then selecting the previously created event handler. After adding the page should be saved.
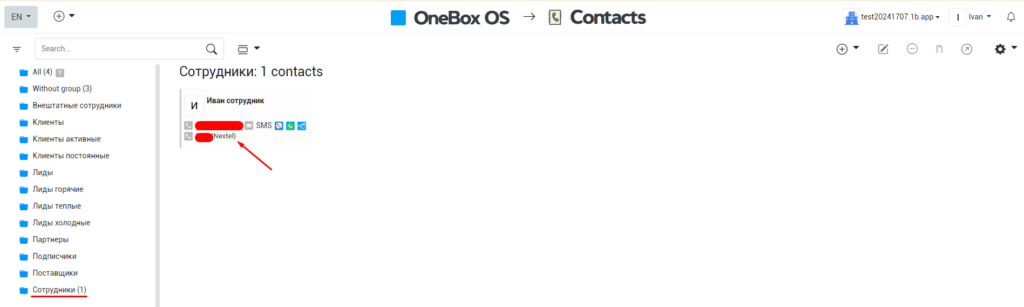
Then, in your OneBox profile, go to the Contacts tab and select Employees. For the integration to work, each employee must have their internal line number listed.

In order for a customer call to be transferred to the responsible manager in charge of the contact, it is necessary to specify this in the UniTalk script by inserting a step with a link to the OneBox as shown in the figure below. In the incoming script, select the “Call to responsible manager” step. In the “Seek responsible person” field, select “Perform API request” and provide a link to the webhook.
All integration settings of UniTalk IP telephony and OneBox CRM are described in detail in the integration settings in the OneBox cabinet.
How routing works:
- If the “If the client has a manager – redirect the call to his/her number” setting is set and the calling client has a manager in the contact card, the call will be redirected to him/her.
- If the previous items did not work and the “Number of days” settings are filled in, OneBox will search for the last call from the specified number for the specified number of days and see which number the client was connected to. If there is a number, it will be passed to telephony to route the call.
- If the previous items did not work and the “Forward all calls from known numbers to ivrid” setting is filled in, and there is a user with that phone number in the box, the call will be forwarded to the specified ivr.
- If the previous items did not work and the “Forward all calls from unknown numbers to ivrid” setting is filled in, and there is no user with this phone number in the box, the call will be forwarded to the specified ivr.
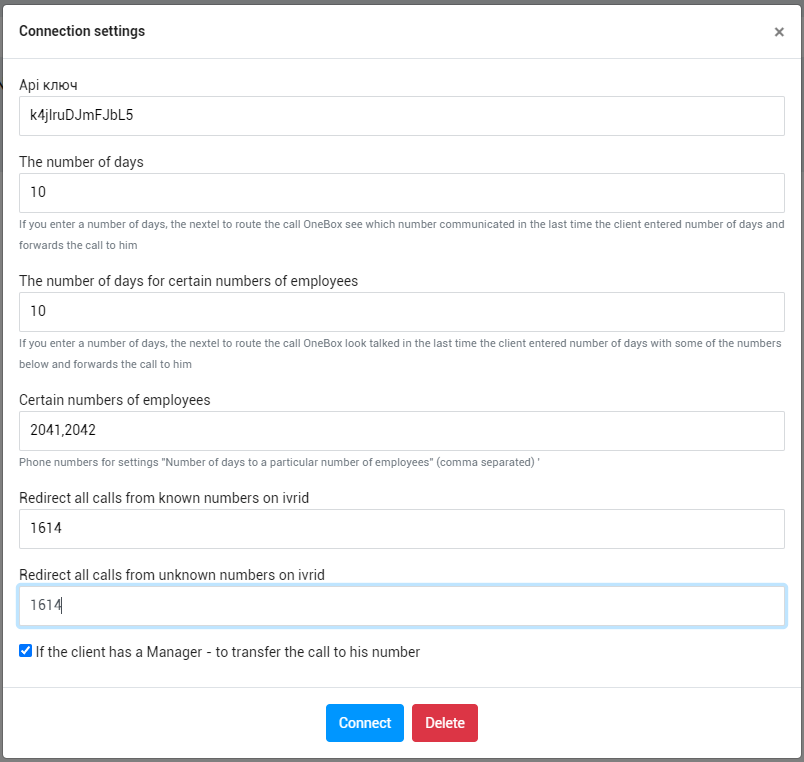
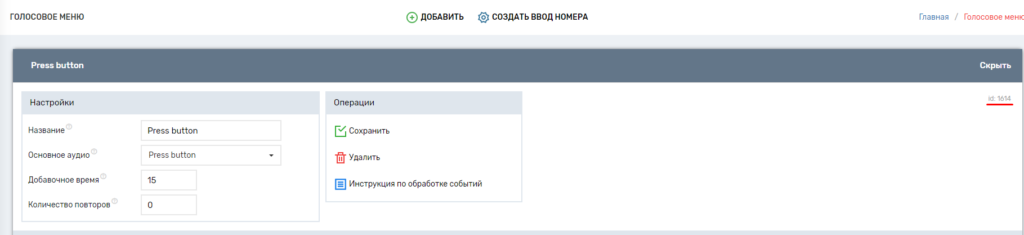
You can find ivrid identifier in UniTalk cabinet by going to the menu item IP Telephony – Voice menu.
If everything is set up correctly, the integration connection is complete, you can make calls directly from the OneBox service.
You can view the list of calls and listen to audio recordings of conversations in the “Events” menu item in the OneBox personal cabinet or directly in the contact card.
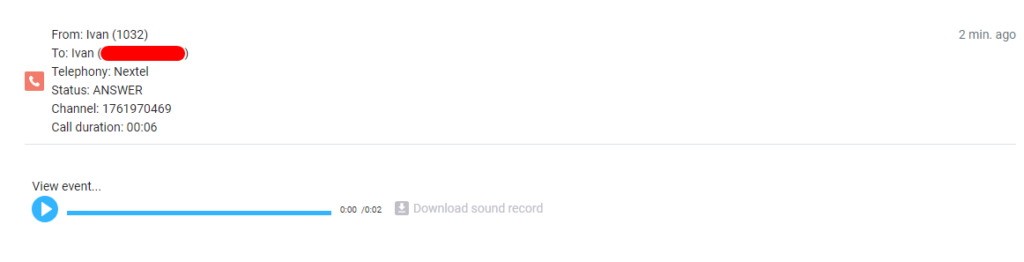
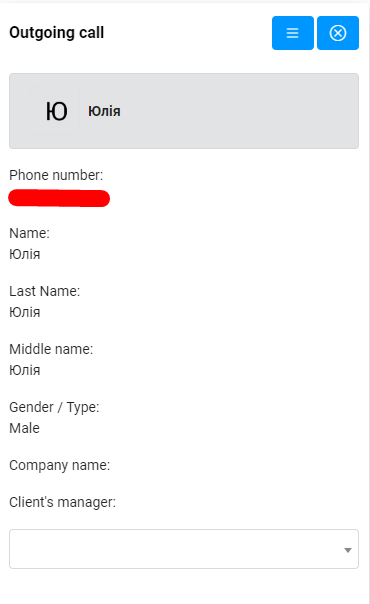
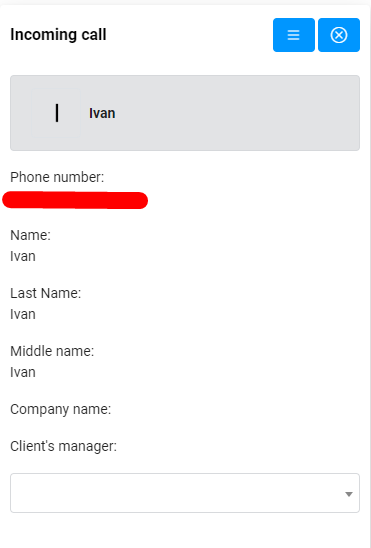
New calls in the OneBox cabinet are displayed in pop-up windows. You can see information about the client’s number and name, operator, order name. And from the pop-up window go in one click to the client’s card.