Instructions for connecting and configuring UniTalk and Salesforce integration
1. Log in to your Salesforce account and follow this link.
Install the UniTalk Integration Package application. The application can only be installed if you have a paid Salesforce account (for example, Enterprise Edition, Unlimited Edition, Developer Edition, Performance Edition).

2. After successful installation of the application, go to the Salesforce integration connection page
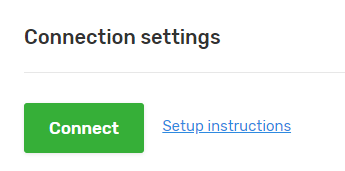
Click the “Connect” button.
3. The system will ask you to authorize to this CRM system.

4. Once Salesforce authorization has been completed, the access required for the integration must be granted. The integration needs access to the API, to users in the system, and to fulfill requests to update information.

5. Then you will be redirected to the UniTalk personal account page. On this page, you must enable integration to transfer call information to Salesforce.
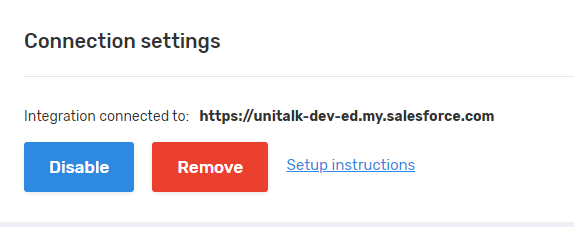
6. When you enable integration, more flexible Unitalk and Salesforce integration settings are available. All integration settings can be found here.
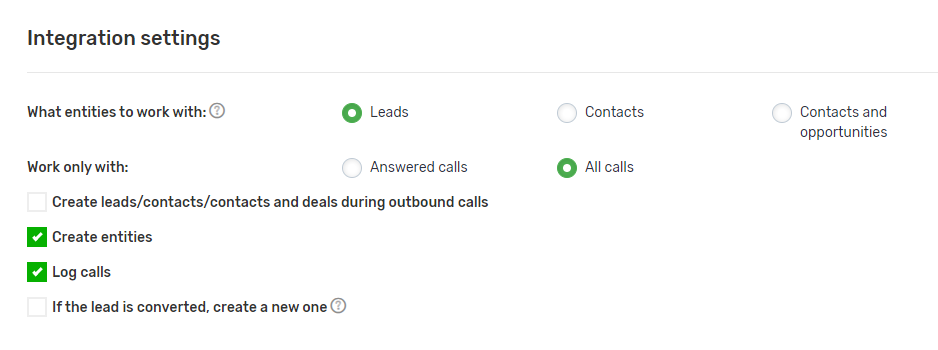
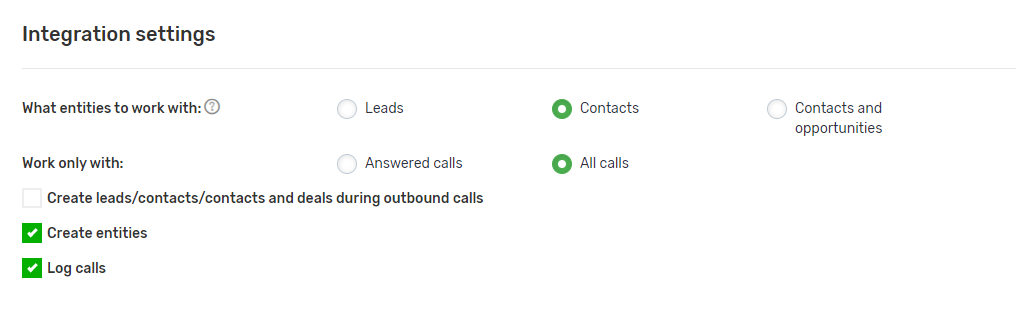
Basic integration settings block
Allows you to select which entities should be created on calls (leads, contacts, or contacts and opportunities).
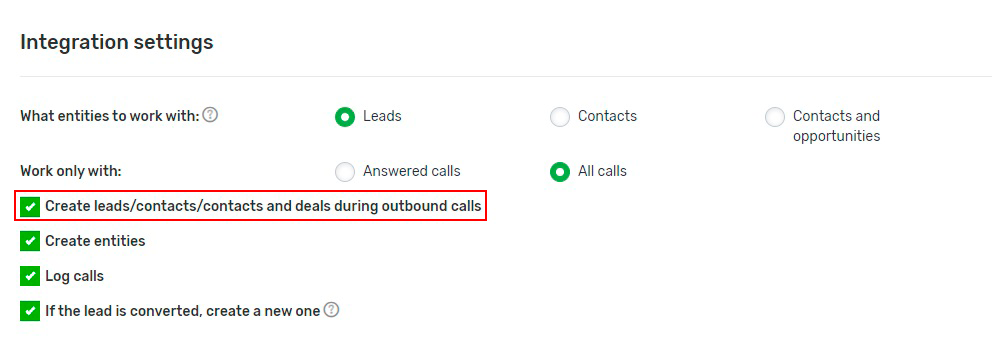
1. If you use the “Leads” checkbox, a Lead will be created when an incoming call is received.
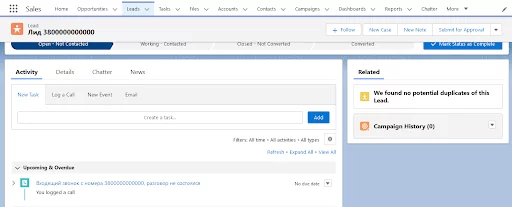
An example of creating a lead in Salesforce:
Also when working with Leads, there is a setting that defines the actions that are performed if a Lead has been previously converted. This setting allows you to either create a new Lead or ignore all information about the call.

2. Working with Contacts is the same as working with Leads.
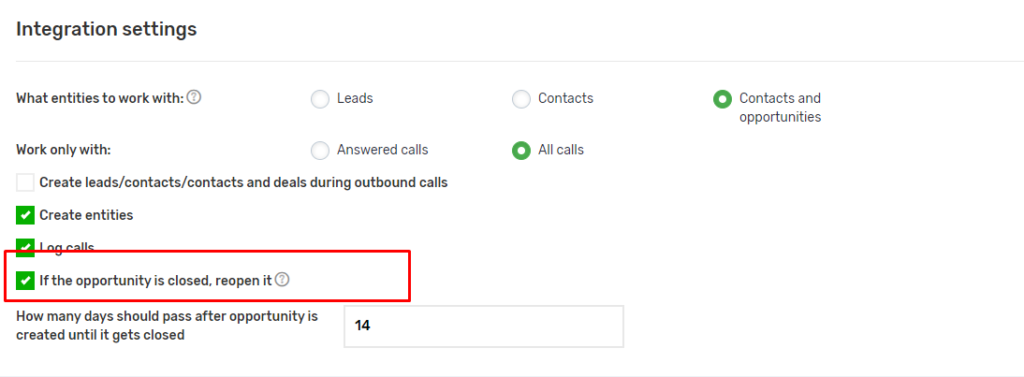
3. Working with Contacts and Opportunities.
One of the features of this type of integration work is working with Opportunities that are attached to a Contact.
Opportunities display the history of calls to this number.
If an Opportunity is closed, it can be reopened or a new Opportunity can be created.
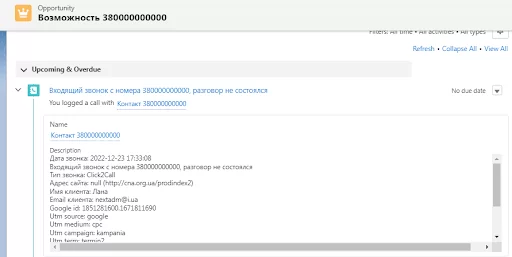
The following information about a successful call is included in the call comment:
- date of the call;
- call status (received/missed; incoming/outbound)
- the name of the employee who received/executed the call;
- customer number;
- external number from which the call is being made;
- link to the call record.
By default, leads, contacts and opportunities are created only on incoming calls. However, if you want the entities to be created also on outbound calls, you must enable this setting “Create leads/contacts/contacts and deals during outbound calls” in the integration settings.
Information about the call is transferred to the CRM system in the following form:
Advanced settings block
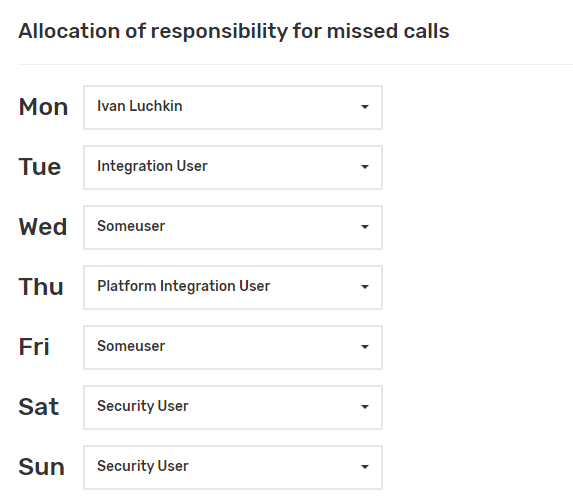
- assigning certain employees as responsible when a missed call occurs;
- entering internal SIP numbers and assigning them to corresponding employees;

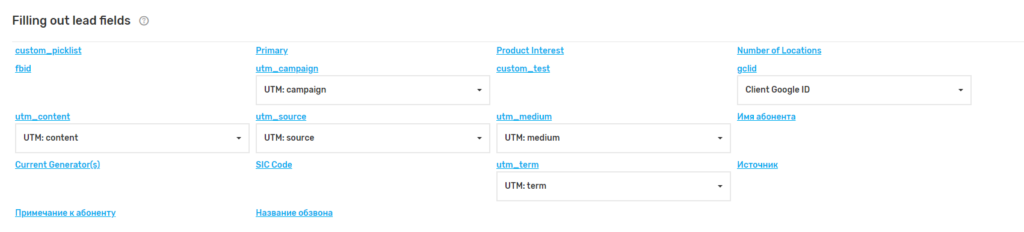
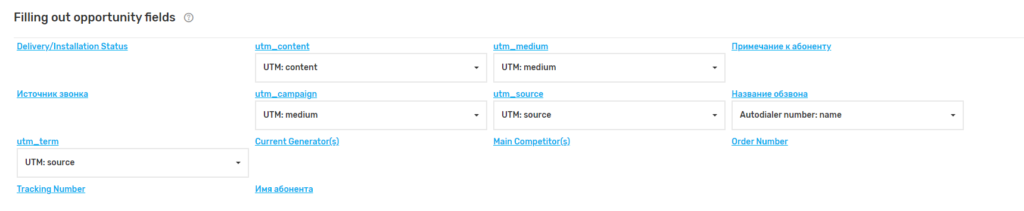
- possibility to fill in your own fields when making a call.