Installing and Using “UniTalk Web Dialer” for Google Chrome
UniTalk Web Dialer is a Google Chrome extension that turns any web page into a fully functional workspace for an operator or manager. The extension lets you make and receive calls, transfer calls, chat, and send SMS/Viber messages directly from your browser — no need to install a separate application. In this guide, we’ll walk through the system requirements, installation, authorization, and key features of the extension.
Minimum system requirements to work with UniTalk Web Dialer
We recommend using modern computer equipment with the latest software to work with the “UniTalk Web Dialer” extension, but realizing that not everyone has this opportunity, we conducted a series of tests and prepared for you information about the minimum acceptable hardware configuration for working with our extension .
System characteristics (minimum):
— RAM 4 GB, when using a PC with RAM less than 4 GB, working in the Google Chrome browser is ineffective
— Processor — 1 core, 2.3 GHz
Operating system (minimal):
— Windows 10 x64
— macOS 10.11
Software used:
— Google Chrome browser. Despite the fact that it is possible to install the “UniTalk Web Dialer” extension in other Chromium-based browsers, we recommend installing the extension in Google Chrome, and updating it to the latest current version for your operating system
— For Google Chrome versions 100-108, it is not possible to install the “UniTalk Web Dialer” extension from the Chrome store, but you can install the extension manually, to do this, you need to contact UniTalk technical support. Older versions of Google Chrome are not supported by our extension
— For Google Chrome version 109 and higher, you can install the extension from the Chrome store using the link in this article or by searching in the store “UniTalk Web Dialer”
Such recommendations give an idea of the compatibility of “UniTalk Web Dialer” with different versions of Google Chrome on different operating systems and hardware configurations.
Also, we would like to draw your attention to the fact that on such weak PC configurations, it is recommended to run the minimum number of tabs in the browser required for work to prevent difficulties in the operation of the “UniTalk Web Dialer” extension.
1. Installing UniTalk Web Dialer
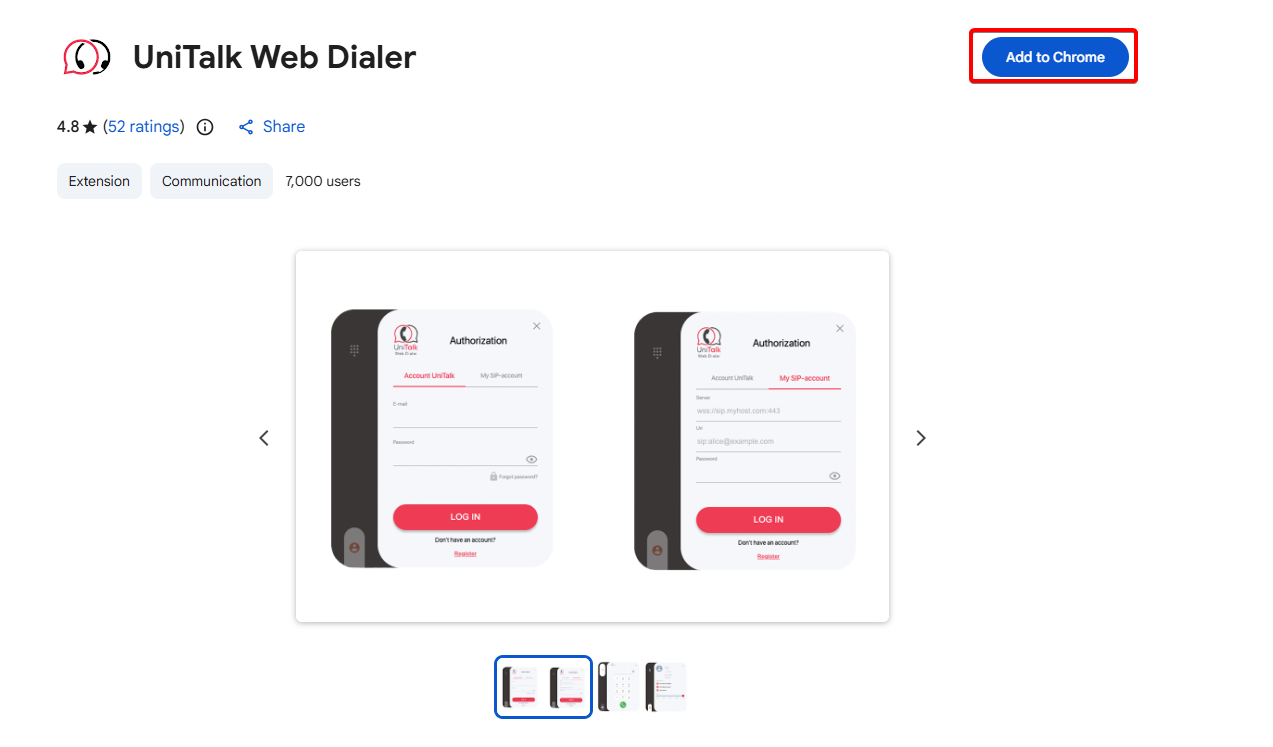
https://chrome.google.com/webstore/detail/unitalk/hokefmefppdgmlgeigcmjdlcdnkclbgo
First, you need to follow the link above👆👆👆
Then, you need to click the “Add to Chrome” button.
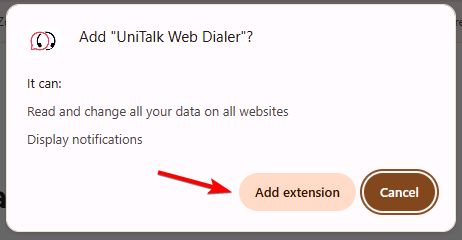
The next step is to click “Add extension”
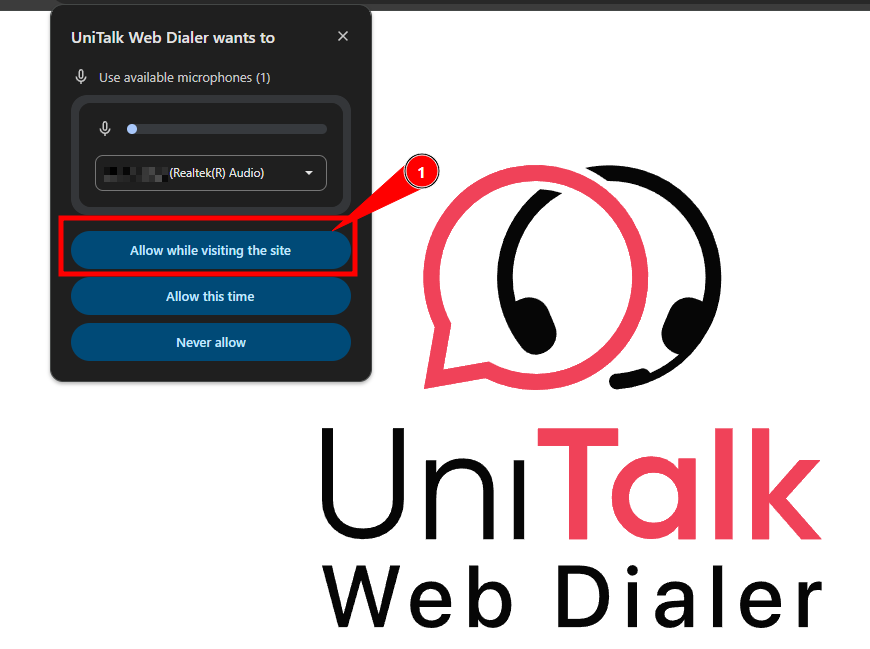
After this, the extension will be automatically added to the browser, you only need to select the microphone you will use in the drop-down menu and grant the extension permission to use the microphone.
2. Authorization in UniTalk Web Dialer
To use the extension, you need to register a line or log in with the credentials from your project’s UniTalk personal account.
Please note that the extension will be available on all open tabs that have content. In other words, the extension will not open on new browser tabs.
2.1. Authorization using UniTalk personal account data
In order to use the “UniTalk Web Dialer” extension, you can use authorization from your project’s UniTalk personal cabinet, but for this you as a user must have a SIP line bound in your project.
You need to click on the extension – its interface will open:
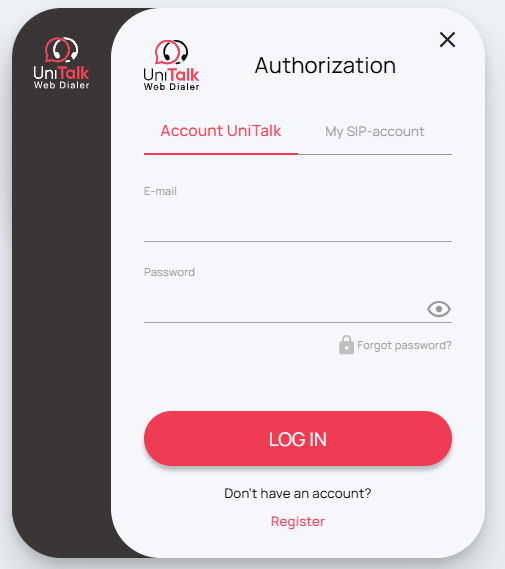
By default, “Account UniTalk” will be opened.
Enter the data (login and password) from your project’s UniTalk personal account:
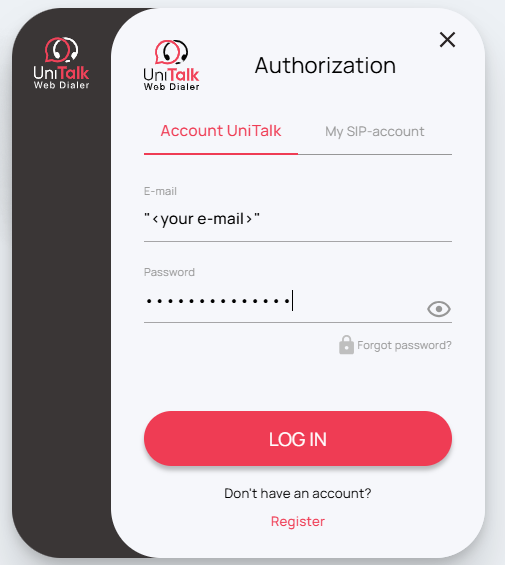
where “<your e-mail>” is your e-mail, which was specified during registration in the personal account of UniTalk and click “Login”.
Select the necessary modes and click “Continue”
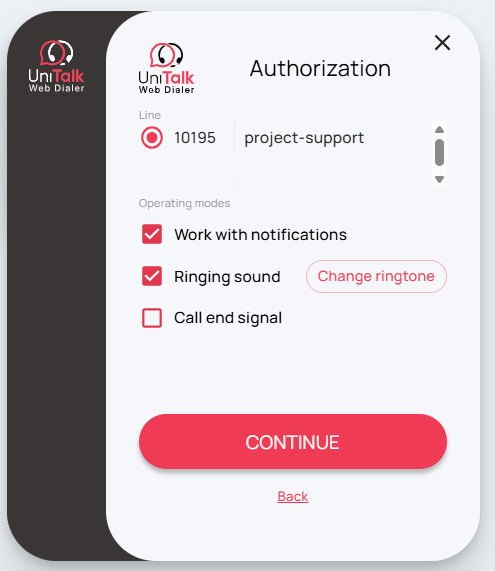
Done! Authorization is complete. You can use the extension to make/receive calls.
2.2. Authorization with SIP line data
The extension can also be used if a line from the project is registered. In this case, there is no need for the line to be assigned to a UniTalk personal account user.
– select the tab “My SIP-account”
– Enter the registration data for the line.
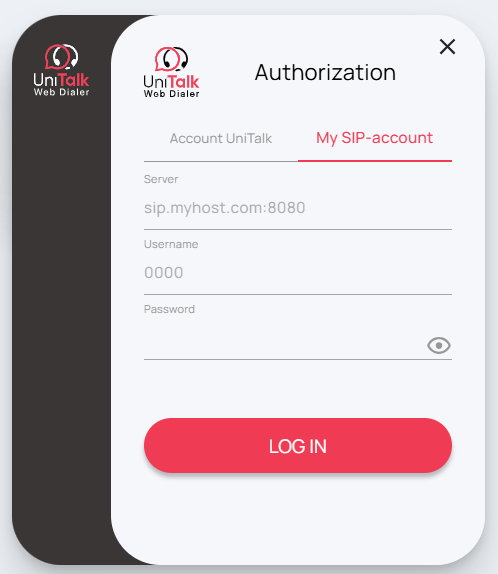
You can find this data in your project’s UniTalk personal profile, in the “Users” section, which displays status, SIP line, user name and line status.

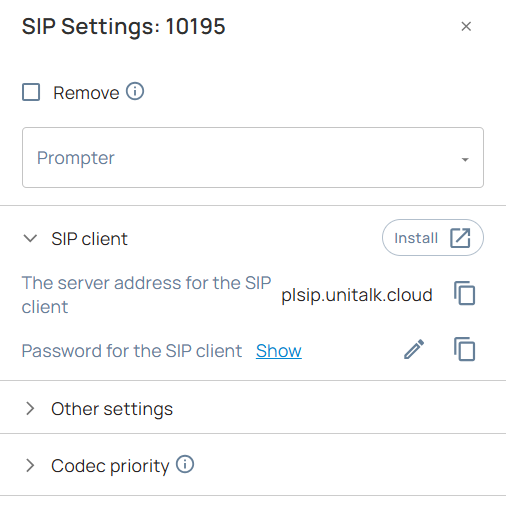
After that you need to click on the gear opposite to the line you need:
The login for the line is the SIP line number itself (four digits), which you need to register.
– enter the data from the UniTalk Personal Account about the SIP line into the extension:
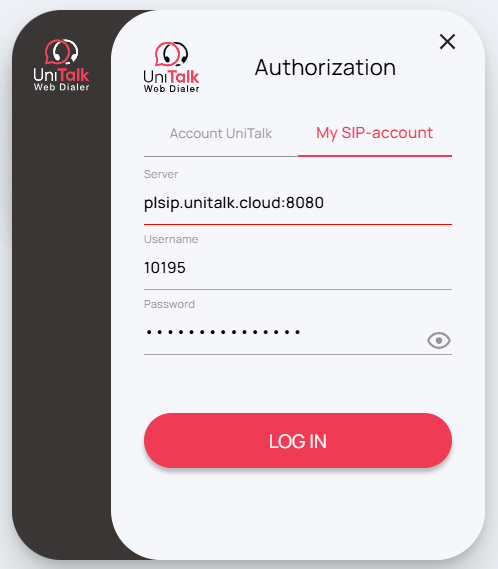
— plsip.unitalk.cloud:8080
You can also search by line number or username, and filter data by availability and department.
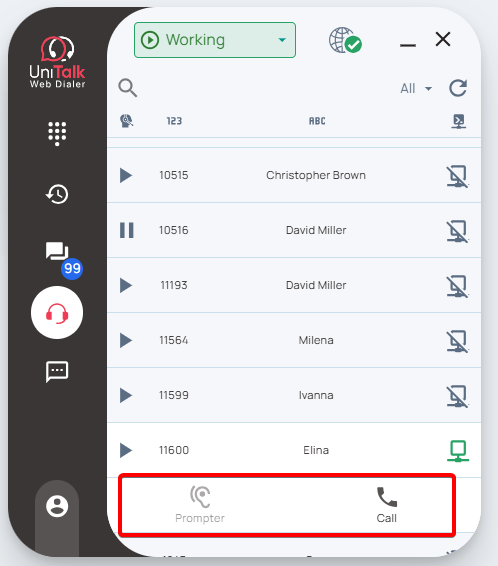
If a line is currently in a call, you can join it in “whisper” mode. If it is idle, you can dial that line.
3. Using UniTalk Web Dialer
3.1. Making Calls
In order to make a call, it is necessary to enter the required number of the subscriber (the input is carried out both from the keyboard and from the buttons in the extension):
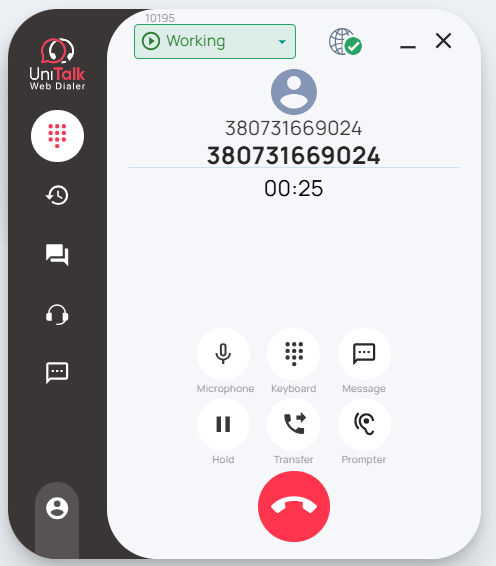
Where “1” is the country code, “222” is the operator code, “3334455” is the subscriber’s phone number.
Click on “Call” (the handset in the center of the green circle) or press “Enter” on the keyboard.
3.2. Call transfer
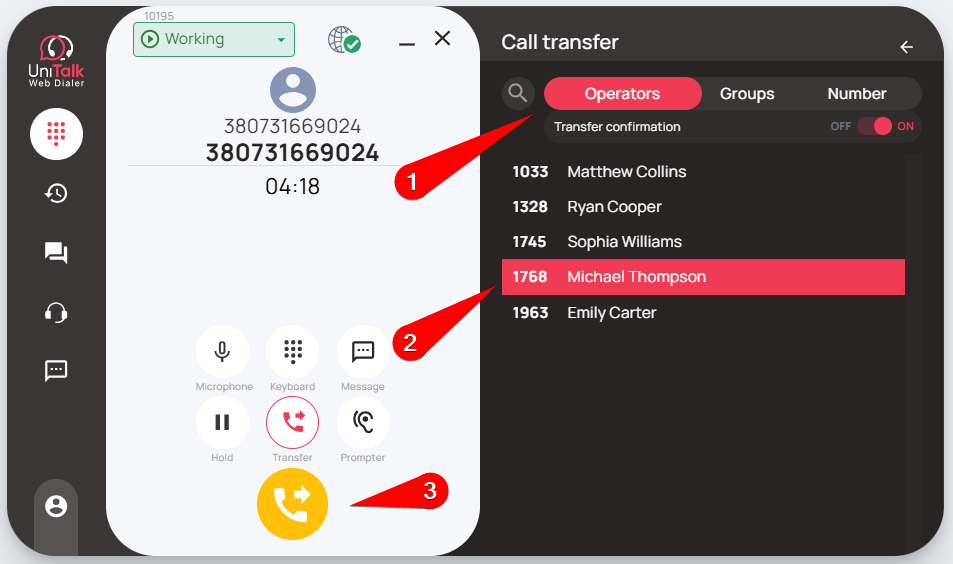
The “UniTalk Web Dialer” extension has the ability to transfer calls. You can transfer a call to another employee from the list, department, or enter a phone number.
To do this, click the “Transfer” button in the extension interface
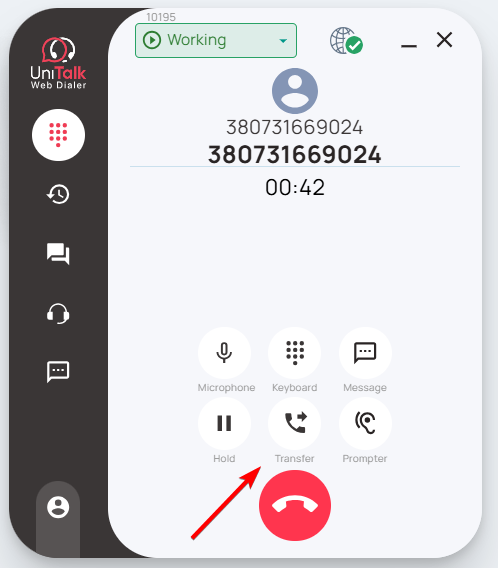
If you need to transfer the call to another employee, you should select the proper name in the “Operators” section of the opened menu.
If you need to transfer a call to another department, select the corresponding department in the “Groups” section of the menu that opens.
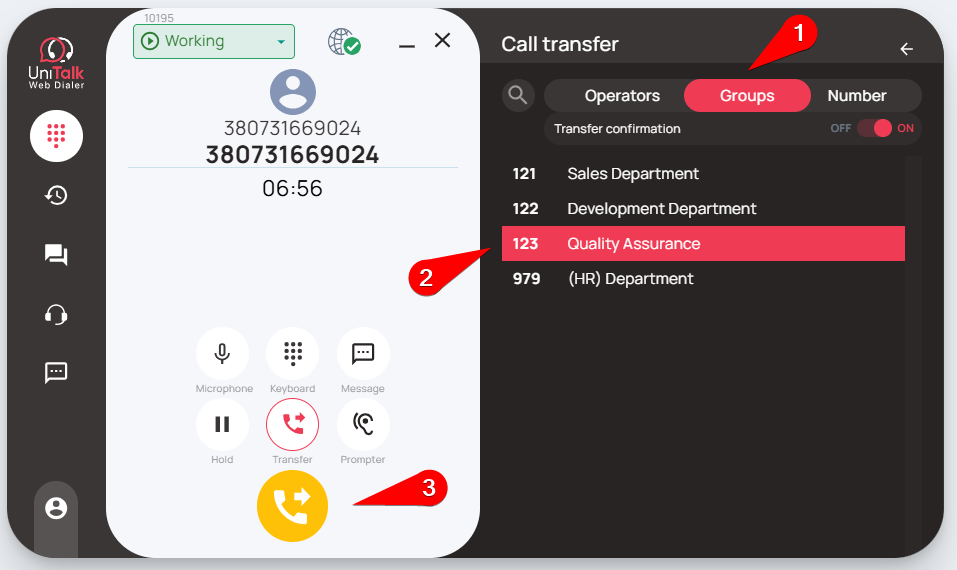
Lists of employees and departments are automatically uploaded from your project in the UniTalk service.
In addition, you can customize the call transfer confirmation in the opened menu after pressing the “Transfer” button.
3.3. UniTalk Web Dialer settings
Transition from extension to project (only for authorization via account UniTalk)
To do this, you need to:
— click on the user icon in the lower left corner of the extension interface
– click on the “gear” button on the opened interface
Once clicked, a new tab will open in your browser with your project’s Call History page.
In “Call History”, besides pressing the number, there is a separate button to initialize the call.
On the same screen as the button above are settings that can customize the look and behavior of UniTalk Web Dialer. These settings include:
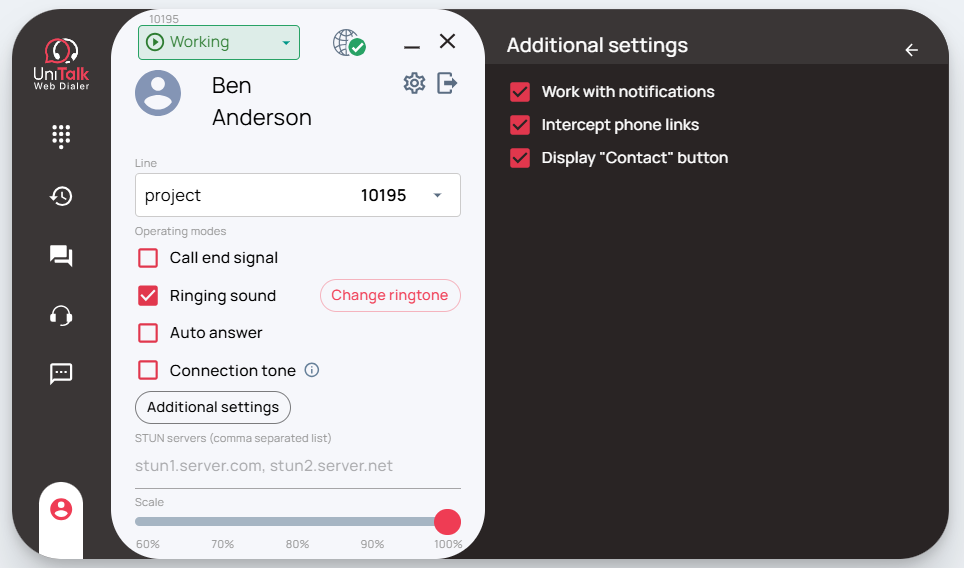
- Call end signal
If this feature is activated, a sound signal will be played when the call ends. - Ringtone
If you check this box, your iPhone’s ringtone will play for incoming calls to the extension. If you uncheck this box, no ringtone will be played for incoming calls. You can change the ringtone for incoming calls using the Change Ringtone button. - Auto-reply
If you activate this function in the corresponding field, all incoming calls will be answered automatically. - Connection signal
Plays a sound signal after connecting to a subscriber. For this option to work correctly, you must check the “” - Scale box in the SIP line settings.
By default, it is set to “100%”, it is possible to change the size of the extension interface at your discretion.
Additional Settings
- Working with Notifications
Located in the “Advanced Settings” tab. Allows you to receive additional information in WebDialer when making calls, such as deal or contact information from your CRM system, if the appropriate integration is enabled. - Intercepting Phone Links
Once enabled, links like tel / sip / callto will be intercepted by WebDialer with priority; the use of default applications for such links will be ignored. - Show “Contact” Button
Controls whether the “Contact” button is displayed in the CRM system connected via Omni integration.
3.4. Changing work statuses in Web Dialer
In version 0.0.7 of the application, the ability to change work status directly from the application was added.
The work status is assigned to each user in the UniTalk personal account and reflects the employee’s work logic:
– If the employee is working, incoming calls are received on their SIP line;
– If the employee is not working or is on a break, the call is not made to this SIP line.
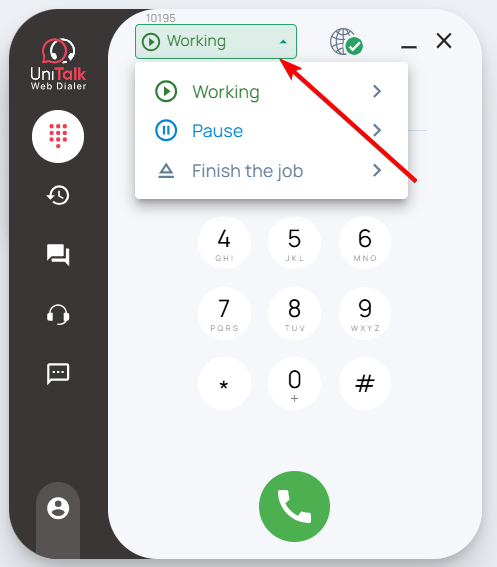
This status menu fully replicates this functionality in the UniTalk personal account, so you no longer need to go to the account to change the work status.
— If the employee is working, incoming calls are routed to their SIP line.;
— If the employee is not working or is on a break, calls are not routed to this SIP line..
This status menu fully replicates the corresponding functionality in the Unitalk personal account; in other words, you no longer need to log in to the account to change your work status.

Additional break statuses need to be specified on this page https://my.unitalk.cloud/custom-statuses by adding new statuses.
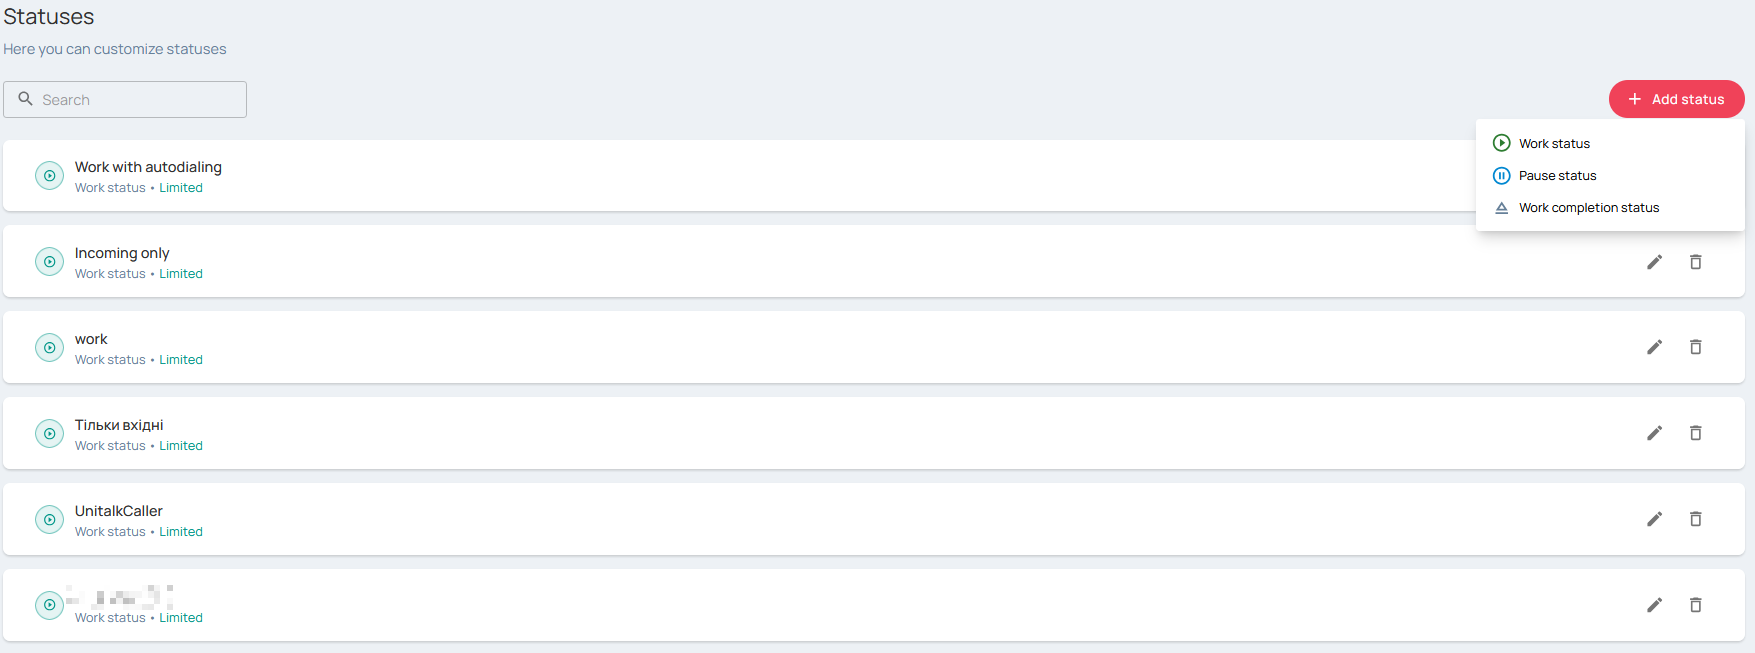
Status changes are automatically synchronized in the personal account with the Unitalk Web Dialer.
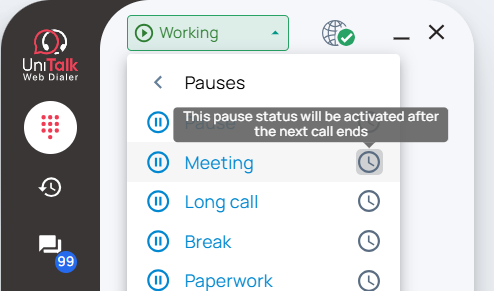
During a call, you can schedule a status change to the desired status by clicking the scheduling button next to the relevant status. This will automatically change the status once the call is completed.
For convenience, you can switch between lines belonging to different projects.
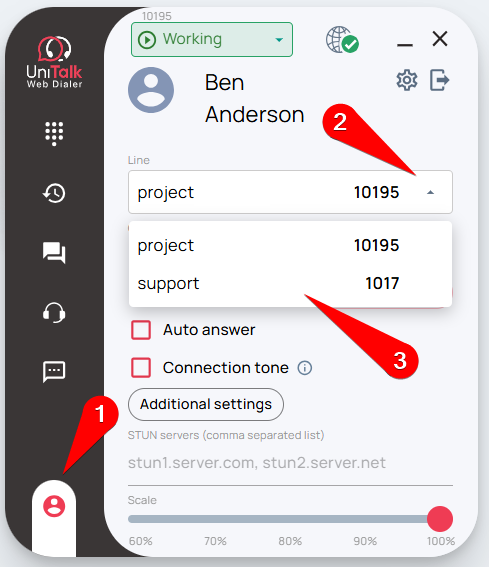
To switch to a different line, first click the user icon in the bottom-left corner.
Then, click on your currently active line. This will display a list of lines from other projects; simply click the one you need to activate it instantly and make it ready for use.
3.5. Switching Between Lines from Different Projects
For convenience, you can switch between lines from different projects.
To change to another line, first click the user icon in the bottom-left corner.
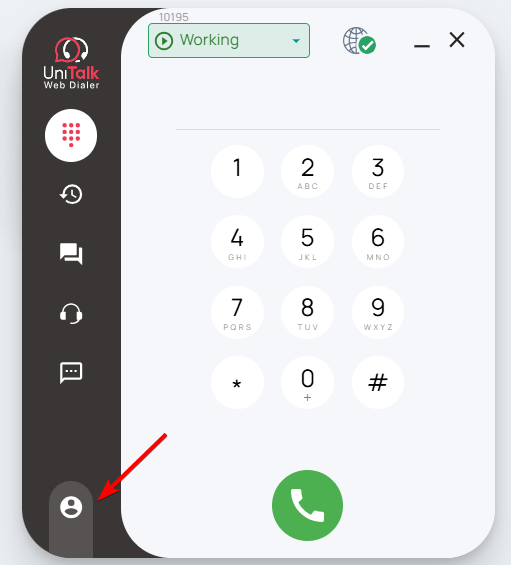
Then click on the line that is currently active
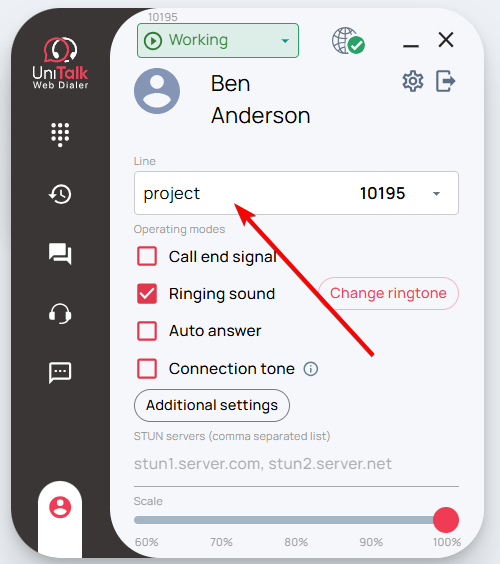
After this, a list of lines from other projects will appear. Clicking on the desired line will immediately activate it and make it ready for use.
3.6. Sending SMS and Viber messages via Unitalk Web Dialer
In the latest versions of our plugin for Google Chrome, the function of sending messages directly during a call was added. This functionality was developed for faster and more convenient interaction with the client, as you can send messages during the conversation.
The message text can be typed during the call or use pre-prepared message templates.
Message sending is performed through the main messaging service UniTalk, as well as other messaging services integrated into the UniTalk personal account (as of now these can be turbosms.ua, smsclub.mobi, BSG World or Laaffic).
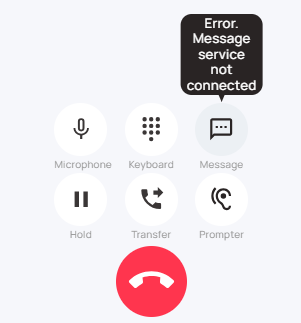
If integration with the above services is not connected in the project, the message sending button in Web Dialer will be inactive and, when hovered over, will show a warning message that integration is not set up.
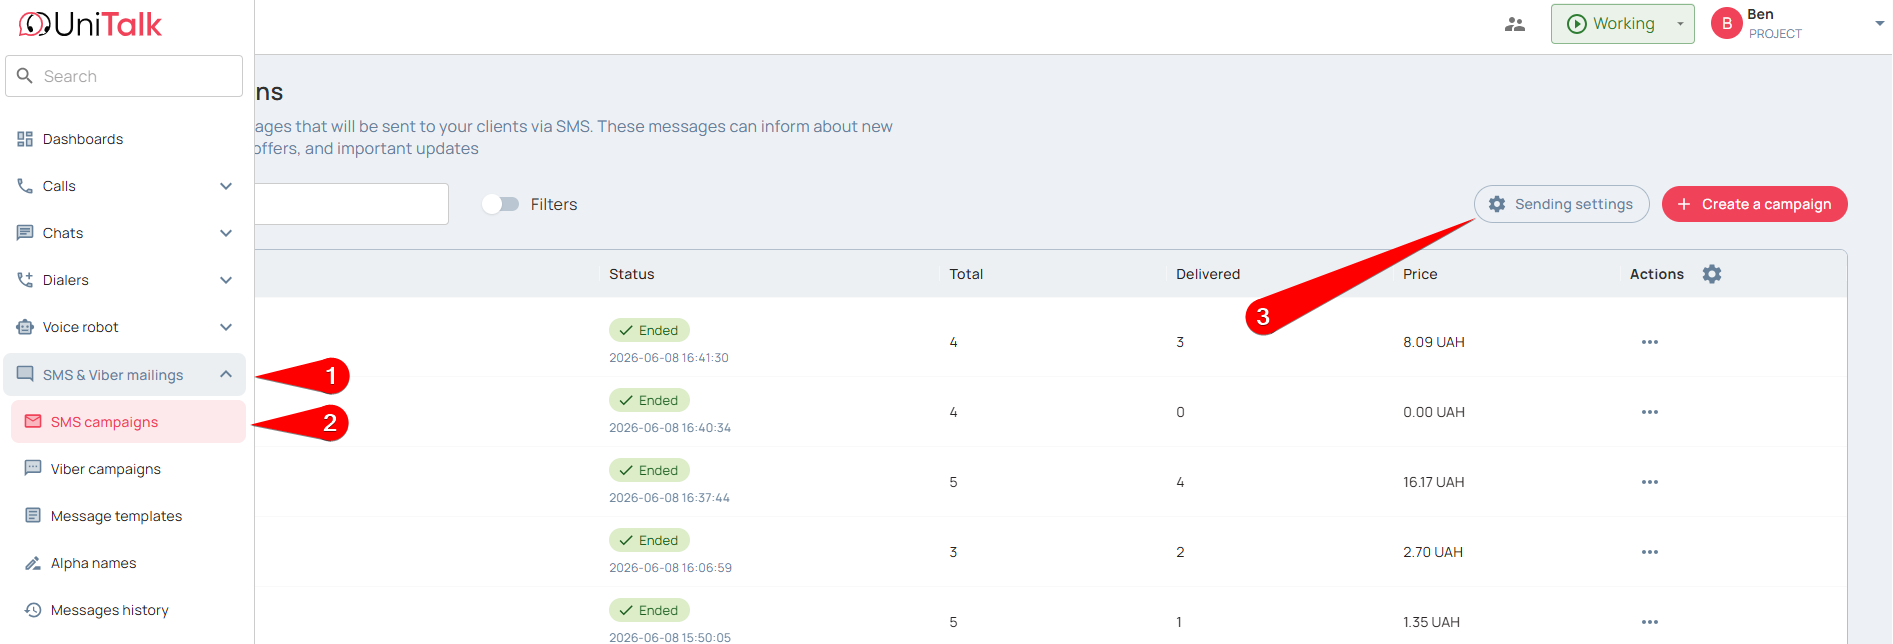
To connect the integration, you need to be registered on the listed services and obtain an API key (which is used for authorization on the service) and permitted sender names (also called Alpha-names, used to display this sender name for clients).
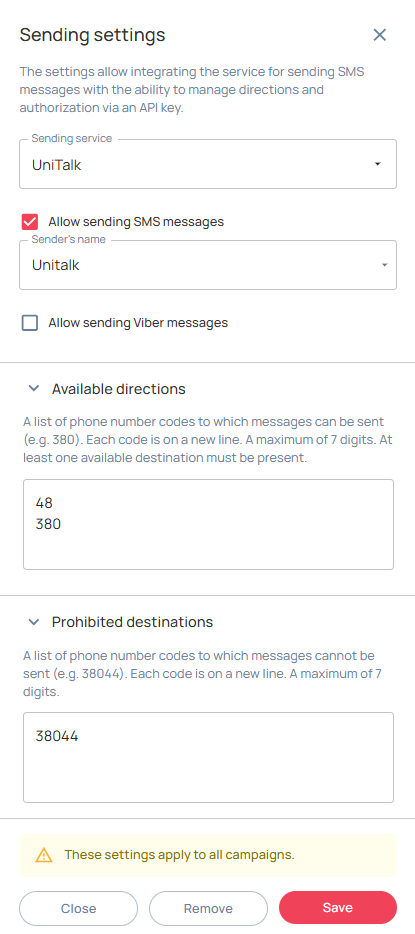
A properly configured integration in the personal account should have the following:
- A message sending service is selected;
- (If necessary) a valid API key for that service is entered;
- Alpha names (sender names) are entered;
- A list of allowed and forbidden message directions is configured.
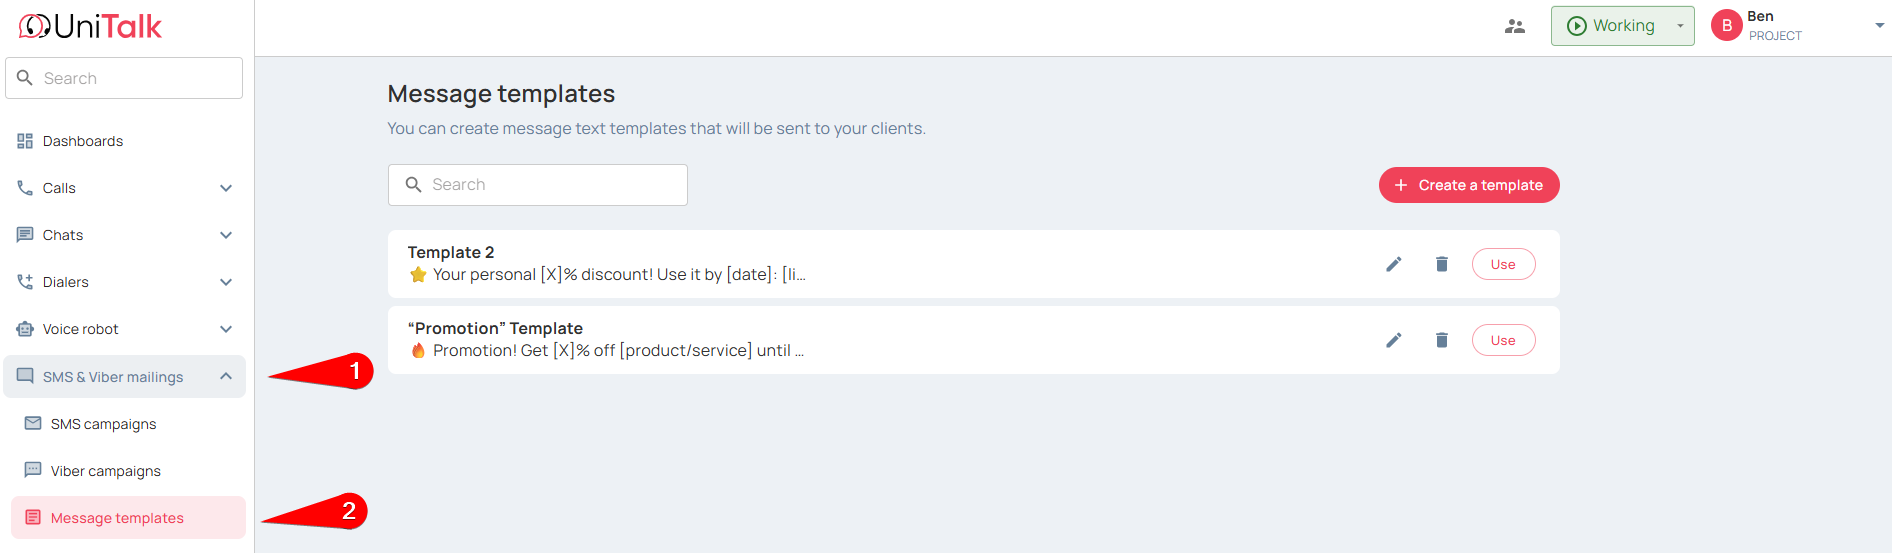
On this page, you can also create message templates for faster message sending or for sending standard messages (invitations, address, contacts, etc.).
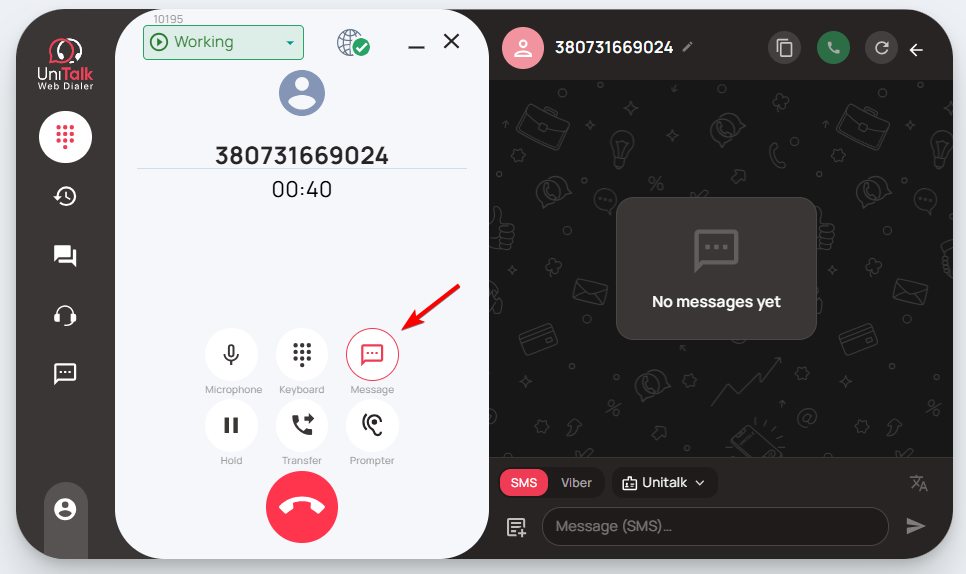
With the integration with the messaging service enabled, the message sending button becomes active — when clicked, a sidebar opens with an area for message input and a display of the message sending history for this number.
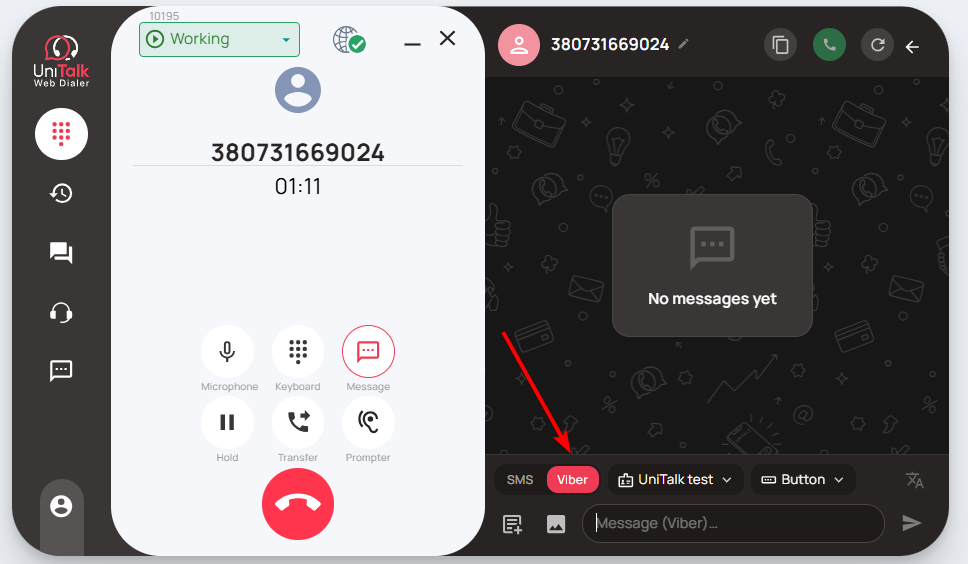
For more convenient switching between SMS and Viber, a mode switch is provided. For visual distinction, the SMS mode is highlighted in red, Viber mode in purple.
If only one mode (SMS or Viber) is enabled in the integration settings, this switch is inactive and only displays the current message sending option.
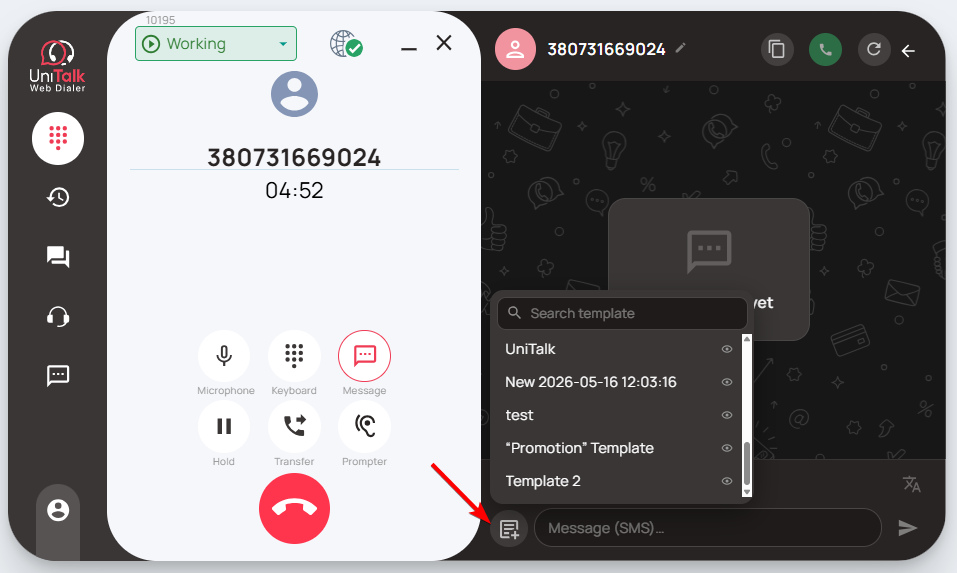
The template selection button allows you to immediately fill the message sending field with a pre-set text template. Before sending the message, it can be edited, for example, to indicate the client’s name.
In case there are too many templates to look through by hand, the search bar on top of the template picker allows to look up templates by their names.
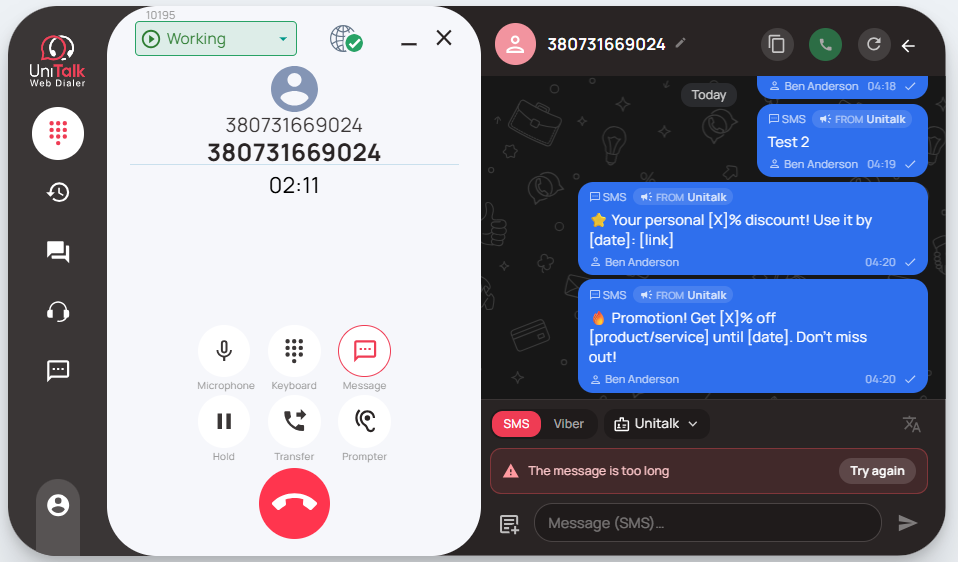
Note: Messages can include and add emojis. However, emoji support depends on each messaging service, and selected emojis may not be supported. If so, the message will not be sent, and an error will be displayed during sending.
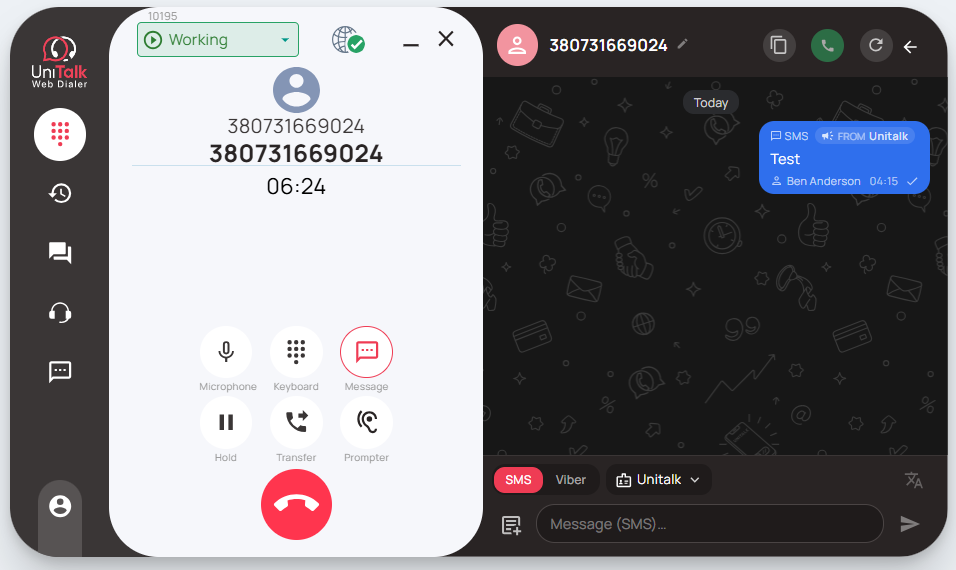
When a message is successfully sent, the extension signals the following information:
- The message sending method (SMS, Viber) is shown above the message;
- A checkmark in the right corner of the message indicates successful message delivery to the messaging service;
- The message sending time.
If message sending fails, an exclamation mark will appear next to the message, and below will be a message explaining the reason for the failure.
Note:
- errors related to Unitalk personal account are described in detail in the project language;
- errors that we receive from the messaging service are shown in their original form
- if the error is not clear, you should contact technical support for more detailed information.
3.7. UniTalk Chat in UniTalk Web Dialer
You can also communicate via chats through UniTalk Web Dialer.
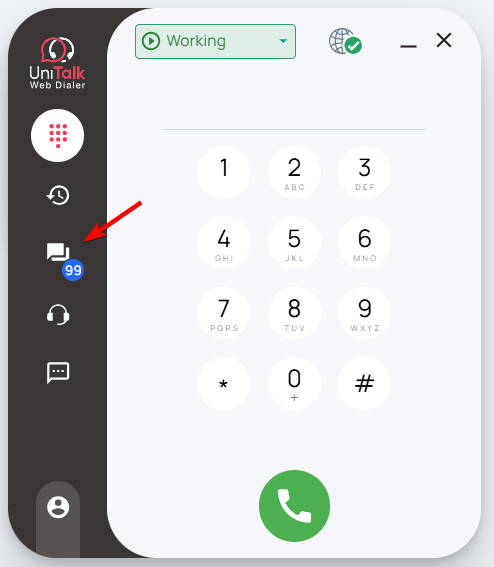
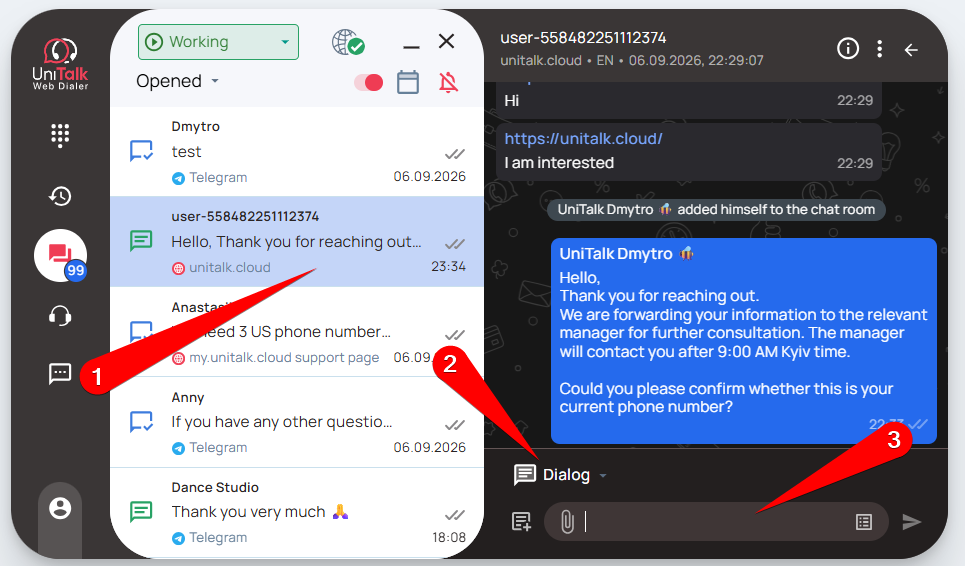
First, click the messages icon to access the chat section
Here you will see a list of chats, which can be filtered at the top by “All chats,” “Open,” and “Archive.”
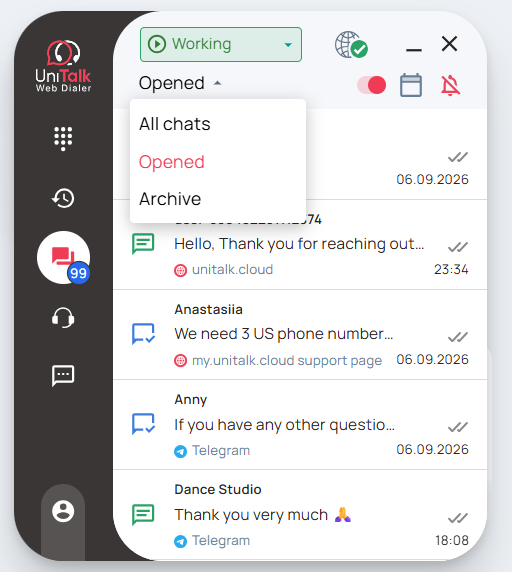
After selecting the desired group, simply click on the chat you want to communicate in. A side panel will appear next to the dialer where you can write and send messages.
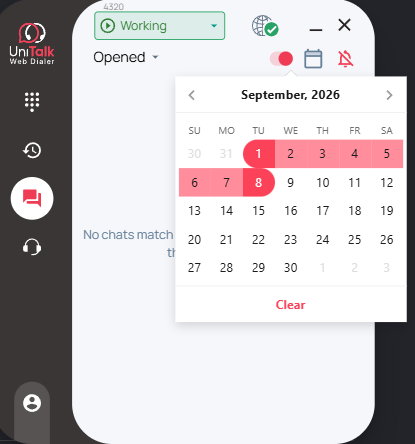
You can also filter chats by date and mute message notifications.
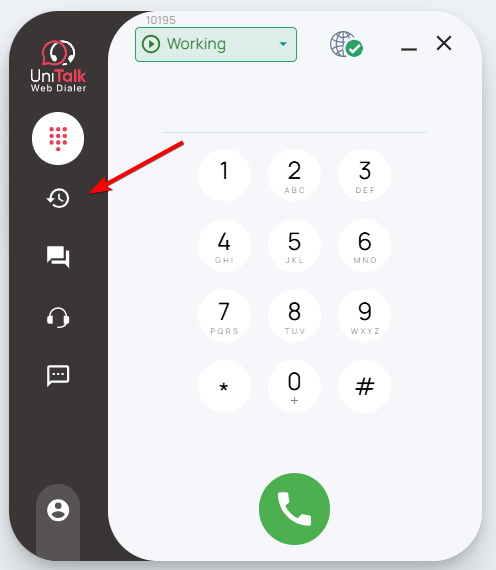
3.8. Call history in UniTalk Web Dialer
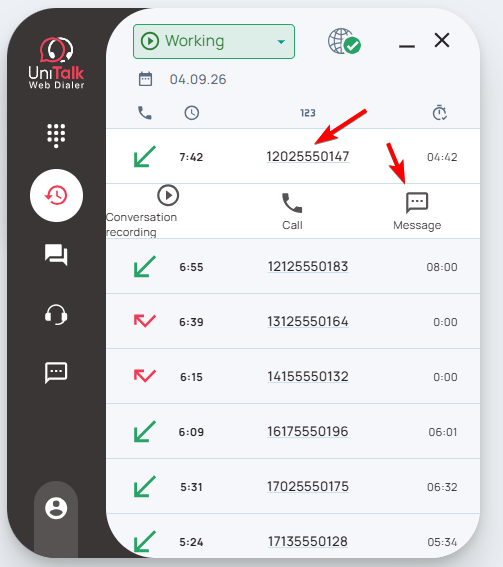
On a separate call history tab in the “UniTalk Web Dialer” extension, the functionality for viewing, listening to calls, redialing, and sending messages to the numbers of subscribers called by the operator is available (available with the option of authorization in the extension using the authorization data from the personal UniTalk account).
By default, calls for the current day are displayed, but you can also view earlier calls by selecting the desired date in the filter.
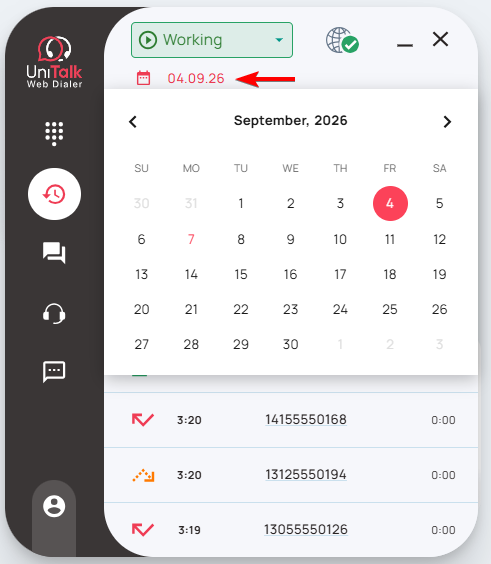
To call a subscriber again, simply click on their number in the list. Alternatively, you can click next to the number to open a menu with additional call record functions, where you can listen to the recording or send a message.
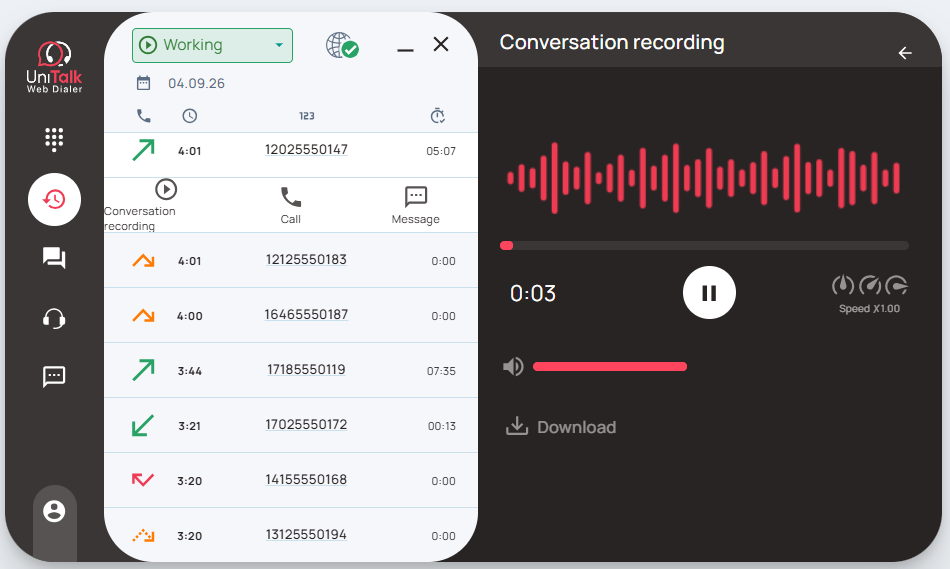
If you need to listen to the recording – the extension has a built-in player with the ability to speed up the recording, adjust the volume and even download the call recording:
3.9. Users in UniTalk Web Dialer
In the “UniTalk Web Dialer” extension, when authorized with an UniTalk account, you can obtain information about which colleagues are online, make internal calls, or connect as a whisperer.
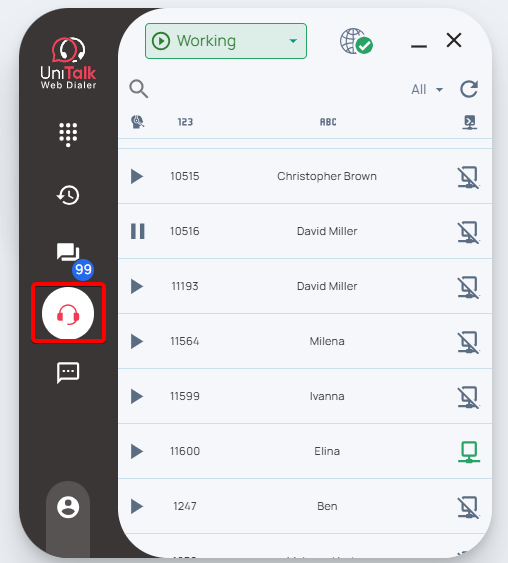
On the left, the user status is displayed (working, on a break, or finished working), followed by their internal number, name, and the status of their workplace in the PBX (online or offline).
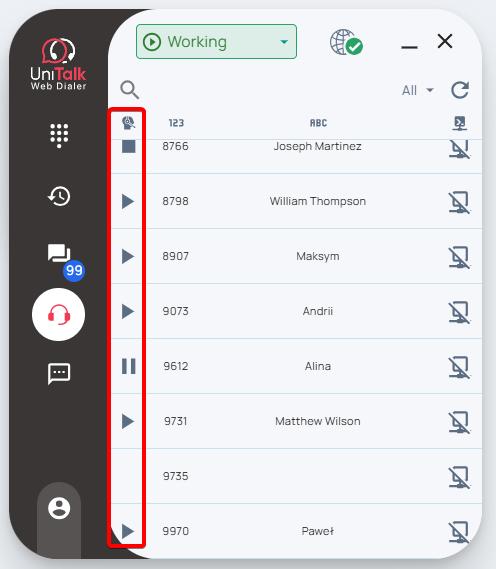
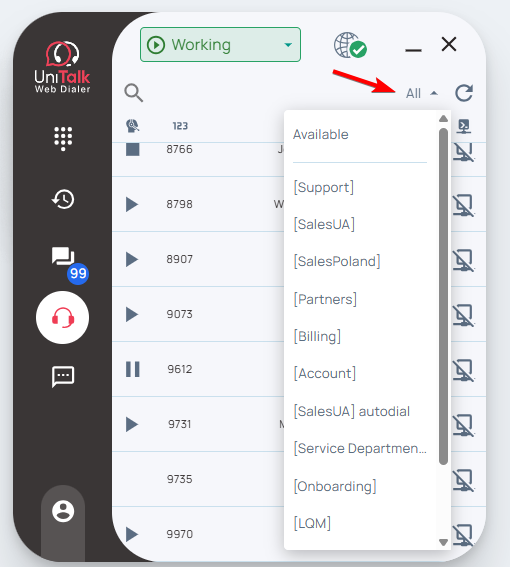
There is a separate filter where you can select all users, a specific department, or everyone who is ready to receive a call (Available)
When you click on the cell with the user, a menu will open through which you can call the user’s internal line if they are not busy, or connect as a whisperer if the user is on a call:
3.10. Call the UniTalk Web Dialer prompter
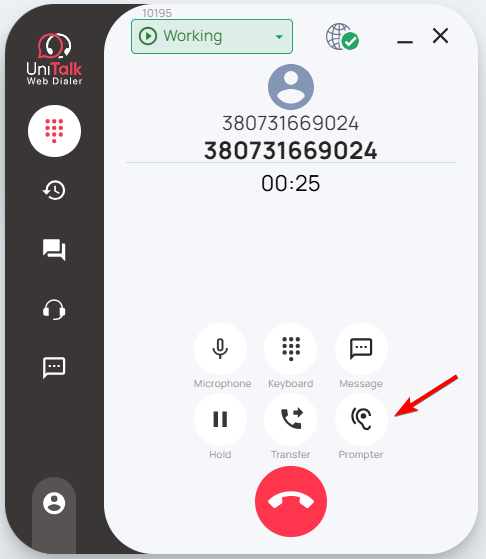
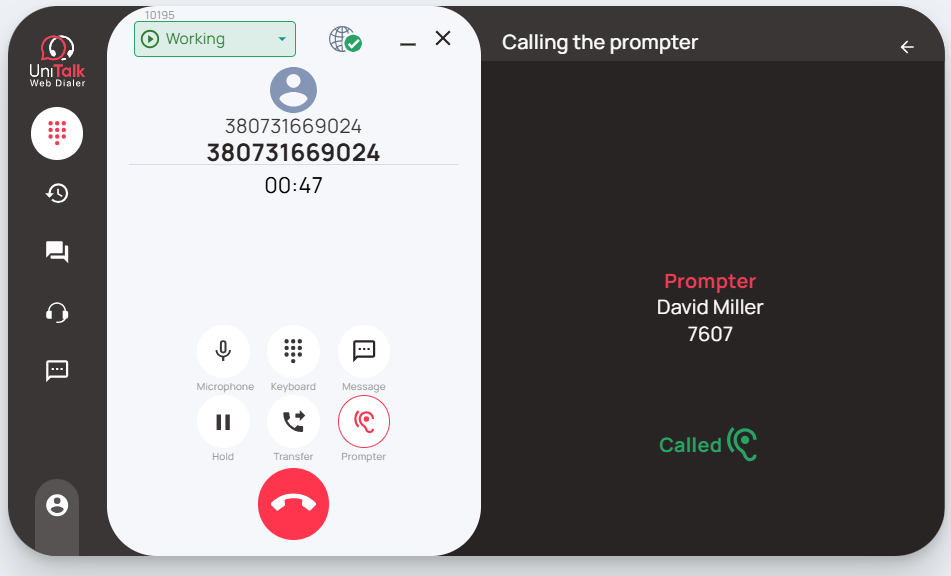
In the “UniTalk Web Dialer” extension, for the operator’s convenience, the ability to call a prompter directly from the extension during a dialogue has been added. To do this, simply click the “Prompter” button during the dialogue, and the operator will see a list of colleagues who can be invited as a prompter:
After selecting a prompter from the list, a yellow prompter call confirmation button will appear:
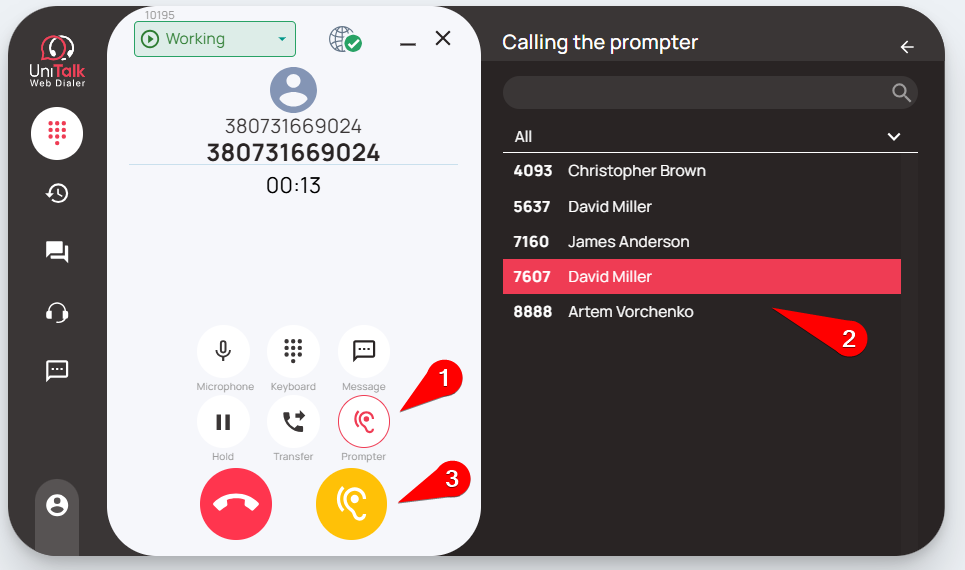
After the prompter’s call is confirmed, the operator will see that the selected prompter has received a request to connect to the dialog:
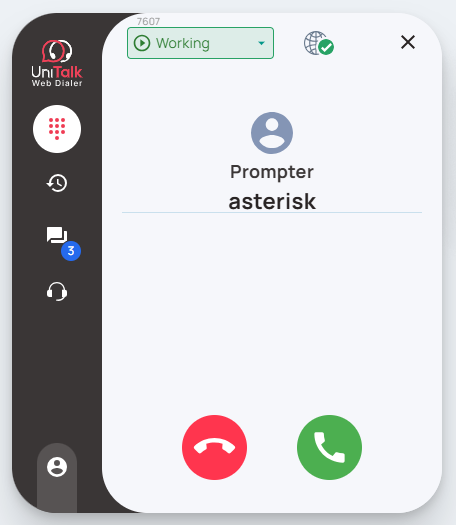
At this time, the called prompter receives a call marked “Prompter” from the extension number of the operator who requested the connection:
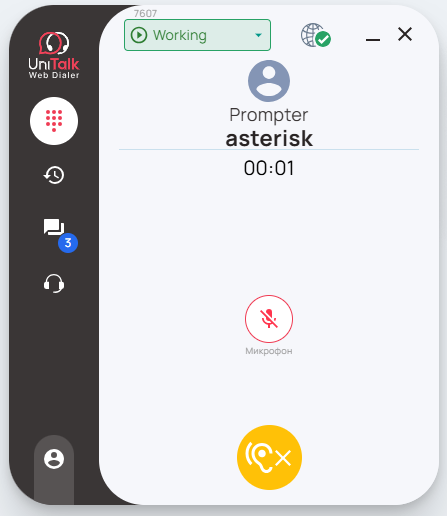
After answering, the prompter will connect with the microphone muted to guide the operator to turn their microphone on:
You’ve successfully set up UniTalk Web Dialer. You can now make and receive calls, transfer calls between colleagues and departments, chat, and send SMS and Viber messages — all without leaving your browser. If you have any questions about setting up or using Web Dialer, the UniTalk support team is always ready to help.